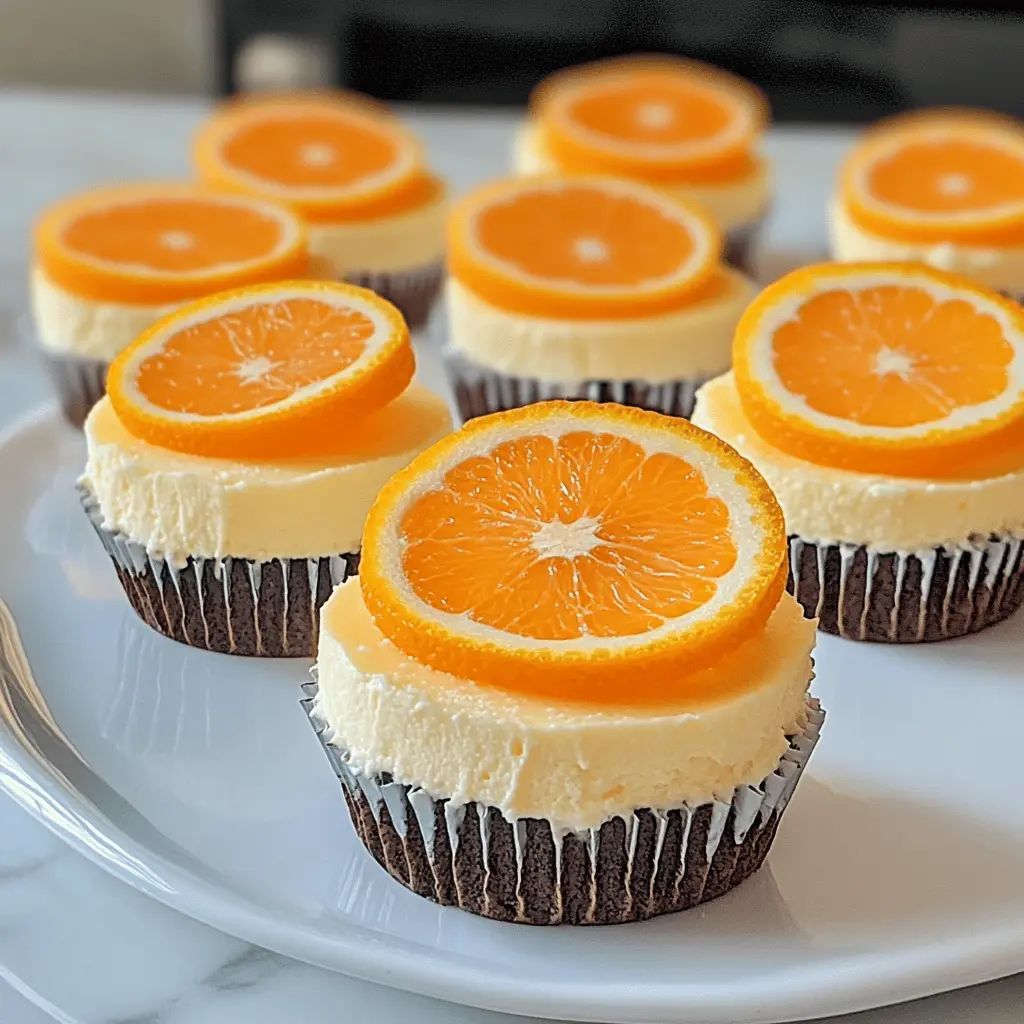
These Orange Creamsicle Mini Cheesecakes are a fun twist on a classic treat! With a creamy orange filling and a crunchy crust, they’re perfect for parties or just a sweet snack.
Honestly, who can resist that orange flavor? It’s like summer in every bite! I love serving these at gatherings—they’re always a hit, and they’re just so cute!
Key Ingredients & Substitutions
Oreo cookie crumbs: They make a delicious crust for these cheesecakes. If you’re looking for a gluten-free option, you can use gluten-free chocolate cookies instead. I find that the chocolate flavor complements the orange well!
Cream cheese: This is key for that rich cheesecake texture. If you want a lighter version, you could swap in Neufchâtel cheese, which has less fat but still gives a creamy consistency.
Sour cream: It adds a nice tanginess. If you’re avoiding dairy, try using a dairy-free sour cream or plain yogurt as a substitute. Both work wonderfully!
Orange juice and zest: Fresh is best for vibrant flavor. If you don’t have fresh oranges, you can use bottled juice, but fresh zest gives a better aroma. You can also use lemon juice if you want a different citrus twist!
How Do I Ensure My Cheesecakes Bake Perfectly?
Baking mini cheesecakes might seem tricky, but with a few careful steps, you’ll get great results. The secret is to handle the filling gently to keep it smooth and creamy.
- Beat the cream cheese until smooth, then add sugar and other wet ingredients gently to avoid adding too much air.
- When adding eggs, mix on low speed and just until combined to prevent overmixing, which can cause cracks.
- For even baking, use a water bath by placing the muffin tin in a larger baking dish filled with hot water. This will help maintain moisture in the oven.
- Check for doneness when the edges are firm, but the center should still jiggle a bit. They’ll set more while cooling.

How to Make Orange Creamsicle Mini Cheesecakes
Ingredients You’ll Need:
For the Crust:
- 1 cup Oreo cookie crumbs
- 4 tablespoons unsalted butter, melted
For the Cheesecake Filling:
- 16 ounces cream cheese, softened
- ½ cup granulated sugar
- ¼ cup sour cream
- 1 teaspoon vanilla extract
- ¼ cup orange juice
- Zest of 1 orange
- 2 large eggs
- Orange food coloring (optional)
For Topping:
- Whipped cream, for topping
- Orange slices, for garnish
How Much Time Will You Need?
This recipe takes about 15 minutes to prepare, plus 20 minutes of baking time and at least 2 hours to chill in the fridge. So, plan for a total of about 2 hours and 35 minutes from start to enjoying these delicious treats!
Step-by-Step Instructions:
1. Prepare the Oven and Muffin Tin:
First, preheat your oven to 325°F (163°C). While it’s heating up, line a muffin tin with cupcake liners to make it easy to remove the mini cheesecakes later.
2. Make the Crust:
In a medium bowl, mix the Oreo cookie crumbs with the melted butter until everything is well combined. Press about 1 tablespoon of this mixture into the bottom of each cupcake liner to form a nice crust. Bake the crusts in the oven for 5-7 minutes, then take them out and let them cool down.
3. Create the Cheesecake Filling:
In a large mixing bowl, beat the softened cream cheese and granulated sugar together until the mixture is smooth and creamy. Then, add the sour cream, vanilla extract, orange juice, and the zest of one orange. Mix everything together until it’s well combined and looks delicious!
4. Incorporate the Eggs:
Add the eggs one at a time, mixing on low speed just until everything is combined. If you’d like your cheesecakes to have an extra pop of orange color, add a few drops of orange food coloring and give it a little mix again.
5. Fill and Bake:
Now, pour the creamy cheesecake mixture over the cooled Oreo crusts. Fill each liner about three-quarters full. Place the muffin tin back in the oven and bake for 18-20 minutes. You want the edges to be set but the center to still be a little jiggly, so don’t worry if it’s not completely firm yet.
6. Cool and Chill:
Once baked, turn off the oven and let the mini cheesecakes sit inside for an extra 10 minutes. This helps them set nicely. After that, take them out and let them cool to room temperature. Finally, move the cheesecakes to the fridge and let them chill for at least 2 hours.
7. Serve and Enjoy:
When you’re ready to serve, top each mini cheesecake with a dollop of whipped cream and garnish with a small slice of orange. Enjoy your delightful Orange Creamsicle Mini Cheesecakes!

Can I Use a Different Type of Cookie for the Crust?
Absolutely! You can substitute the Oreo cookie crumbs with any other cookie that you enjoy, such as Graham crackers or vanilla wafer cookies. Just make sure to adjust the amount of melted butter slightly if the texture of the cookies differs dramatically.
How Can I Make These Cheesecakes Gluten-Free?
To make these mini cheesecakes gluten-free, simply use gluten-free cookies for the crust. Many brands offer gluten-free Oreos or cookie options that work perfectly for this recipe.
Can I Freeze Leftover Cheesecakes?
Yes, you can freeze these mini cheesecakes! After they have fully chilled, wrap each cheesecake tightly in plastic wrap and place them in an airtight container. They can be frozen for up to 2 months. Thaw them overnight in the fridge before serving!
What Can I Use Instead of Sour Cream?
If you don’t have sour cream on hand, you can use Greek yogurt as a substitute. It adds a similar creamy texture and tangy taste. Alternatively, you could use cream cheese mixed with a bit of lemon juice to mimic the flavor of sour cream.


