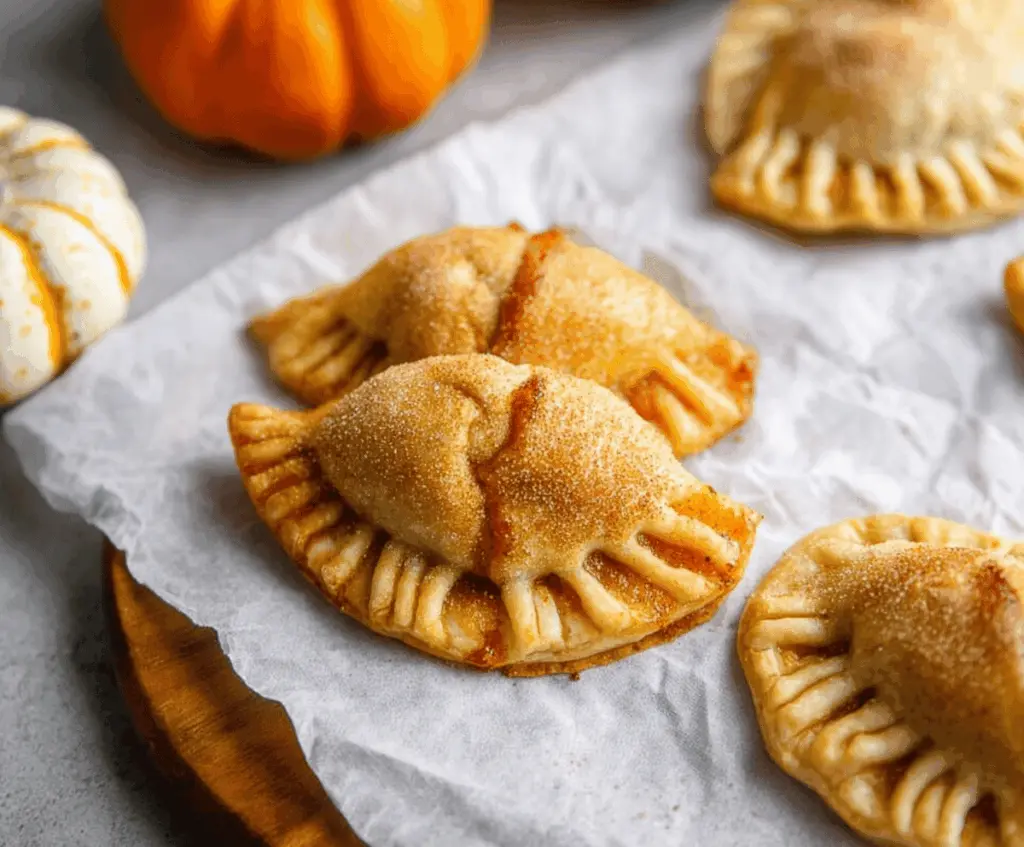
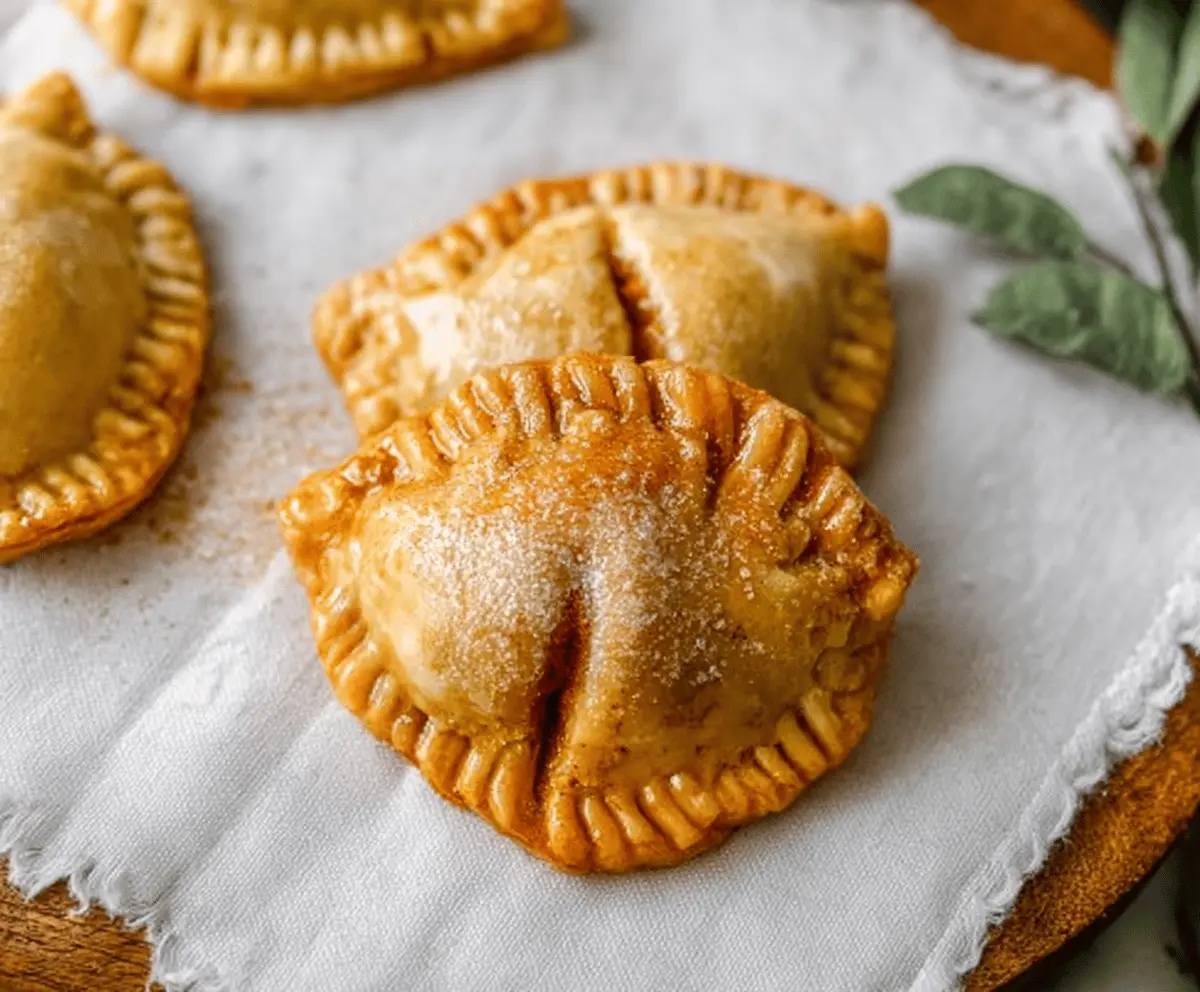
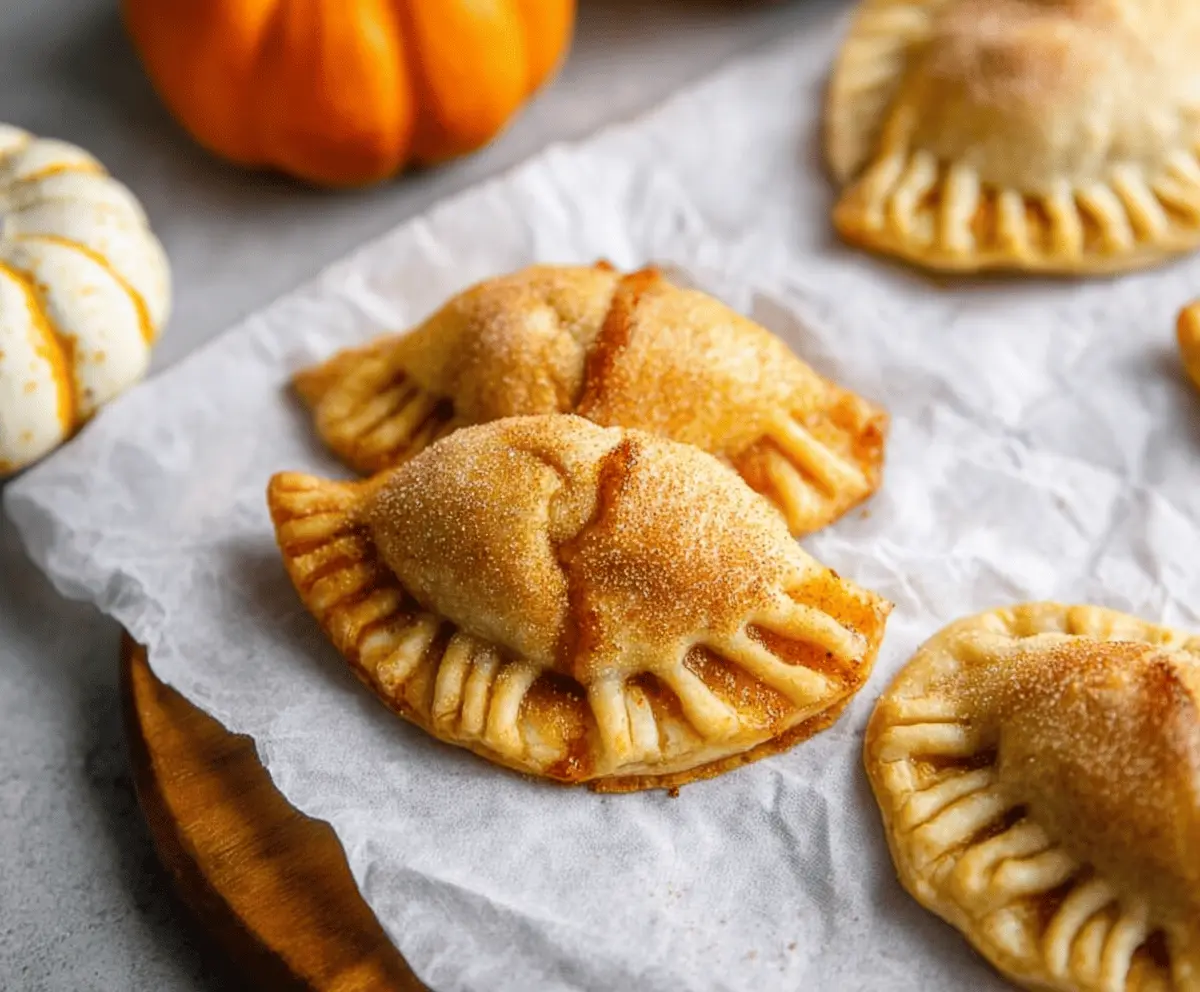
These mini pumpkin hand pies are the perfect fall treat! With a sweet pumpkin filling and a flaky crust, they are like little hugs of deliciousness.
They’re fun to eat and even more fun to make! I love whipping up a batch while sipping on cider. You may want to make extra because they disappear fast! 😄
Key Ingredients & Substitutions
Pumpkin Puree: This is the star of the show! Canned pumpkin puree works great, but if you have fresh pumpkin, you can roast and puree it for a fresher taste.
Brown Sugar: I love using dark brown sugar for a rich flavor, but light brown works too. If you’re looking for a healthy option, coconut sugar or maple syrup can substitute, though adjust the amount to taste.
Spices: Traditional pumpkin pie spices include cinnamon, nutmeg, ginger, and cloves. Feel free to get creative! A pinch of allspice works well, or add a bit more cinnamon if you love it.
Pie Crusts: The convenience of refrigerated pie crusts cannot be beaten! If you’re feeling adventurous, homemade crust is excellent. For a gluten-free option, use a gluten-free pie crust or phyllo dough.
Egg Wash: This adds a nice shine. If you prefer a vegan option, try using almond milk or aquafaba to brush on the crust.
How Do You Ensure Your Hand Pies Stay Flaky and Delicious?
The key to flaky hand pies is keeping everything cold until baking. Here are some simple tips:
- Keep your pie crusts in the fridge until you’re ready to use them, and roll them out gently to avoid overworking the dough.
- Don’t overfill your pies! A tablespoon of filling is usually just right. Too much can cause them to burst while baking.
- Make sure to cut vent holes in the tops! This allows steam to escape which keeps the insides from getting soggy.
- Chill the assembled pies for about 15 minutes before baking to help maintain that nice flaky texture.
With these tips and ingredients, your mini pumpkin hand pies will turn out perfectly every time!
Mini Pumpkin Hand Pies
Ingredients You’ll Need:
- 1 (14 oz) can pumpkin puree
- ½ cup brown sugar, packed
- 1 tsp ground cinnamon
- ½ tsp ground nutmeg
- ¼ tsp ground ginger
- ⅛ tsp ground cloves
- 1 tbsp cornstarch
- 1 tsp vanilla extract
- Pinch of salt
- 1 package refrigerated pie crusts (2 crusts), softened but still cold
- 1 large egg
- 1 tbsp water
- 1 tbsp granulated sugar
- 1 tsp ground cinnamon (for sprinkling)
How Much Time Will You Need?
This delightful recipe takes about 20 minutes to prepare and 20-25 minutes to bake. In total, you’ll need around 45 minutes to enjoy these cozy mini pumpkin hand pies fresh out of the oven!
Step-by-Step Instructions:
1. Ready, Set, Preheat!
First things first, preheat your oven to 375°F (190°C). This ensures your hand pies bake evenly and get that lovely golden color. While the oven heats up, line a baking sheet with parchment paper to prevent sticking.
2. Create the Pumpkin Filling:
In a medium bowl, mix together the pumpkin puree, packed brown sugar, cinnamon, nutmeg, ginger, cloves, cornstarch, vanilla extract, and a pinch of salt. Stir it all together until the mixture is nice and smooth. Set this delicious filling aside for a moment.
3. Roll Out the Dough:
On a lightly floured surface, gently roll out your refrigerated pie crusts just a little to smooth out any creases—remember to keep them cold. Using a round cutter (3 to 4 inches in diameter), cut circles from the dough.
4. Fill ‘Em Up!
Take about 1 tablespoon of the pumpkin filling and place it right in the center of each dough circle. Make sure to leave some space around the edges so you can seal them easily.
5. Get Eggy!
In a small bowl, whisk the egg and water together to create an egg wash that will help seal your hand pies and give them a beautiful finish.
6. Seal the Deal:
Brush the egg wash around the edges of each circle—this is where you’ll seal them. Carefully fold the dough over to create a half-moon shape. Press the edges gently to close them, but don’t worry about perfection! You can use the tines of a fork to seal them firmly and create a fun design.
7. Brush and Sprinkle:
Move your mini hand pies to the prepared baking sheet. Brush the tops with more egg wash for that shiny look. In a small bowl, mix granulated sugar and cinnamon, and sprinkle this sweet blend lightly over the tops of each pie.
8. Vent It Out:
Using a sharp knife, cut two small slits on the top of each pie to let steam escape. This helps keep the filling from getting soggy during baking.
9. Bake to Perfection:
Pop the baking sheet in the oven and bake for 20-25 minutes, until the pies are golden brown and the filling bubbles. Your kitchen will smell amazing!
10. Cool Down and Enjoy:
Once baked, let the mini pumpkin hand pies cool slightly before serving. They can be enjoyed warm or at room temperature, making them a perfect treat for any occasion!
Enjoy these delightful mini pumpkin hand pies as a cozy treat for fall or anytime you want a sweet handheld dessert!
Can I Use Fresh Pumpkin Instead of Canned Puree?
Absolutely! If you prefer fresh pumpkin, you can roast and puree it. Just make sure to drain any excess moisture before using it in the filling for the best texture.
What Can I Use Instead of Brown Sugar?
If you don’t have brown sugar on hand, you can substitute it with granulated sugar mixed with a bit of molasses (about 1 tsp per cup of sugar) to mimic that depth of flavor. Honey or maple syrup can also work, but adjust the liquids in the recipe accordingly.
How Should I Store Leftover Hand Pies?
Store any leftovers in an airtight container in the fridge for up to 3 days. To reheat, simply pop them in a warm oven for about 10 minutes or give them a quick zap in the microwave, though they may lose some flakiness that way.
Can I Freeze These Mini Hand Pies?
Yes, you can freeze uncooked mini pumpkin hand pies! Assemble them, then place them on a baking sheet to freeze individually. Once frozen, transfer them to a zip-top bag. Bake straight from the freezer, adding a few extra minutes to the baking time!