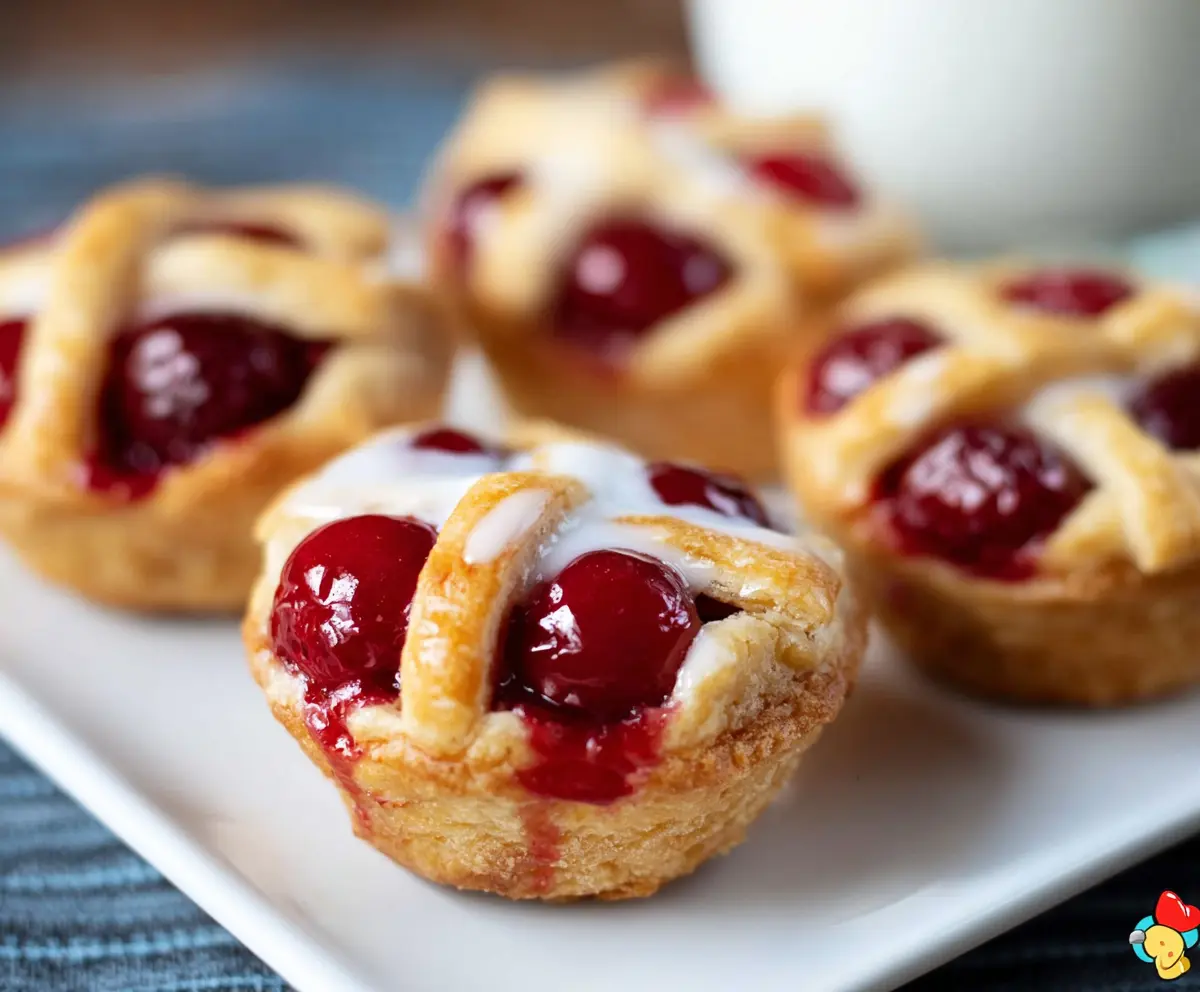
These Cherry Pie Bites are like little pockets of happiness! With a flaky crust and sweet cherry filling, they’re the perfect treat for any occasion.
Making these bites is super fun! I love how they fit perfectly in your hand, making them a great snack. Plus, who can resist that cherry goodness? 🍒
Key Ingredients & Substitutions
Pie Crusts: I love using refrigerated pie crusts for convenience. If you prefer homemade, go for a simple recipe. Alternatively, you can use puff pastry for a flakier texture.
Cherry Pie Filling: Canned cherry pie filling makes things easy, but you can use fresh or frozen cherries. Just cook them down with some sugar, lemon juice, and cornstarch for a homemade filling!
Egg: The egg wash gives a nice golden color. If you’re vegan, you can use a mixture of almond milk and a bit of cornstarch as a substitute.
Granulated Sugar: This adds a bit of crunch and sweetness on top. You could also sprinkle cinnamon sugar for a twist or just leave it off if you prefer less sweetness.
How Do I Create a Flaky Pie Crust?
A flaky crust really sets these bites apart. Here’s how to get the best results:
- Keep your butter cold. If making homemade crust, use chilled butter and handle the dough as little as possible to keep it tender.
- Roll out your dough evenly so it bakes uniformly. If using store-bought, let it sit at room temperature for about 10 minutes to make it easier to work with.
- Don’t overfill your mini crusts! Keep the filling to about 1-2 tablespoons per crust to avoid spillovers while baking.
Taking these steps will ensure your Cherry Pie Bites have a delicious and flaky crust every time!
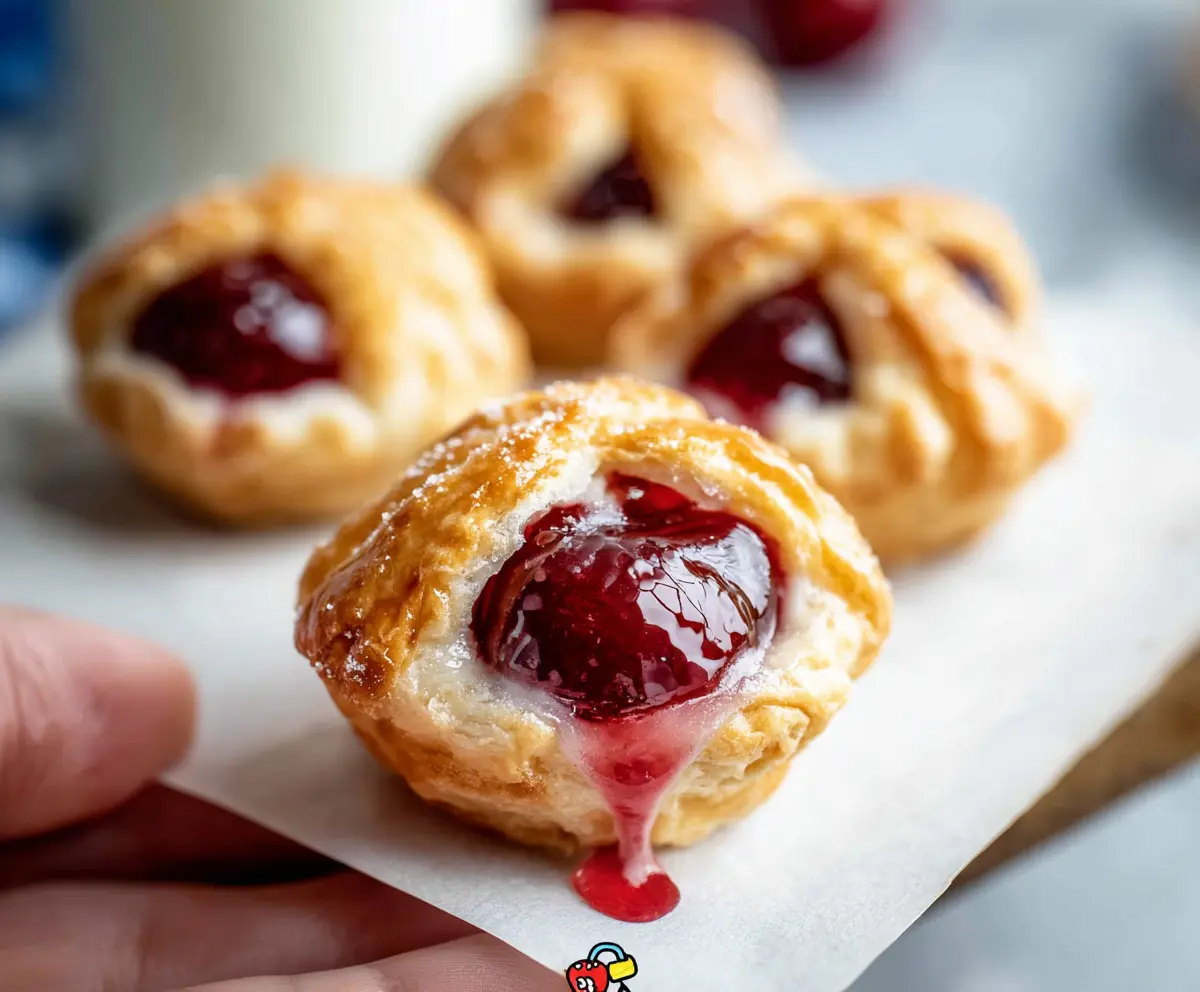
Cherry Pie Bites
Ingredients You’ll Need:
- 1 package (14.1 oz) refrigerated pie crusts (usually 2 crusts)
- 1 can (21 oz) cherry pie filling
- 1 tablespoon all-purpose flour (optional, to thicken filling if needed)
- 1 tablespoon granulated sugar (optional, for sprinkling)
- 1 egg, beaten (for egg wash)
- 1 tablespoon water (for egg wash)
- Optional: powdered sugar or glaze for drizzle
How Much Time Will You Need?
You’ll need about 10 minutes for prep and another 20-25 minutes for baking. Once they’re out of the oven, let them cool for about 10 minutes. In total, you’re looking at around 40 minutes to have these delicious Cherry Pie Bites ready to enjoy!
Step-by-Step Instructions:
1. Preheat and Prepare the Muffin Tin
First, you’ll want to preheat your oven to 375°F (190°C). While that’s warming up, lightly grease a standard 12-cup muffin tin to prevent sticking. This will ensure your mini cherry pies come out easily once they are baked.
2. Prepare the Pie Crusts
Take the refrigerated pie crusts out and unroll them on a clean surface. With a round cutter or a glass (about 3-4 inches in diameter), cut out circles large enough to fit into the muffin tin cups, allowing a little overhang for the edges. You should have enough dough to make twelve mini crusts.
3. Form the Mini Pie Shells
Gently press each dough circle into the bottom and up the sides of the muffin tin cups. This creates your little pie shells, ready to be filled with that delicious cherry filling!
4. Fill with Cherry Filling
If your cherry pie filling seems a bit runny, mix it with 1 tablespoon of flour to thicken it slightly. Now spoon about 1 to 2 tablespoons of the cherry pie filling into each mini crust.
5. Create a Lattice Top
Take the second pie crust and cut thin strips to make a lattice topping. Weave or place 2-3 strips over each cherry filling. This not only looks pretty but also lets the steam escape while baking.
6. Apply Egg Wash
In a small bowl, mix the beaten egg with 1 tablespoon of water to create your egg wash. Brush this mixture lightly over the edges of the crust and the lattice strips. This will give your Cherry Pie Bites a beautiful, golden finish when baked.
7. Optional Sugar Sprinkling
If you’d like, sprinkle a little granulated sugar over the tops for an extra sweetness and sparkle.
8. Bake to Perfection
Pop your muffin tin into the preheated oven and bake for 18-22 minutes. You’ll know they’re done when the crust is golden brown and the filling is bubbly. The smell will be irresistible!
9. Cool and Enjoy
Once baked, let the cherry pie bites cool in the muffin tin for about 10 minutes. This allows them to set a bit. After that, transfer them to a wire rack to cool completely.
10. Add a Finishing Touch (Optional)
If you like, you can drizzle a simple glaze made from powdered sugar and a little milk over your bites or just dust them with powdered sugar before serving. It adds a lovely touch!
Now, dig in and enjoy your mini cherry pies! They’re perfect for snacks, parties, or just a sweet treat any time of day!
Can I Use Fresh or Frozen Cherries Instead of Canned Filling?
Absolutely! If you prefer fresh or frozen cherries, simply cook them down with some sugar, lemon juice, and a bit of cornstarch to thicken the mixture before filling the crusts. You’ll get a delicious homemade cherry filling!
How Do I Store Leftover Cherry Pie Bites?
Store any leftovers in an airtight container in the fridge for up to 3 days. To enjoy them again, simply reheat in the oven at 350°F (175°C) for 5-10 minutes to warm them up and restore the crispiness of the crust.
Can I Make These Cherry Pie Bites Ahead of Time?
Definitely! You can prepare the mini crusts and fill them with cherry filling a day in advance. Assemble and refrigerate them, then bake them fresh when you’re ready to serve!
What Can I Use Instead of Egg for the Wash?
If you’re looking for a vegan option, you can use a mixture of non-dairy milk and a little cornstarch or even some melted coconut oil as a substitute for the egg wash. This will help the crust achieve a nice finish without using eggs!