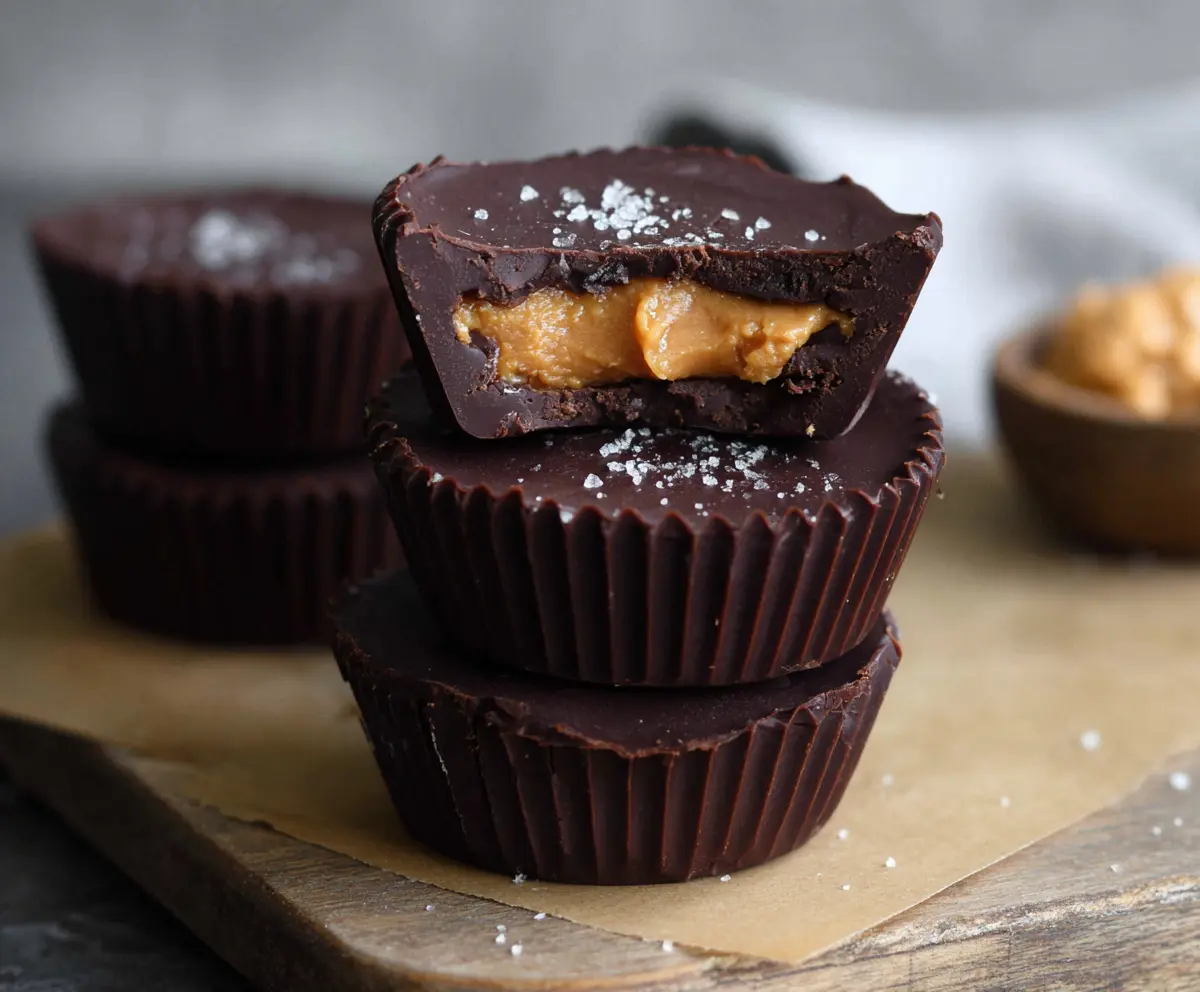
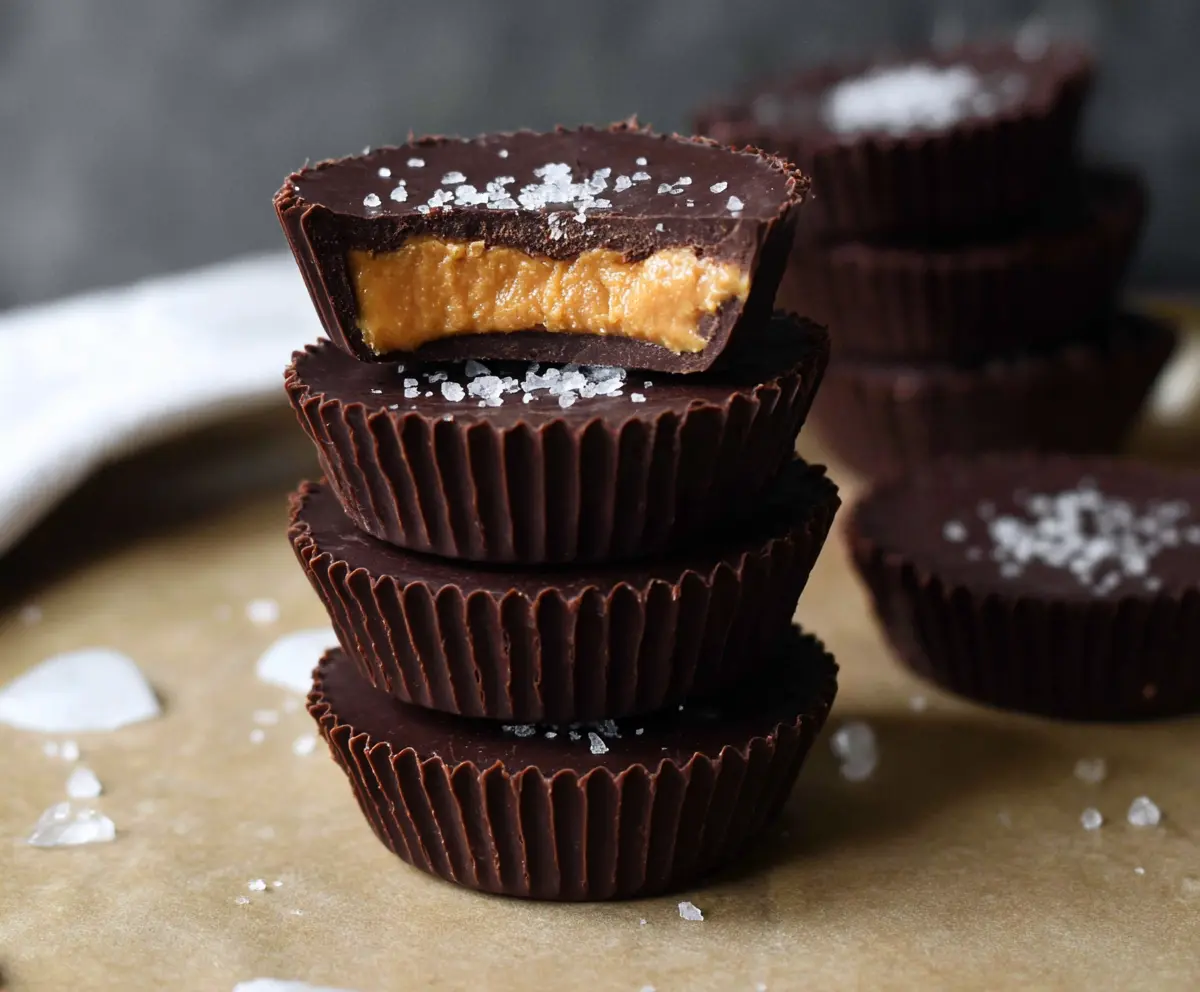
These Dark Chocolate Peanut Butter Cups are a chocolate lover’s dream! With a rich, creamy peanut butter filling and a smooth dark chocolate coating, they are simply irresistible.
Making these treats is easy and fun! I love popping them in the fridge to let them chill—the wait only makes it more exciting. Trust me, they’ll disappear in no time!
Key Ingredients & Substitutions
Peanut Butter: Use natural creamy peanut butter for the best texture. If you need a nut-free option, try sun butter or almond butter. I personally love using smooth peanut butter, but chunky adds a nice crunch too!
Powdered Sugar: This helps sweeten the peanut butter filling without leaving graininess. If you want a healthier option, try coconut sugar or a sugar alternative like erythritol. Just keep in mind the sweetness level may vary.
Dark Chocolate: Choose chocolate that’s at least 70% cocoa for a rich flavor. If you’re dairy-free, look for vegan dark chocolate chips. I’ve used a mix of milk and dark chocolate, which brings a nice balance!
Coconut Oil: It’s optional but helps create a smoother chocolate coating. You can also use vegetable or canola oil. I’ve found that a little coconut oil makes a noticeable difference!
How Do I Melt Chocolate Smoothly Without Overheating It?
Melted chocolate can seize up if overheated, so here’s how to do it right!
- Use a microwave: Heat chocolate in 30-second intervals. Stir in between until it’s nearly melted, then stir until smooth.
- Double boiler method: Place chopped chocolate in a heatproof bowl over simmering water. Stir gently until melted. The steam will heat it gently.
- If using coconut oil, add it to the chocolate before melting; it aids in a smooth texture.
Take your time with melting—quick is not always better when it comes to chocolate!
Delicious Dark Chocolate Peanut Butter Cups
Ingredients You’ll Need:
For the Peanut Butter Filling:
- 1 cup natural creamy peanut butter (smooth, unsweetened)
- 1/4 cup powdered sugar (adjust to taste)
- 1 teaspoon vanilla extract
For the Chocolate Coating:
- 2 cups dark chocolate chips or chopped dark chocolate (70% cocoa or higher)
- 1 tablespoon coconut oil (optional, for smooth melting)
For Topping:
- Sea salt flakes, for sprinkling on top
How Much Time Will You Need?
This recipe takes about 15 minutes to prepare and around 30 minutes to chill in the freezer. Super quick recipe for a satisfying treat that’s worth the wait!
Step-by-Step Instructions:
1. Prepare the Muffin Liners:
Start by lining a muffin tin with cupcake liners. This will hold your peanut butter cups and make them easy to remove later.
2. Make the Peanut Butter Filling:
In a medium bowl, mix the creamy peanut butter, powdered sugar, and vanilla extract. Stir them together until smooth and well-combined. Taste and adjust sweetness if you like it a bit sweeter!
3. Melt the Dark Chocolate:
In a microwave-safe bowl, combine the dark chocolate and coconut oil (if using). Microwave in 30-second intervals, stirring in between, until the chocolate is fully melted and smooth. Alternatively, you can melt it using a double boiler for gentle heating.
4. Form the Chocolate Base:
Spoon about 1 tablespoon of melted dark chocolate into the bottom of each liner. With the back of a spoon, gently spread the chocolate up the sides a little bit—it doesn’t have to be perfect!
5. Set the Chocolate Base:
Slide the muffin tin into the freezer for about 10 minutes so the chocolate can set and harden.
6. Add the Peanut Butter Layer:
Once the chocolate is firm, remove the tin from the freezer. Carefully spoon about 1 tablespoon of the peanut butter mixture over the chocolate base in each liner, keeping it centered. Avoid getting peanut butter on the edges!
7. Cover with More Chocolate:
Now spoon another tablespoon of melted dark chocolate over the peanut butter layer, covering it completely and sealing it in. Smooth the top if needed.
8. Sprinkle with Sea Salt:
For a little extra flavor, sprinkle a pinch of sea salt flakes on top of each cup.
9. Chill Until Set:
Return the muffin tin to the freezer and chill for at least 30 minutes, or until fully set and firm to the touch.
10. Serve and Enjoy!
Once your peanut butter cups are hardened, gently peel them from the cupcake liners. Store any leftovers in an airtight container in the refrigerator. Enjoy your delicious homemade dark chocolate peanut butter cups!
Can I Use Milk Chocolate Instead of Dark Chocolate?
Absolutely! While dark chocolate offers a rich flavor, you can use milk chocolate for a sweeter, creamier taste. Just be mindful of the sweetness level in your filling since milk chocolate is generally sweeter than dark chocolate.
Can I Make These Peanut Butter Cups Vegan?
Yes! Just choose a dairy-free dark chocolate and ensure your peanut butter is also free of added ingredients that contain animal products. Brands like Enjoy Life chocolate chips are great for making these vegan-friendly!
How Should I Store Leftovers?
Store your peanut butter cups in an airtight container in the fridge—they’ll stay fresh for up to two weeks. If you want to keep them longer, you can also freeze them. Just make sure to separate layers with parchment paper to prevent sticking!
What If My Chocolate Isn’t Melting Smoothly?
If your chocolate is seizing up or not melting smoothly, it might be overheated. Ensure to melt it gradually in 30-second intervals while stirring frequently. Adding a little coconut oil can help create a smoother texture if you encounter any issues!