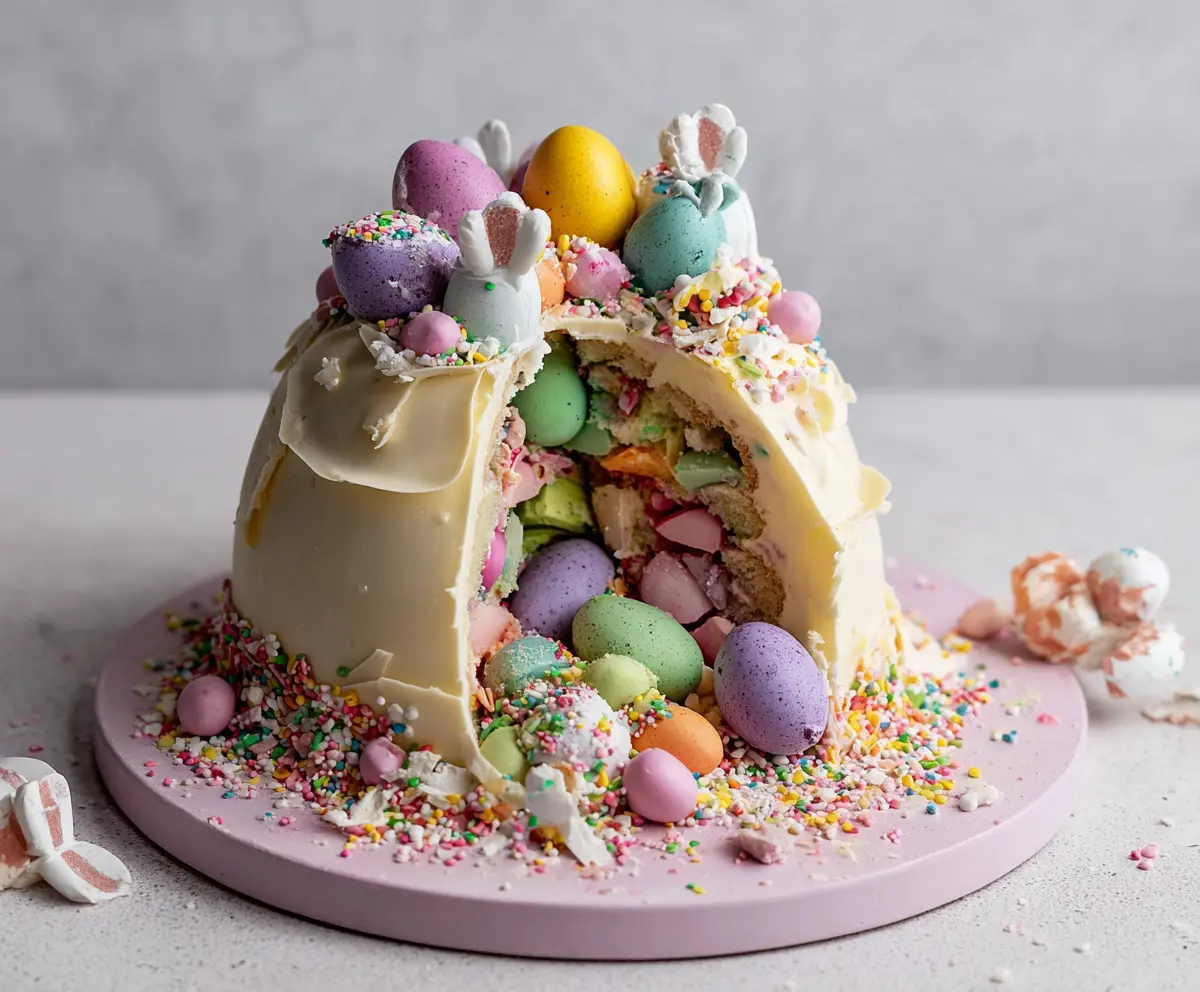
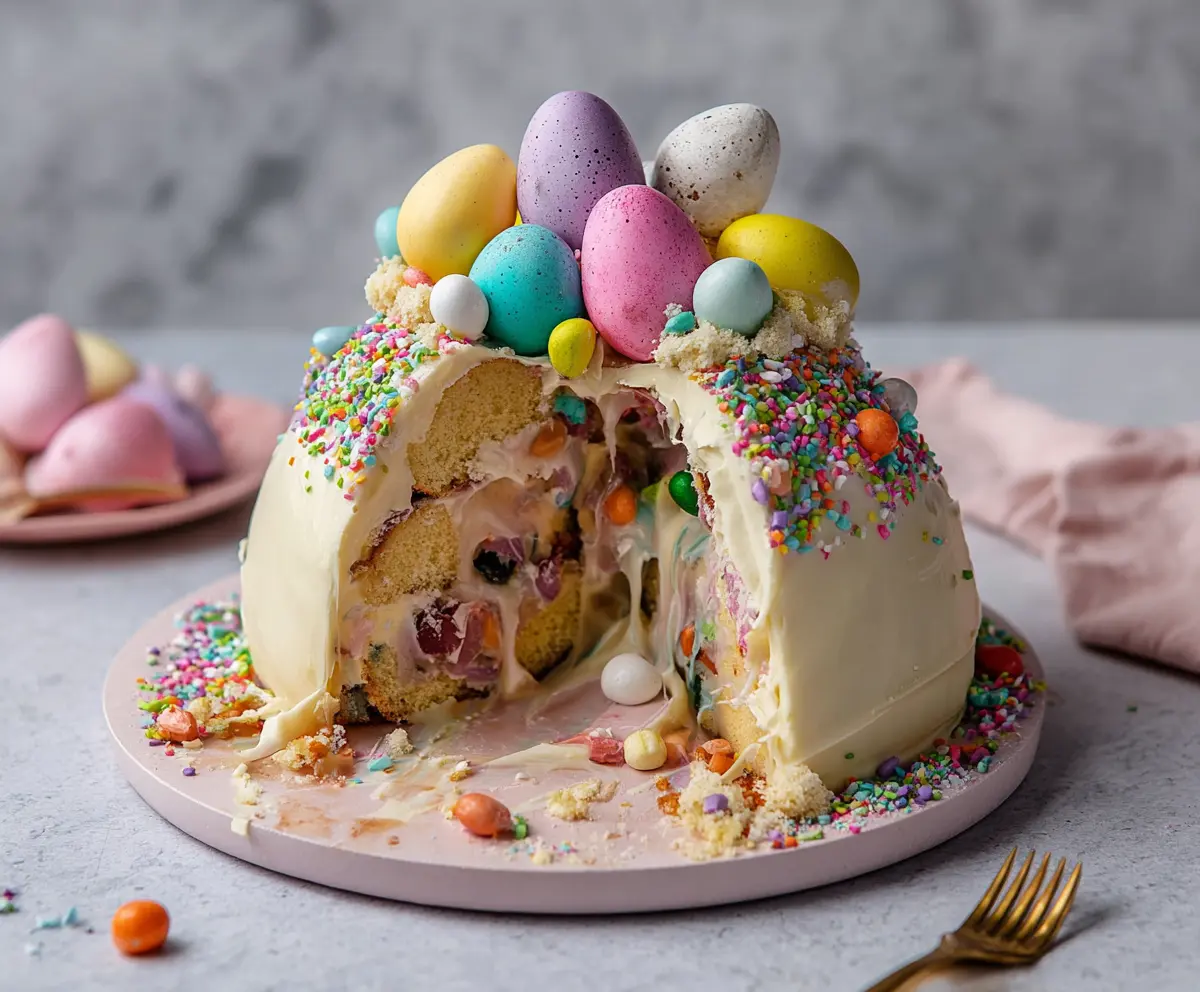
This fun Easter Egg Smash Cake is filled with surprises! It’s a fluffy cake covered in colorful frosting that hides candy eggs inside, just waiting to be discovered.
I love the moment when I smash the cake open, and all the goodies spill out. Kids (and adults!) giggle every time. It’s a perfect centerpiece for your Easter celebration!
Key Ingredients & Substitutions
All-Purpose Flour: This provides the base and structure for the cake. If you want a lighter cake, you could try a cake flour or a gluten-free blend. I personally prefer using a bit of almond flour for added flavor.
Unsalted Butter: For both the cake and frosting, using unsalted butter allows you to control the saltiness. If you’re dairy-free, try a plant-based butter or coconut oil, but keep in mind it may affect the cake’s texture.
Sugar: Granulated sugar creates sweetness and moisture. You can substitute with brown sugar for a richer flavor or a sugar alternative like coconut sugar or a stevia blend if you’re watching your sugar intake.
Eggs: Eggs add moisture and help bind the cake. If you’re vegan or allergic, use flax eggs (1 tablespoon of ground flaxseed mixed with 3 tablespoons of water for each egg) for a similar effect.
Heavy Cream: This makes the frosting creamy and rich. Substitute with whole milk or a non-dairy milk for a lighter frosting, but the texture might be slightly different.
How Do I Get the Buttercream Frosting Just Right?
Getting your buttercream frosting smooth and fluffy can be tricky! Here’s how to ensure it comes out perfectly every time:
- Start with really soft butter. If it’s too hard, it won’t mix well.
- Add powdered sugar gradually so it incorporates evenly and doesn’t create a mess.
- Use high speed when mixing after adding cream or milk to trap air for fluffiness.
- Check consistency—if it’s too thick, add a splash of cream; if it’s too thin, add more powdered sugar. Aim for a fluffy texture that holds its shape.
What’s the Best Way to Create a Hollow Center in the Cake?
Creating a hollow center is key to hiding your candy surprise! Here’s a simple method:
- Once the cakes have cooled, use a serrated knife to level the tops of the cakes.
- Place an inverted glass or small bowl in the center of the cake layer and carefully cut around it to form a hollow shape. You want enough space to fit those candies!
- Save those cake scraps! They’re perfect for mixing into some frosting for a special treat later.
How Do I Get a Smooth White Chocolate Shell?
Creating a beautiful shell is easier than it sounds! Here are the steps:
- Use a double boiler or microwave to melt the chocolate gently. Be careful not to overheat!
- Once melted, let it cool slightly before using. It needs to be pourable, not too hot.
- Spread a thin, even layer around the cake, allowing it to drape a little over the edges for a nice finish.
- Let it set at room temperature or chill briefly in the fridge to harden effectively.
With these tips, you’re well on your way to crafting a delightful Easter cake! Enjoy the baking process and the smiles it will bring!
How to Make Epic Easter Egg Smash Cake
Ingredients You’ll Need:
For The Cake:
- 2 ½ cups all-purpose flour
- 2 ½ tsp baking powder
- ½ tsp salt
- 1 cup unsalted butter, softened
- 1 ¾ cups granulated sugar
- 4 large eggs
- 1 tbsp vanilla extract
- 1 cup whole milk
For The Buttercream Frosting:
- 1 ½ cups unsalted butter, softened
- 5 cups powdered sugar, sifted
- 2 tsp vanilla extract
- 4-6 tbsp heavy cream or milk
- Pinch of salt
For Decoration:
- White chocolate or candy melts (for shell covering)
- Assorted pastel-colored candy-coated chocolate Easter eggs (various sizes)
- Jelly-filled marshmallow bunny candies
- Multicolored sprinkles
- Edible confetti or small candies
- Optional: white chocolate shards or flakes
How Much Time Will You Need?
This delightful cake takes about 1 hour to prepare, plus 30-35 minutes to bake and an additional 20 minutes for chilling. Set aside some extra time for decorating and serving, especially if you want to enjoy the smashing fun!
Step-by-Step Instructions:
1. Prepare the Cake Batter:
First, preheat your oven to 350°F (175°C) and grease and flour two 8-inch round cake pans. In a medium bowl, whisk together the flour, baking powder, and salt. Set this dry mix aside. In a large bowl, beat the softened butter and granulated sugar together with an electric mixer until the mixture is light and fluffy—this should take about 3-5 minutes. Next, add the eggs one at a time, mixing well after each addition, and then mix in the vanilla extract. Gradually add the dry ingredients along with the milk, starting and ending with the dry mix. Mix just until combined; overmixing can make the cake tough!
2. Bake the Cakes:
Divide the batter evenly between the two prepared pans and smooth the tops. Bake them in the preheated oven for 30-35 minutes. To check if they’re done, insert a toothpick into the center; it should come out clean. Once baked, remove them from the oven and let the cakes cool in the pans for about 10 minutes before carefully transferring them to wire racks to cool completely.
3. Prepare the Buttercream Frosting:
In a mixing bowl, use an electric mixer to beat the softened butter on medium speed until it’s creamy. Gradually add the sifted powdered sugar, one cup at a time, and beat well after each addition. Then add the vanilla extract and a pinch of salt. Slowly add the heavy cream or milk, one tablespoon at a time, until you reach your desired consistency. Mix on high speed for about 3-4 minutes until the frosting is light and fluffy!
4. Assemble the Cake and Create Hollow Center:
Make sure the tops of both cooled cakes are level. Carefully cut a dome-shaped hole or circle out of the center of each cake layer to create a hollow area. Reserve those cake scraps for other treats. Place one cake layer on a serving plate and fill the hollow center with your pastel candy-coated chocolate eggs and some marshmallow bunny candies. Spread a layer of buttercream around the top surface and inside the hollow edges, then carefully place the second cake layer on top, lining up the hollow centers. Coat the entire cake lightly with a crumb coat of buttercream and let it chill in the fridge for 20 minutes to set.
5. Create the White Chocolate Shell:
Melt the white chocolate or candy melts according to the package instructions, letting them cool slightly. Using an offset spatula, spread the melted chocolate around the dome-shaped surface of the cake to form a nice, thin layer that will harden into a shell. Allow the chocolate to set completely, which can be done by chilling it briefly in the fridge.
6. Decorate:
For extra flair, frost the cake with a smooth layer of buttercream over and around the white chocolate shell. Now comes the fun part—decorate the top and base of the cake with your pastel candy-coated eggs, jelly bunny marshmallows, multicolored sprinkles, and edible confetti. Scatter a few sprinkles around the base for a festive finish!
7. Serving:
When it’s time to serve, gently break or smash the white chocolate shell to reveal the hidden candy eggs inside. Slice into the cake and enjoy the delicious surprise that awaits!
Enjoy making and sharing this colorful, festive, and surprise-filled Easter cake, which is perfect for your celebrations!
Can I Use a Different Type of Flour?
Yes! You can substitute all-purpose flour with a gluten-free flour blend or cake flour for a lighter texture. Just ensure any gluten-free flour mix is designed for baking to get the best results.
How Can I Make This Cake Ahead of Time?
Absolutely! You can bake and cool the cake layers a day in advance. Just wrap them tightly in plastic wrap and store them at room temperature. Frost and decorate the cake on the day you plan to serve it for the freshest results.
What Should I Do If My Buttercream Is Too Thick?
If your buttercream frosting is too thick, simply add more heavy cream or milk a tablespoon at a time until you reach your desired consistency. Mix well after each addition to ensure an even texture.
Can I Freeze the Cake?
Yes, you can freeze the cake! Wrap the un-frosted layers in plastic wrap, then aluminum foil, and store them in the freezer for up to 3 months. Thaw them in the fridge overnight before frosting and decorating.