These spooky Frankenstein Brownies are not just tasty, but fun to make too! They’re rich, chocolaty, and topped with colorful icing that turns them into little monsters.
Whenever I make these, it brings out the silly side in everyone. Kids (and adults) love decorating them, and who can resist a brownie that looks this cute? 🍫
Key Ingredients & Substitutions
Unsalted Butter: This provides richness and moisture. You can substitute with melted coconut oil or a dairy-free buttery spread for a vegan option.
Cocoa Powder: Unsweetened cocoa powder is key for deep, chocolaty flavor. If you prefer a milder taste, use Dutch-processed cocoa. For a non-cocoa version, you might replace it with carob powder, but it will alter the flavor.
Granulated Sugar: Granulated sugar adds sweetness and moisture. You can use brown sugar for a slight caramel flavor, or a sugar substitute like erythritol if you’re looking for lower sugar options.
Green Food Coloring: This gives the fun Frankenstein hue! In case you prefer a natural option, beet juice or spinach powder can create a green shade, but the color will differ in intensity.
Candy Eyeballs: These are essential for the monster look! If you can’t find candy eyeballs, mini marshmallows with chocolate chips work as a fun alternative!
How Can I Make the Perfect Fudgy Brownies?
Getting brownies just right can be tricky! The goal is moist and fudgy without being undercooked. Here’s how:
- Mix melted butter with sugar well, as it helps to dissolve the sugar properly, making for a smoother batter.
- Don’t overmix once you add the dry ingredients. Just stir until everything is combined to keep them chewy.
- Keep an eye on baking time. Brownies should have a few moist crumbs on your toothpick, but not wet batter.
- Let the brownies cool in the pan before cutting! This helps them set and makes them easier to slice.
Making these Frankenstein Brownies will be a blast, especially while decorating! Enjoy the process and the smiles they bring!
Frankenstein Brownies
Ingredients:
For the Brownies:
- 1/2 cup (115g) unsalted butter, melted
- 1 cup (200g) granulated sugar
- 2 large eggs
- 1 teaspoon vanilla extract
- 1/3 cup (40g) unsweetened cocoa powder
- 1/2 cup (65g) all-purpose flour
- 1/4 teaspoon salt
- 1/4 teaspoon baking powder
For Decoration:
- 1 cup buttercream frosting or cream cheese frosting
- Green food coloring
- Black sanding sugar or black colored sugar sprinkles
- Candy eyeballs (approx. 20 for 16 brownies)
- Brown icing or melted chocolate (in piping bag or zip bag with corner cut)
- White icing or white candy melts for teeth
Time Needed:
This fun treat takes approximately 30 minutes to prep and about 25 minutes to bake. After decorating, allow some time for the frosting to set before serving. In total, you’ll be looking at about 1 hour for everything from start to finish!
Instructions:
1. Prepare Brownies:
Start by preheating your oven to 350°F (175°C). Grease and flour an 8×8 inch baking pan or line it with parchment paper to keep those brownies from sticking!
In a large bowl, mix the melted butter, sugar, eggs, and vanilla extract until well blended. This will give your brownies a nice sweetness and rich flavor.
Now, sift in the cocoa powder, flour, salt, and baking powder. Stir everything together gently until just combined—don’t overmix, or your brownies will be tough!
Pour the brownie batter into your prepared pan and smooth it out evenly. Bake in the preheated oven for 20-25 minutes, or until a toothpick inserted in the center comes out with a few moist crumbs attached. Once they’re done, allow the brownies to cool completely in the pan on a wire rack.
2. Prepare Green Frosting:
While the brownies cool, it’s time to make the frosting! Take your buttercream or cream cheese frosting and mix in green food coloring until you get that classic Frankenstein green color. Feel free to adjust the color to your liking!
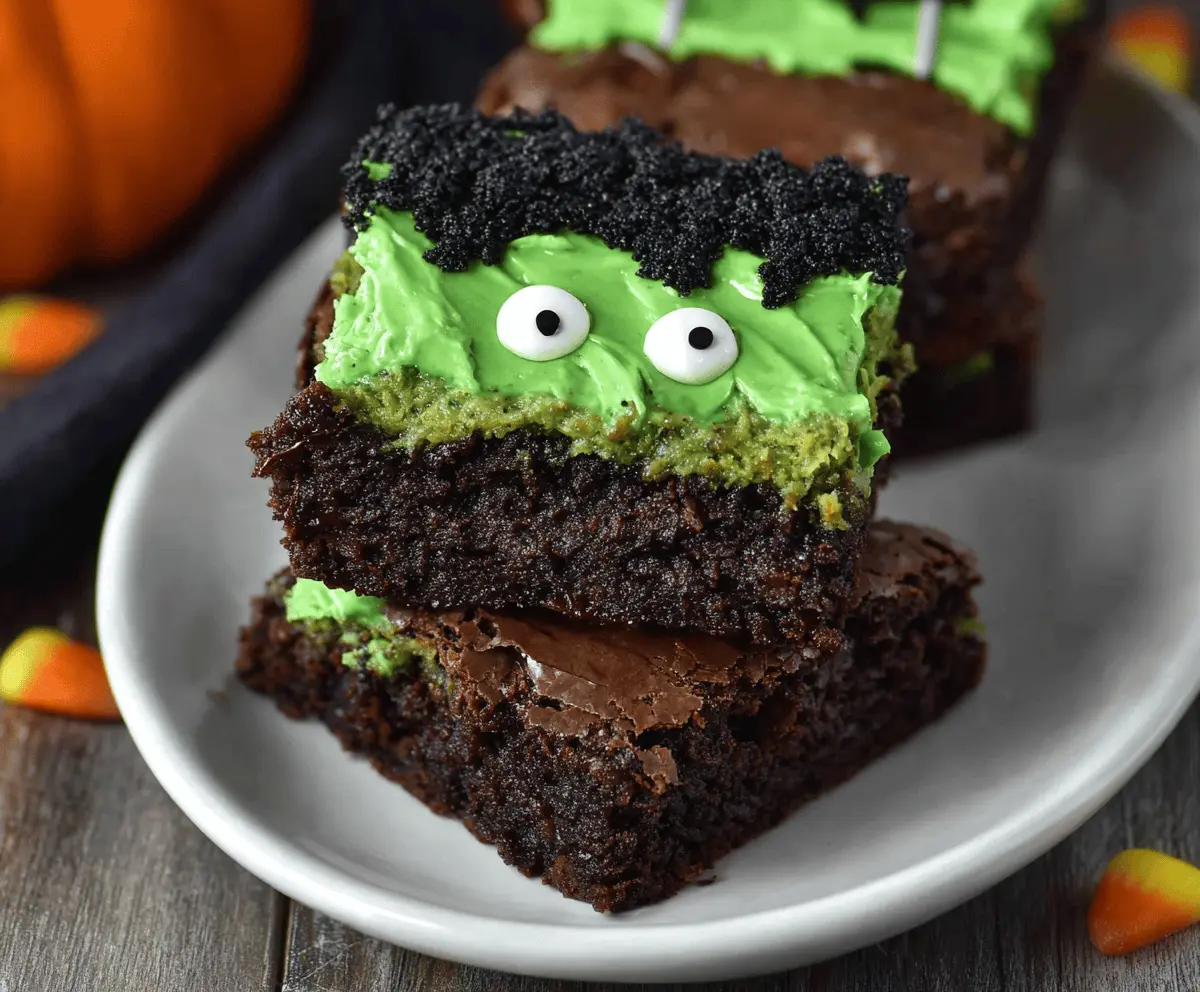
3. Assemble Frankenstein Faces:
Once your brownies are completely cool, cut them into squares (about 16 pieces should do). Now it’s time for the fun part! Spread a generous layer of green frosting evenly over the top of each brownie square.
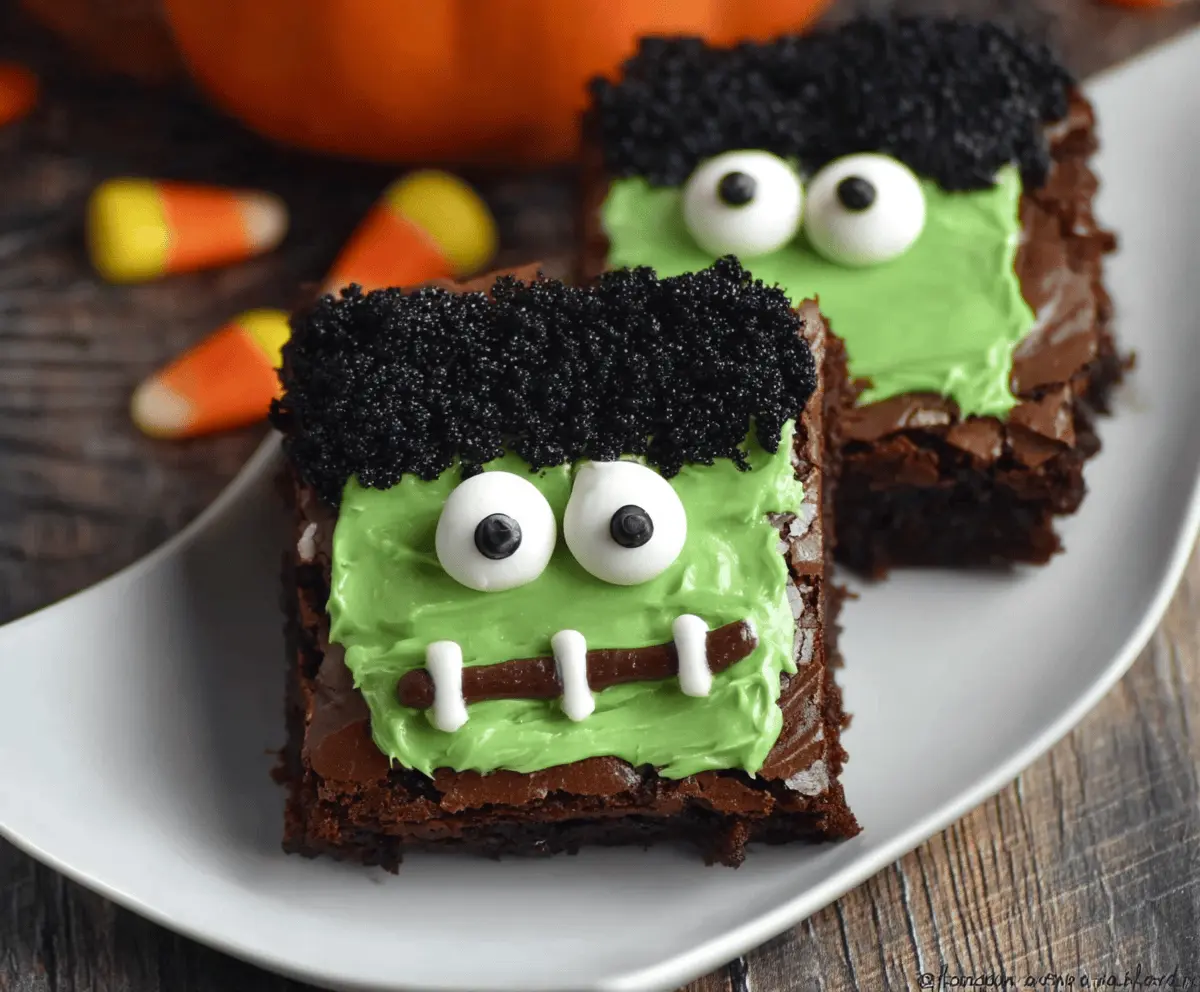
To create Frankenstein’s wild hair, sprinkle black sanding sugar along the top edges of each brownie. Then, place two candy eyeballs on each brownie, side by side, near the top center.
Using brown icing or melted chocolate, pipe a horizontal line about 1/3 from the bottom for Frankenstein’s mouth. Add a creative touch by piping three small short white vertical lines on the brown line to make his teeth!
4. Finish and Serve:
Let your spooky creations set for a little while so that the frosting and decorations firm up. Once you’re done, arrange them on a festive plate, and get ready for a party! Enjoy your delicious, adorable Frankenstein Brownies!
These brownies are a delicious treat with a fun twist—perfect for Halloween or any festive occasion where you want to add a bit of monster magic! 🎃🍫
Can I Use Gluten-Free Flour for This Recipe?
Absolutely! You can substitute all-purpose flour with a gluten-free flour blend. Make sure it’s a 1:1 replacement to maintain the same texture in your brownies.
How Can I Store Leftover Brownies?
Store any leftover brownies in an airtight container at room temperature for up to 3 days. You can also keep them in the fridge for about a week if you prefer them chilled.
Can I Make the Brownies in Advance?
Yes, you can bake the brownies up to two days ahead of time! Just make sure to let them cool completely before covering them with frosting and storing them in an airtight container.
What Can I Use if I Don’t Have Black Sanding Sugar?
If you don’t have black sanding sugar, you can use regular granulated sugar that you color with black food coloring, or you could use crushed Oreos as a fun alternative for the hair effect!