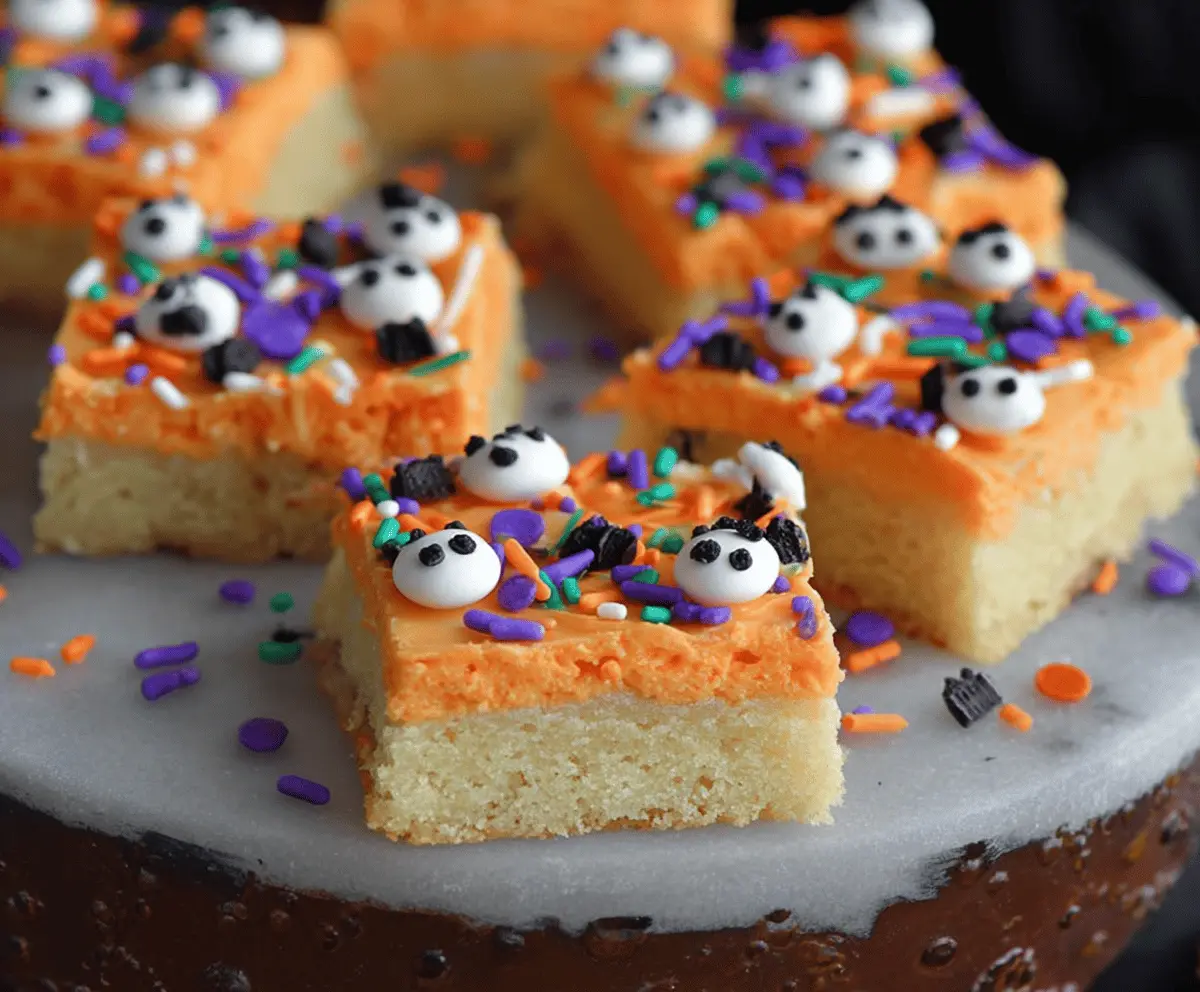
These Halloween Sugar Cookie Bars are a sweet treat perfect for the spooky season! Soft, chewy, and topped with delicious frosting, they bring a fun twist to traditional cookies.
Baking these bars is super easy, and they make a perfect treat for parties or sharing with friends. I love adding sprinkles on top—they make everything more festive! 🎃
Key Ingredients & Substitutions
All-purpose flour: This is the base of your sugar cookie bars. For a gluten-free option, you can use a gluten-free all-purpose blend that measures cup-for-cup like regular flour.
Unsalted butter: Softened butter makes a difference in texture. If needed, you can use margarine or coconut oil if you’re dairy-free, but keep in mind the flavor might change slightly.
Food coloring: I use orange and cream colors to make them festive! For a natural option, try beet juice for pinkish hues or turmeric for yellow.
Sprinkles and candies: Use your favorite Halloween-themed decorations! If you can’t find specific shapes, regular sprinkles work just fine, or you could use mini chocolate chips for a different look.
How to Ensure Your Frosting is Perfectly Smooth?
To get a nice, smooth frosting, mix the powdered sugar and milk until there are no lumps. Start with less milk and add more gradually until you reach a spreadable consistency. It’s all about finding that right balance!
- Mix well with an electric mixer for fluffiness.
- Let it rest a few minutes before frosting your bars for easier spreading.
- If it’s too thick, add a little more milk; if too thin, a touch more powdered sugar.
Practice makes perfect, so don’t worry if it takes a couple of tries to get it just right! Happy baking!
Halloween Sugar Cookie Bars
Ingredients You’ll Need:
For the Cookie Base:
- 2 1/2 cups all-purpose flour
- 1/2 teaspoon baking powder
- 1/2 teaspoon salt
- 1 cup unsalted butter, softened
- 1 cup granulated sugar
- 1 large egg
- 1 1/2 teaspoons vanilla extract
For the Frosting:
- 1 cup powdered sugar
- 3 tablespoons milk (more as needed)
- Orange and cream-colored food coloring
For Decoration:
- Black, white, and orange Halloween-themed sprinkles
- Decorative Halloween sugar shapes or candies (e.g., ghosts, pumpkins, bats)
How Much Time Will You Need?
This delightful recipe takes about 15 minutes to prep and 20-25 minutes to bake, plus additional time for cooling and frosting. So, you’ll need around 1 hour in total, including decorating. Perfect for a fun fall afternoon!
Step-by-Step Instructions:
1. Preheat and Prepare the Pan:
First things first! Preheat your oven to 350°F (175°C). While it’s heating up, grease a 9×9 inch baking pan with butter or line it with parchment paper for easy removal later.
2. Mix the Dry Ingredients:
In a medium bowl, whisk together the flour, baking powder, and salt. This will ensure your bars rise nicely and have a wonderful texture!
3. Cream Butter and Sugar:
In a large bowl, cream the softened butter and granulated sugar using an electric mixer until it’s light and fluffy. This usually takes about 2-3 minutes.
4. Add Egg and Vanilla:
Now, add in your egg and vanilla extract. Beat until everything is combined and smooth. The mixture should look a bit fluffy!
5. Combine Wet and Dry Ingredients:
Gradually add the dry flour mixture to the wet mixture. Mix just until everything is combined—don’t overmix or your bars might be tough!
6. Spread in the Pan:
Press the dough evenly into the prepared baking pan. Make sure it reaches the corners for even baking.
7. Bake the Bars:
Pop the pan in the oven and bake for 20-25 minutes. You’ll know they’re done when the edges start to turn golden and a toothpick inserted into the center comes out clean.
8. Cool Your Bars:
Once baked, let the bars cool completely in the pan on a wire rack. Patience is key here for properly frosting them later!
9. Make the Frosting:
While they cool, mix the powdered sugar and milk in a bowl until smooth. Adjust the consistency by adding a little more sugar or milk if necessary.
10. Color Your Frosting:
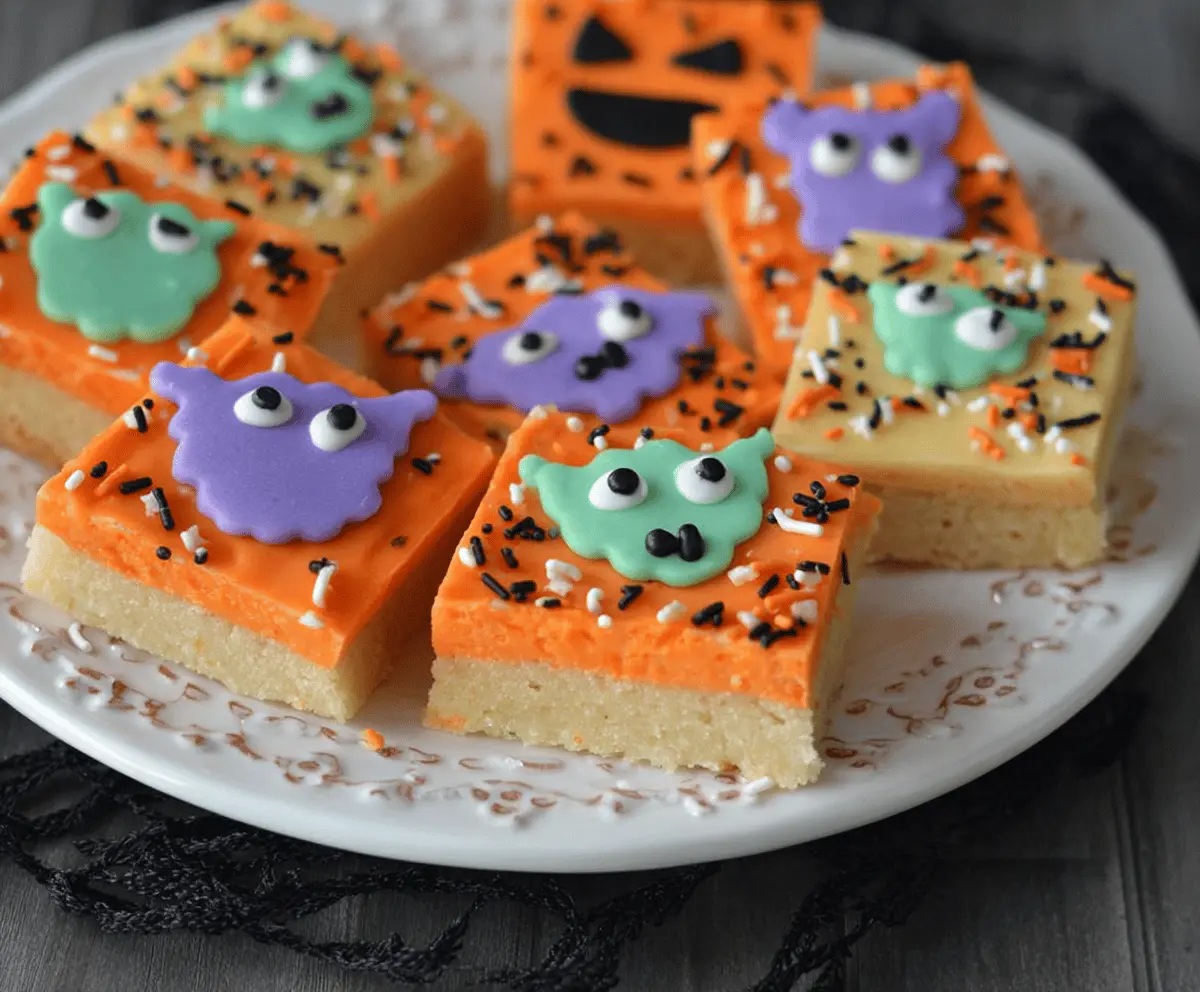
Divide the frosting into two bowls. Tint one bowl with orange food coloring and leave the other cream-colored. Go ahead and make them as vibrant as you like!
11. Frost the Bars:
Once your bars are completely cool, spread the orange frosting over half of the cooled cookie bars and the cream frosting over the other half until they are nicely covered.
12. Add Festive Decorations:
Now for the fun part! Decorate with Halloween sprinkles and add your spooky sugar shapes or candies on top. Get creative with it!
13. Let Set & Serve:
Let the frosting set at room temperature or pop them in the fridge for a few minutes. Once set, cut the bars into squares and enjoy these Halloween delights!
Share these festive, soft, and colorful Halloween Sugar Cookie Bars with friends and family, and enjoy some seasonal fun!
Can I Use Different Types of Flour?
Yes, you can try using almond flour or coconut flour for a gluten-free option, but keep in mind that you may need to adjust the quantities since these flours behave differently than all-purpose flour.
Can I Make These Bars in Advance?
Absolutely! You can bake the cookie bars a day or two in advance. Just store them in an airtight container at room temperature to keep them fresh until you’re ready to frost and serve.
What Should I Do if My Frosting is Too Runny?
If your frosting is too runny, simply add a little more powdered sugar until it reaches your desired consistency. Start with a tablespoon or two at a time to avoid making it too thick.
How to Store Leftover Cookie Bars?
Store any leftovers in an airtight container at room temperature for up to three days. If you want to keep them longer, refrigerate them for up to a week. Just make sure to let them come back to room temperature before enjoying!