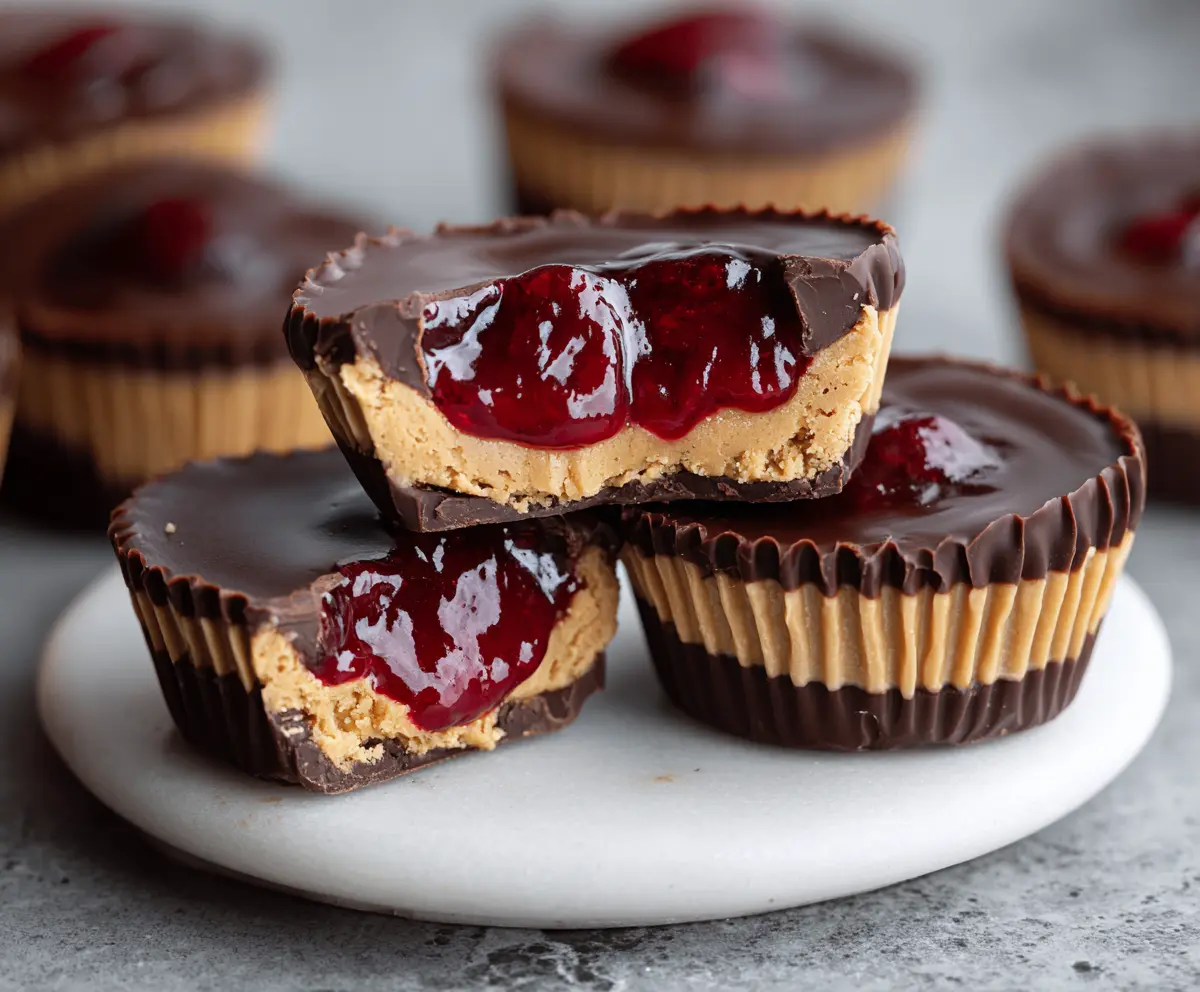
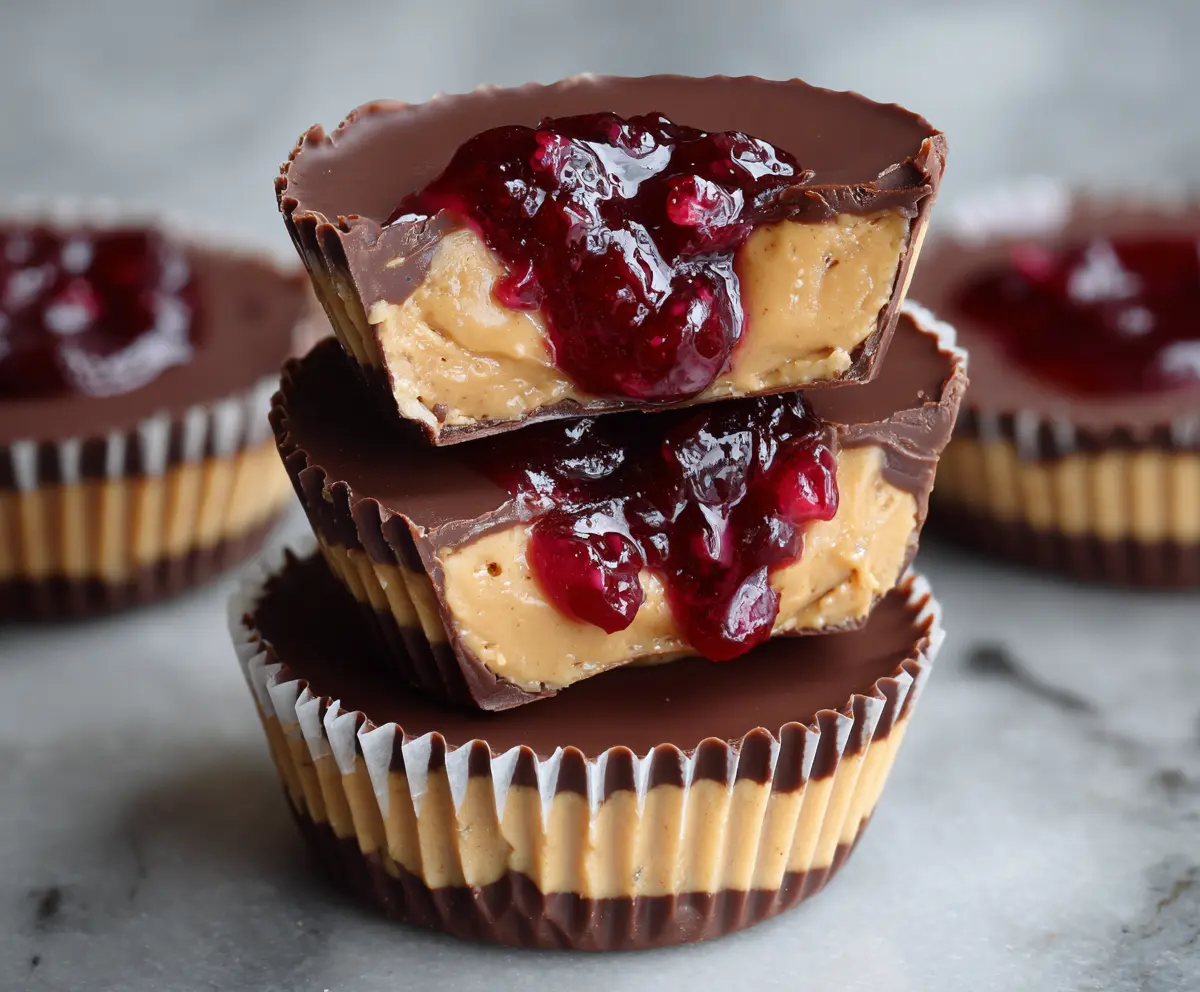
Peanut Butter and Jelly Cups are a fun twist on a classic combo! They have a creamy peanut butter filling inside a sweet chocolate shell, with a touch of fruity jelly for extra yum.
These little treats are super easy to make and appreciate how they remind me of my childhood snacks. I love sharing them with friends—they always bring back happy memories! 🤗
Key Ingredients & Substitutions
Chocolate Chips: Semi-sweet chocolate chips give a nice balance of sweetness. If you’re looking for a healthier option, dark chocolate is a great choice. You can also use milk chocolate if you prefer something sweeter. Just watch for the melting time as it may differ!
Peanut Butter: I recommend using creamy peanut butter for a smooth filling. If you’re allergic to peanuts, try almond or sun butter as tasty alternatives. Natural or no-stir peanut butter will give the best texture, but standard types work too!
Jelly or Jam: Any flavor works well! Strawberry is a classic, but raspberry or grape can bring a fun twist. If you’re avoiding sugar, consider using no-sugar-added jelly or even homemade fruit puree for a healthier option.
How Do I Get Perfectly Sealed Chocolate Cups?
To ensure your peanut butter and jelly cups seal well, pay special attention to the chocolate melting and shell formation. Start with a temperature-controlled microwave for melting chocolate, as it can easily burn if not stirred properly.
- Melt chocolate in short bursts, stirring until it’s completely smooth.
- Spoon enough chocolate into each liner to create a thick bottom and sides, but be careful not to make it too thin!
- After refrigerating, if the chocolate shell is still too soft, pop it back in the fridge for a few minutes before adding the filling.
By sealing them well, you’ll keep that delicious peanut butter and jelly combo perfectly in place!
How to Make Peanut Butter and Jelly Cups
Ingredients You’ll Need:
For the Chocolate Shell:
- 1 1/2 cups semi-sweet chocolate chips (or dark chocolate), divided
For the Peanut Butter Filling:
- 1 cup creamy peanut butter (preferably natural or no-stir)
- 1/4 cup powdered sugar
- 1/4 cup unsalted butter, softened
- Optional: pinch of salt if using unsalted peanut butter
For the Jelly Layer:
- 1/2 cup jelly or jam of your choice (strawberry, raspberry, or grape work great)
How Much Time Will You Need?
This fun recipe takes about 15 minutes of prep time, plus at least 40 minutes for chilling. The majority of the time is waiting for the chocolate to set in the fridge!
Step-by-Step Instructions:
1. Prepare the Muffin Tin:
Start by lining a standard 12-cup muffin tin with paper liners. This makes it easy to remove the cups once they’re set.
2. Melt the Chocolate:
In a microwave-safe bowl, melt 1 cup of the chocolate chips. Do this in 20-30 second intervals, stirring well each time until the chocolate is fully melted and smooth.
3. Create the Chocolate Shell:
Spoon about 1 tablespoon of the melted chocolate into the bottom of each paper liner. Tilt the tin gently to spread the chocolate up the sides of the liner, creating a nice shell. Place the tin in the refrigerator for about 10 minutes or until the chocolate is firm.
4. Mix the Peanut Butter Filling:
While the chocolate sets, mix together the peanut butter, softened butter, powdered sugar, and optional salt in a medium bowl. Stir until it’s smooth and creamy—this is the tasty filling!
5. Add the Peanut Butter Layer:
Once the chocolate shells are firm, spoon about 1 tablespoon of the peanut butter mixture into each cup. Press it down gently, but leave a little space in the middle for the jelly.
6. Add the Jelly:
Now, place about a teaspoon of your chosen jelly right in the center of the peanut butter layer. This adds that delightful fruity touch!
7. Seal with More Chocolate:
Melt the remaining 1/2 cup of chocolate chips until smooth. Then, spoon this melted chocolate over the top of each cup to seal in the peanut butter and jelly layers.
8. Chill to Set:
Pop the muffin tin back into the refrigerator for at least 30 minutes to fully set the cups. This will make sure everything holds together nicely.
9. Enjoy!
Once set, carefully peel off the paper liners and enjoy your delicious peanut butter and jelly cups! Store any leftovers in an airtight container in the refrigerator.
These treats are perfect for satisfying your sweet tooth—creamy, chocolaty, and fruity in every bite! 😋
Can I Use Different Types of Chocolate?
Absolutely! While semi-sweet chocolate is commonly used, you can switch it up with dark chocolate for a richer taste or milk chocolate for a sweeter flavor. Just be mindful of the melting time as different chocolates can vary in consistency.
How Can I Store Leftover Peanut Butter and Jelly Cups?
Store any leftovers in an airtight container in the refrigerator for up to a week. They can also be frozen for longer storage; just wrap them well in plastic wrap and then place them in a freezer-safe container. Thaw them in the fridge before enjoying!
Can I Make These Cups Gluten-Free?
Yes! This recipe is naturally gluten-free, but always check the labels of your ingredients, such as chocolate and jelly, to ensure they’re free from gluten. You’ll be safe to indulge!
What Can I Substitute for Peanut Butter?
If you have a peanut allergy or simply want to try something different, you can use almond butter, cashew butter, or even sunflower seed butter. Each will give a unique flavor, but they all work well in this recipe!