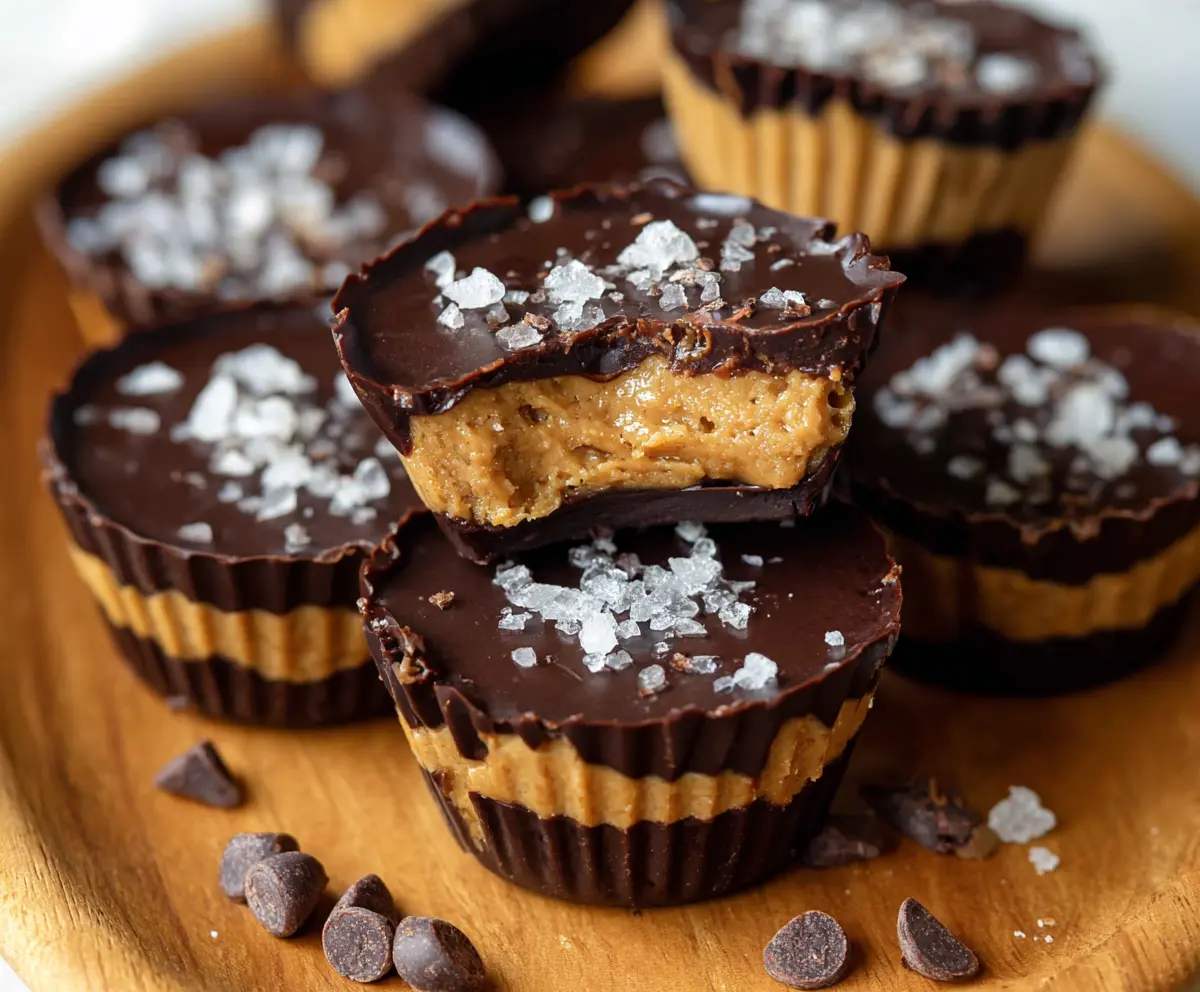
These Peanut Butter Protein Cups are little bites of heaven! They combine rich peanut butter with protein powder for a tasty treat that’s healthy too.
They’re perfect for a quick snack or a post-workout boost. I always keep some in my fridge for when I need a speedy pick-me-up. Plus, who can resist that creamy peanut butter goodness? 😋
Key Ingredients & Substitutions
Peanut Butter: I love using natural peanut butter for its richer flavor and fewer additives. If you’re looking for a nut-free option, try sunflower seed butter. It gives a similar taste and creamy texture.
Honey or Maple Syrup: I usually go for honey for the sweetness, but maple syrup is a great vegan substitute. You can also use agave syrup if you want something lighter.
Protein Powder: Vanilla or chocolate protein powder adds a lovely flavor. If you’re dairy-free, opt for a plant-based protein like pea or rice protein. Just remember that it might alter the taste slightly.
Coconut Flour: This is optional and helps thicken the mixture. If you don’t have it or prefer not to use it, you can skip it completely or replace it with almond flour for a different texture.
Dark Chocolate: For a rich treat, I recommend using high-quality dark chocolate (around 70% cocoa). If you want to cut some sugar, you can use sugar-free dark chocolate instead.
How Do I Achieve Perfectly Layered Protein Cups?
Creating those beautifully layered protein cups takes a bit of care but is totally worth it! Here’s how to get those layers just right:
- Start with a thin layer of melted chocolate to form a nice base. Don’t rush it; let it harden in the freezer for a few minutes.
- Scoop the peanut butter mixture on top, ensuring an even layer. Flatten it gently for the next chocolate layer to sit well.
- Finally, cover the peanut butter with more chocolate, letting it flow around the edges for a clean finish.
- Chill your cups thoroughly to keep those layers intact when ready to eat!
Enjoy your homemade protein cups and feel free to get creative with toppings or fillings! 🌟

Peanut Butter Protein Cups
Ingredients You’ll Need:
- 1 cup natural peanut butter (creamy or crunchy)
- 1/4 cup honey or maple syrup
- 1 scoop vanilla or chocolate protein powder
- 1/4 cup coconut flour (optional, for thickness)
- 8 oz dark chocolate chips or chopped dark chocolate
- 1 tablespoon coconut oil
- Sea salt flakes, for topping
How Much Time Will You Need?
This recipe takes about 15 minutes of prep time, plus 30 minutes to chill in the freezer. It’s a quick and fun treat to make, and the wait for them to set is worth every minute!
Step-by-Step Instructions:
1. Mix the Peanut Butter Filling:
In a medium bowl, combine the peanut butter, honey (or maple syrup), protein powder, and coconut flour (if you’re using it). Stir everything together until you have a thick, smooth dough. This filling is what makes these cups so tasty!
2. Get the Muffin Tin Ready:
Line a muffin tin with silicone or paper liners. This will make it easier to remove the cups once they’re set.
3. Melt the Chocolate Base:
In a microwave-safe bowl, melt half of the dark chocolate chips together with the coconut oil. Do this in 30-second bursts, stirring in between each burst until it’s smooth and melted.
4. Create the Chocolate Layer:
Spoon a small amount of the melted chocolate into the bottom of each liner, just enough to cover it. Use the back of a spoon to spread it evenly across the base.
5. Freeze the Base:
Now, pop the tray in the freezer for about 5 to 10 minutes so that the chocolate can harden. This step is essential for the layers to come out right!
6. Add the Peanut Butter Mixture:
Once the chocolate base is set, scoop a tablespoon of the peanut butter mixture and place it on top of the frozen chocolate. Gently flatten it out, making sure it covers the chocolate layer nicely.
7. Top with More Chocolate:
Melt the remaining chocolate in the same way as before. Once melted, pour it over the peanut butter layer, making sure to cover it completely.
8. Finish with a Sprinkle:
Sprinkle a few flakes of sea salt on top of each cup. This adds a tasty contrast to the sweetness!
9. Chill to Set:
Return the tray to the freezer and let the cups chill for at least 30 minutes, or until the chocolate is nice and firm.
10. Store and Enjoy:
Once they are set, store the protein cups in an airtight container in the refrigerator or freezer. They make for a delicious snack that’s easy to grab and go!
These peanut butter protein cups are rich, creamy, and full of flavor. Whether you’re enjoying them as an afternoon snack or a post-workout treat, they’re sure to hit the spot! 😊
Can I Use a Different Nut Butter?
Absolutely! If you’re not a fan of peanut butter or have allergies, you can use almond butter, cashew butter, or even sunflower seed butter for a nut-free option. Just keep in mind that each nut butter will give a slightly different flavor!
Can I Make These Vegan?
Yes, you can easily make these vegan by using maple syrup instead of honey, as honey is not considered vegan. Make sure to choose dark chocolate that is dairy-free as well!
How Should I Store the Protein Cups?
Store the protein cups in an airtight container in the refrigerator for up to one week. If you want them to last longer, you can freeze them for up to 3 months. Just make sure to keep them separated with parchment paper if stacking!
Can I Customize the Flavor?
Definitely! Feel free to add in extras like chopped nuts, dried fruit, or even a splash of vanilla extract to the peanut butter mixture. You can also try using flavored protein powder for a fun twist!