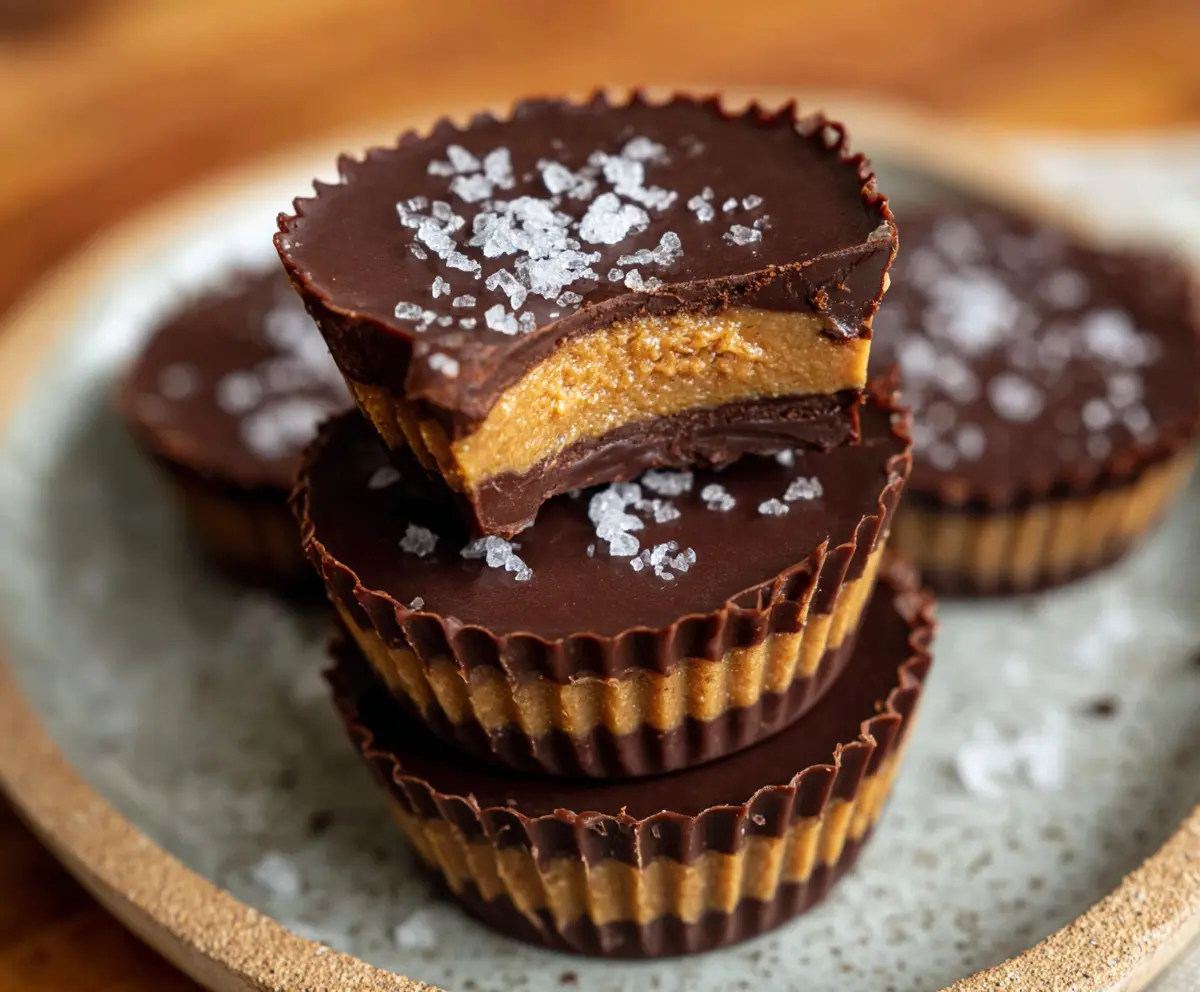
These Protein Peanut Butter Cups are a tasty treat that will satisfy your sweet tooth without the guilt! Packed with creamy peanut butter and a boost of protein, they’re perfect for a quick snack.
Plus, they’re super easy to make! I whip up a batch whenever I crave something chocolatey. You can even freeze them for a cool treat on a hot day—so yummy! 🍫🥜
Key Ingredients & Substitutions
Peanut Butter: Natural peanut butter is best for flavor. You can use crunchy for a fun texture or smooth for a creamier bite. If you’re allergic, try almond or sunflower seed butter instead!
Protein Powder: Vanilla protein powder adds great flavor. If you prefer, you can use unflavored powder or even a plant-based option if you’re vegan!
Sweeteners: Honey adds a lovely sweetness, but feel free to swap in maple syrup if you want it vegan. Adjust the amount based on your taste preference!
Chocolate Chips: Dark chocolate is my favorite for a rich taste. Semi-sweet works too! If you’re dairy-free, look for dairy-free chocolate chips.
How Can You Melt Chocolate Perfectly?
Melted chocolate adds a delicious layer to these cups, but melting can be tricky. To do it right:
- Use a microwave-safe bowl and microwave chocolate chips in 30-second bursts, stirring each time. This prevents scorching.
- If you notice any unmelted chips, give it a good stir—the heat will continue to melt them!
- Keep the bowl dry, as water can cause chocolate to seize up.
Perfectly melted chocolate is smooth and glossy, making it easy to work with for your peanut butter cups!
How to Make Delicious Protein Peanut Butter Cups
Ingredients You’ll Need:
For the Peanut Butter Filling:
- 1 cup natural peanut butter (smooth or crunchy)
- 1/4 cup vanilla or unflavored protein powder
- 2 tablespoons honey or maple syrup
- 1/2 teaspoon vanilla extract
- Pinch of salt
For the Chocolate Coating:
- 1 1/2 cups dark chocolate chips (or semi-sweet)
- Sea salt flakes for topping (optional)
Other:
- Silicone or paper muffin cups
How Much Time Will You Need?
Making these protein peanut butter cups will take you about 15-20 minutes of active prep time. Then, give them 25-40 minutes to set in the freezer. Overall, you should plan for about an hour, including freezing time.
Step-by-Step Instructions:
1. Make the Peanut Butter Filling:
In a mixing bowl, combine the natural peanut butter, protein powder, honey (or maple syrup), vanilla extract, and a pinch of salt. Stir this mixture well until everything is smooth and nicely blended together. Feel free to taste and adjust the sweetness if you like it sweeter!
2. Prepare the Muffin Tins:
Get your muffin tin ready by lining it with silicone or paper muffin cups. This will make it super easy to pop the cups out once they’re set.
3. Melt the Chocolate:
Now it’s time to melt the chocolate chips! Put them in a microwave-safe bowl and heat them in the microwave in 30-second intervals. Make sure to stir the chocolate after each interval until it’s completely melted and smooth.
4. Create the Chocolate Base:
Take about 1 teaspoon of the melted chocolate and spoon it into the bottom of each muffin cup. Spread the chocolate evenly to create a nice, smooth base layer.
5. Firm Up the Chocolate Layer:
Place the muffin tin in the freezer for about 5-10 minutes. This will help the first chocolate layer to harden a bit so that we can add the filling without it mixing in.
6. Add the Peanut Butter Mixture:
Once the chocolate is firm, remove the tin from the freezer. Take about 1 tablespoon of the peanut butter mixture and place it on top of the hardened chocolate layer in each cup. Spread it gently, keeping it away from the edges.
7. Top it Off with More Chocolate:
Now, cover the peanut butter layer with more melted chocolate, making sure you seal the sides and fill the cups completely. This keeps that delicious filling nice and cozy inside!
8. Add Optional Salt:
If you like, sprinkle a few sea salt flakes on top of the chocolate. This adds a nice flavor contrast to the sweetness!
9. Final Freeze:
Pop the muffin tin back into the freezer for about 20-30 minutes. You want the peanut butter cups to be firm and set before you enjoy them.
10. Storing Your Treats:
Once they are set, carefully remove the peanut butter cups from the muffin tin and store them in an airtight container. You can keep them in the refrigerator or freezer—just make sure to enjoy them chilled for the best experience!
Enjoy your homemade Protein Peanut Butter Cups as a tasty and healthy snack anytime you need a pick-me-up! 🍴✨
Can I Use a Different Nut Butter?
Absolutely! You can substitute peanut butter with almond butter, cashew butter, or even sunflower seed butter for a nut-free option. Just keep in mind that the flavor may change slightly!
How Do I Store Leftovers?
Store any leftover protein peanut butter cups in an airtight container in the refrigerator for up to a week, or in the freezer for up to 3 months. Thaw in the fridge before enjoying or eat them straight from the freezer for a cold treat!
Can I Make These Vegan?
Yes! To make these protein cups vegan, use maple syrup as your sweetener, and opt for vegan chocolate chips. Most plant-based protein powders will work as well!
How Can I Make These Cups Sweeter?
If you prefer a sweeter taste, add extra honey or maple syrup to the peanut butter filling. Just be careful not to make it too runny—keep the proportion of peanut butter and protein powder balanced for best results!