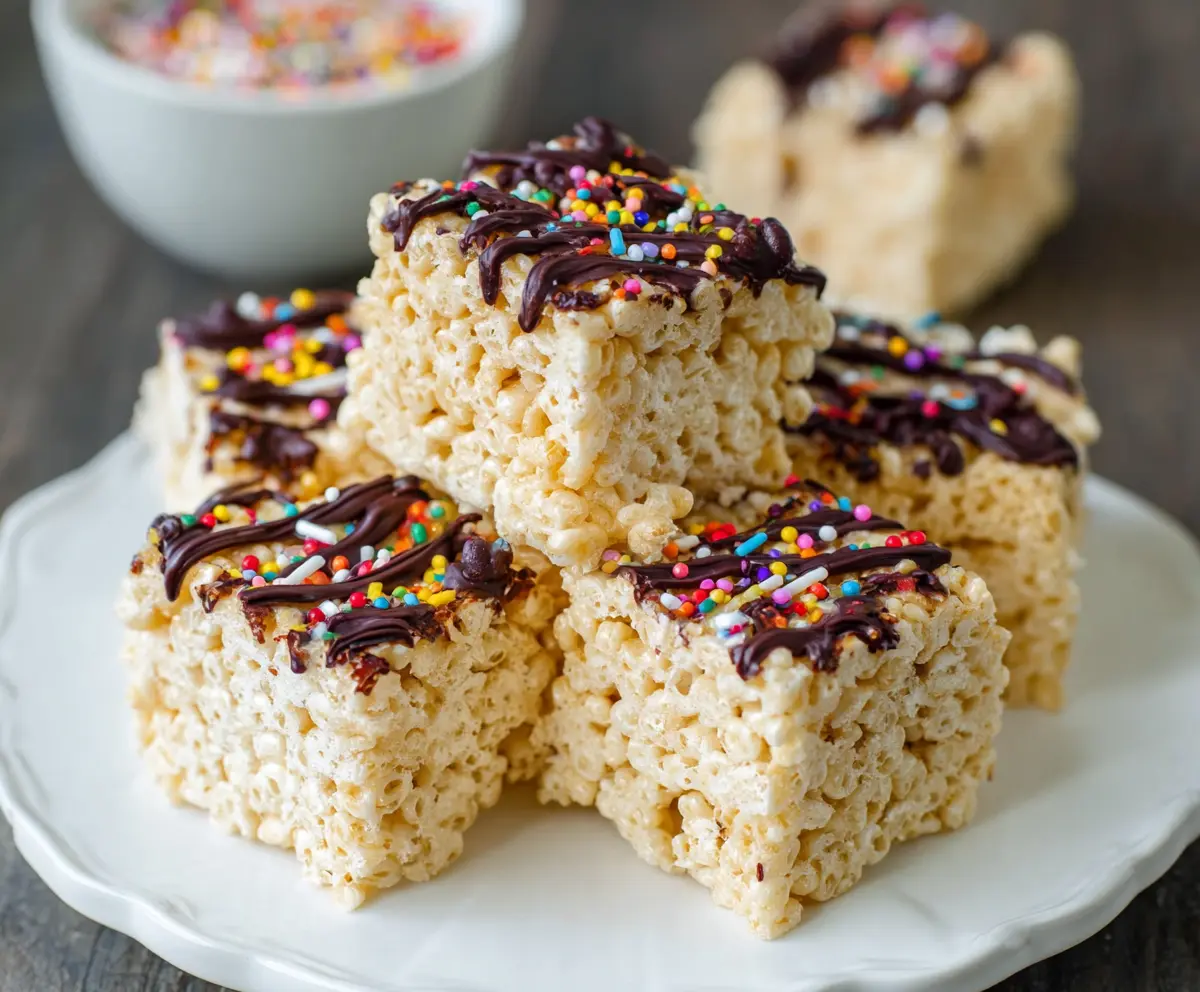
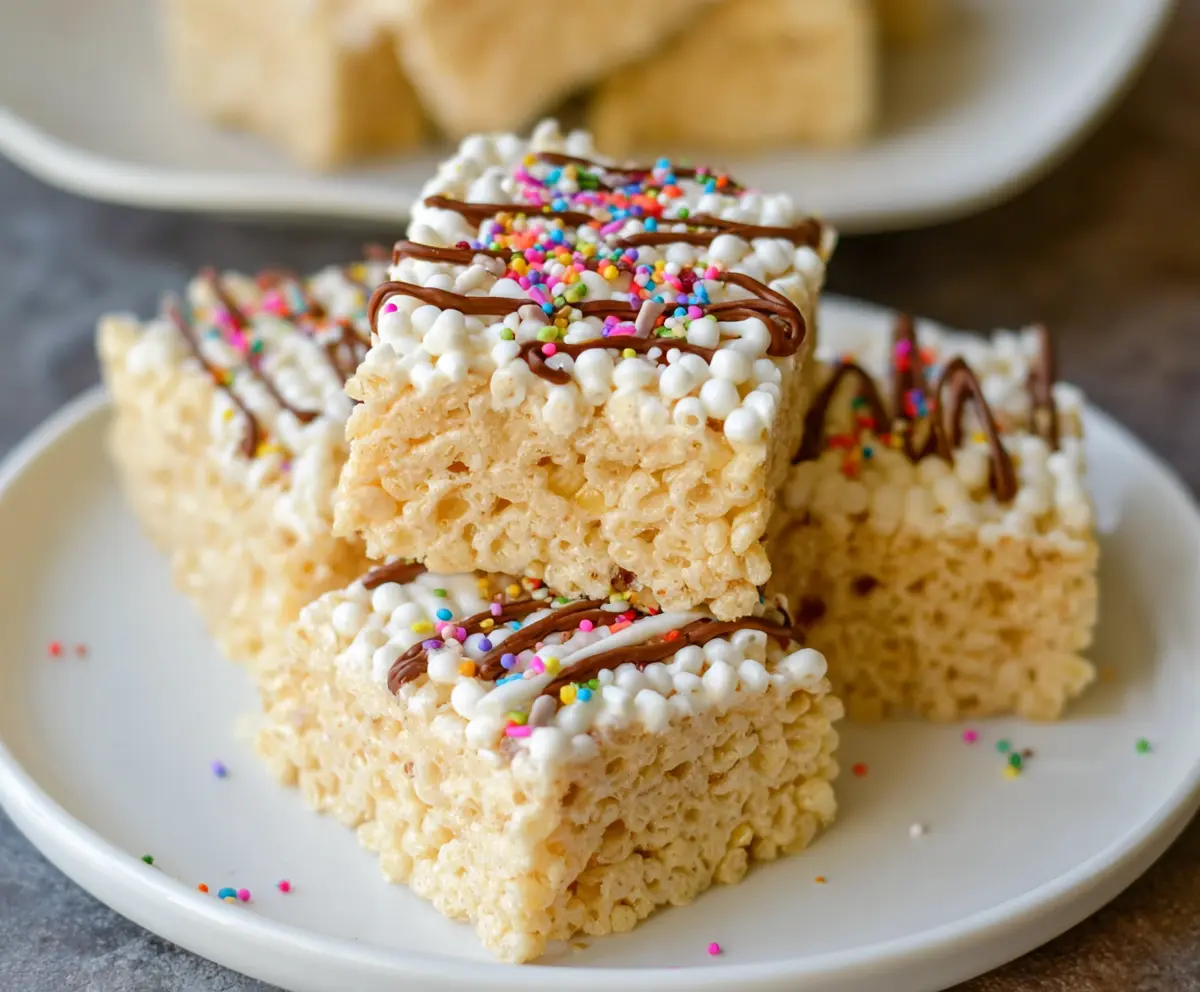
These Protein Rice Krispie Treats are a fun and chewy snack that packs a punch of protein! Made with gooey marshmallows and crispy rice cereal, they are simple to whip up.
Whenever I make these, I can’t resist sneaking a piece. 🍚 Plus, they’re perfect for a sweet pick-me-up after a workout or as an easy treat anytime!
Key Ingredients & Substitutions
Crisp Rice Cereal: This is the base of the treats, bringing that classic crunch. If you can’t find crisp rice cereal, you can use any puffed cereal like puffed brown rice or even cornflakes for a different texture.
Protein Powder: I often use vanilla whey protein because it adds flavor. If you’re vegan or dairy-free, a plant-based protein powder like pea or brown rice works great too. Just make sure it’s a powder that mixes well!
Mini Marshmallows: If you want a healthier spin, try using natural marshmallows or even homemade marshmallow fluff. They’ll give the same gooey texture, but with fewer preservatives.
Butter: Unsalted butter is best for controlling saltiness. You can easily swap it for coconut oil or a dairy-free butter if you need a dairy-free version.
Dark Chocolate Chips: They’re optional but add a nice touch. You can use milk chocolate or white chocolate chips depending on your preference. For a dairy-free option, look for dark chocolate that’s labeled dairy-free.
How Do You Get the Perfectly Coated Cereal?
Coating the rice cereal evenly is key to delicious treats. Here’s how to do it smoothly:
- First, ensure that your marshmallows are perfectly melted and smooth before adding the protein powder.
- When adding protein powder, do it gradually. Use a whisk to stir it in, which helps blend it without lumps.
- Afterward, fold in the crisp rice cereal carefully. Use a gentle hand to avoid crushing the rice cereal—it helps keep the treats light.
- Press the mixture into the pan firmly, but not too hard. This helps it stick together without turning hard.
Following these tips will give you perfect, chewy Protein Rice Krispie Treats every time!
How to Make Protein Rice Krispie Treats
Ingredients You’ll Need:
For the Base:
- 4 cups crisp rice cereal
- 1 cup protein powder (vanilla or unflavored whey protein)
- 1/4 cup unsalted butter
- 10 oz mini marshmallows (about 4 cups)
- 1 tsp vanilla extract
- 1/4 tsp salt
For Optional Toppings:
- 1/2 cup dark chocolate chips (optional, for drizzle)
- Sprinkles (optional, for garnish)
How Much Time Will You Need?
This recipe takes about 10 minutes of prep time, plus 30 minutes to cool and set. It’s quick to make and doesn’t take long to chill, making it a perfect snack for when you need a protein boost!
Step-by-Step Instructions:
1. Prepare the Baking Pan:
Start by lightly greasing a 9×9-inch baking pan. For easy cleanup, you can also line it with parchment paper, allowing for easy removal of the treats later.
2. Melt the Butter:
In a large pot, melt the unsalted butter over low heat. Keep an eye on it to ensure it doesn’t burn. Once it’s melted, you’re ready for the marshmallows!
3. Melt the Marshmallows:
Add the mini marshmallows to the melted butter. Stir continuously until they are completely melted and form a smooth mixture. This is where the treat gets its gooey goodness!
4. Mix in Flavorings:
Remove the pot from the heat and stir in the vanilla extract and salt. This adds great flavor to the treats!
5. Add Protein Powder:
Gradually add the protein powder to the marshmallow mixture. Stir well to combine, making sure there are no lumps. It should be a nice thick mixture.
6. Fold in the Cereal:
Add the crisp rice cereal to the marshmallow mixture, folding it in gently. Make sure that every piece of cereal is coated in the marshmallow mixture—this will give you that chewy texture!
7. Pour into the Pan:
Quickly transfer the mixture into your prepared pan. Use a spatula or a piece of wax paper to press the mixture down firmly and evenly. This helps it stick together better!
8. Let It Cool:
Allow the bars to cool and set for at least 30 minutes. This step is crucial, as it allows the mixture to firm up and makes cutting easier.
9. Drizzle Chocolate (Optional):
If you want to add a little indulgence, melt the dark chocolate chips in the microwave in 15-second intervals. Stir until smooth, then drizzle over the set bars.
10. Add Sprinkles (Optional):
Garnish the top with colorful sprinkles for a fun touch! They make it look festive and appealing.
11. Cut and Serve:
Once set, cut the treats into squares. Enjoy these chewy, sweet Protein Rice Krispie Treats as a snack or post-workout energy boost!
Can I Use Different Types of Protein Powder?
Absolutely! You can experiment with different flavors, like chocolate or strawberry, but vanilla or unflavored whey protein works best for blending seamlessly. If you prefer plant-based options, try a vegan protein powder, just ensure it’s one that mixes well.
How Should I Store Leftovers?
Store any leftovers in an airtight container at room temperature for up to 5 days. If you live in a warm climate, you might want to refrigerate them to keep them from becoming too soft. Just be sure to let them come to room temperature before serving!
Can I Add Other Ingredients?
Definitely! Feel free to mix in your favorite additions such as chopped nuts, dried fruits, or even chocolate chips. Just make sure to adjust the ratio of cereal and protein powder if needed to maintain balance.
What If My Mixture Is Too Sticky?
If your mixture is overly sticky, it may be due to too many marshmallows or not enough cereal. You can stir in a bit more crisp rice cereal or protein powder to help balance it out. Just remember, it’s all about getting that right consistency!