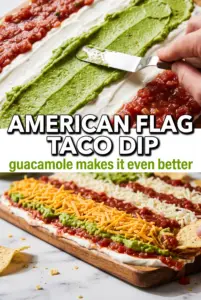
American Flag Taco Dip is the kind of party dish that gets people hovering around the table before the chips even hit the bowl. It starts with the familiar comfort of layered taco dip, then turns into a centerpiece with crisp white sour cream stripes, a dark blue corner, and bright red rows that hold their shape long enough to serve. The contrast matters here: cool, creamy layers underneath and a tidy, colorful top that looks festive without turning into a mess.
The trick is building the layers with enough structure to support the flag design. Softened cream cheese keeps the middle smooth, while the refried beans anchor the base so the dip doesn’t slide around in the dish. Chilling it for a short stretch helps the top settle, which makes the stripes cleaner and keeps the chips from digging straight through the design the second it hits the table.
Below you’ll find the small details that make the flag pattern easier to assemble, plus a few swaps if you need to adjust the layers for what you have on hand.
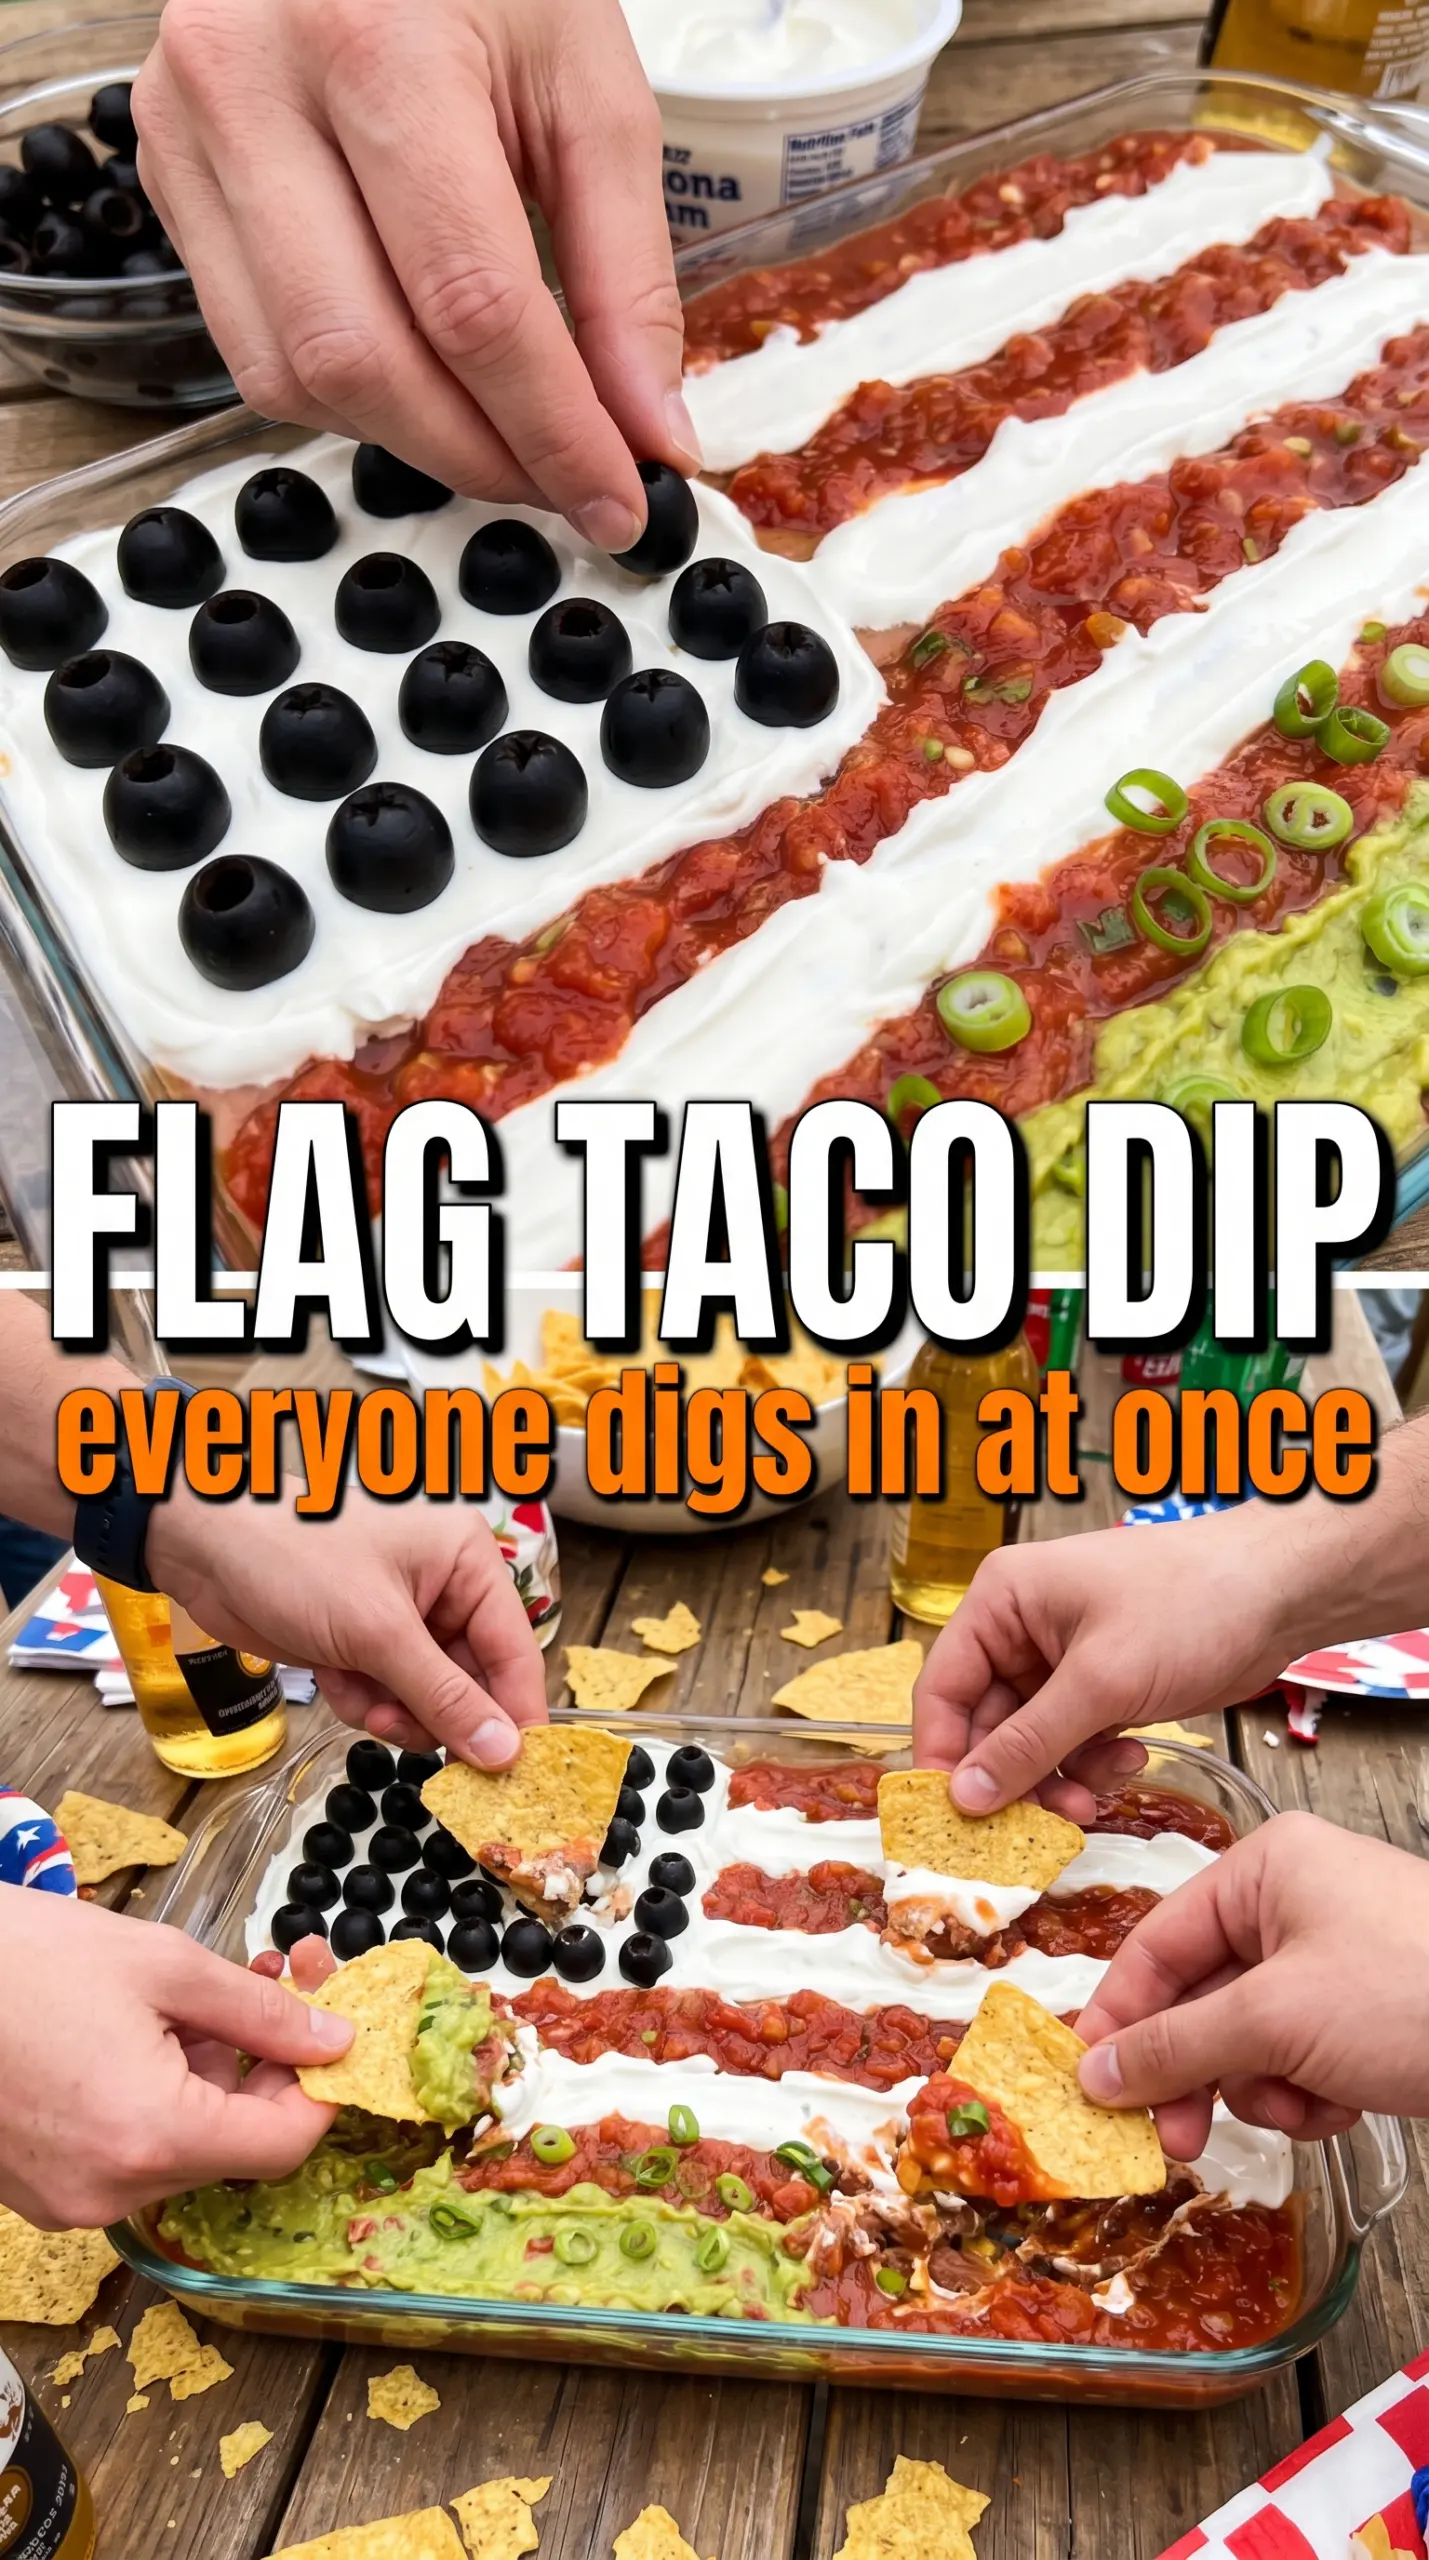
The layers stayed neat, and the sour cream stripes held after chilling. I used a zip-top bag like you suggested, and the flag actually looked like a flag when I brought it out.
Like this patriotic taco dip? Save it to Pinterest for the next 4th of July spread when you want a colorful appetizer that slices cleanly and disappears fast.
The Part That Makes the Flag Pattern Stay Clean
The biggest mistake with a layered dip like this is building it too loose. If the middle layers are soft or warm, the sour cream stripes sink, the salsa bleeds into the white, and the whole flag loses its shape before it reaches the table. A short chill fixes most of that because the cream cheese firms up just enough to hold the top layers in place.
Use a rectangular dish if you want the design to read clearly. A round bowl turns the flag into decoration instead of a pattern, and the rows get harder to line up. Keep the top layers shallow and even, because thick mounds of salsa or guacamole make it harder to pipe clean stripes across the surface.
- Refried beans — This is the base that keeps the dip grounded. Thick, not runny beans work best. If yours are stiff, stir in a spoonful of warm water or a little salsa so they spread without tearing the layer beneath.
- Cream cheese — Softened cream cheese gives the dip its body and helps the taco seasoning distribute evenly. Cold cream cheese leaves little lumps that make the second layer patchy, so let it sit out until it presses smooth under a spatula.
- Guacamole — This layer adds color and richness, but it can brown if made too far ahead. Store-bought guacamole is fine here if it’s thick and seasoned well. If you use homemade, spread it on soon after mixing and press it gently against the cream cheese layer.
- Sour cream — The stripes only look sharp if the sour cream is thick enough to pipe. Regular sour cream works, but if yours is loose, stir in a spoonful of cream cheese to help it hold its shape.
- Chunky salsa or pico de gallo — Chunky salsa gives you the red rows without flooding the top. If your salsa is watery, drain it first. Too much liquid will blur the flag design and make the chips soggy fast.
- Black olives or cherry tomatoes — The olives create the blue canton effect even though the color is darker than true navy. Cherry tomatoes or diced red bell pepper work for the red rows if you want a fresher, brighter look than salsa alone.
What Each Ingredient Is Actually Doing in This Recipe
- Primary ingredient (the star) — Quality matters most. Choose the best you can find.
- Cooking medium (oil, butter, or broth) — This carries flavors and prevents dryness.
- Seasonings (salt, pepper, spices, herbs) — Layer flavors so nothing overpowers. Build depth gradually.
- Aromatics (garlic, onion, herbs) — Cook with fat to bloom flavors. Become the foundation.
- Supporting ingredients — Complement the main ingredient without overpowering it.
- Sauce or liquid (if applicable) — Brings flavors together. Balance richness with acid.
- Acid (lemon, vinegar, wine, or other) — Brightens and prevents flat-tasting results.
- Final finish (garnish, glaze, or sauce) — Prevents one-dimensional taste and adds visual appeal.
Building the Layers So the Top Decoration Doesn’t Collapse
Start with the bean foundation
Spread the refried beans into an even layer all the way to the corners of the dish. Press them flat with the back of a spoon so there aren’t thin spots where the cream layer can sink through. If the beans are cold and stubborn, warm them just enough to loosen them before spreading. A smooth base makes every layer above it easier to keep tidy.
Mix the cream cheese layer until it turns silky
Stir the softened cream cheese with the taco seasoning until the mixture looks uniform and creamy, with no pale streaks left behind. This layer should spread like frosting, not clump in patches. If the cream cheese is still cool in the center, the mixture will drag the bean layer and leave holes, so wait until it gives easily under the spoon.
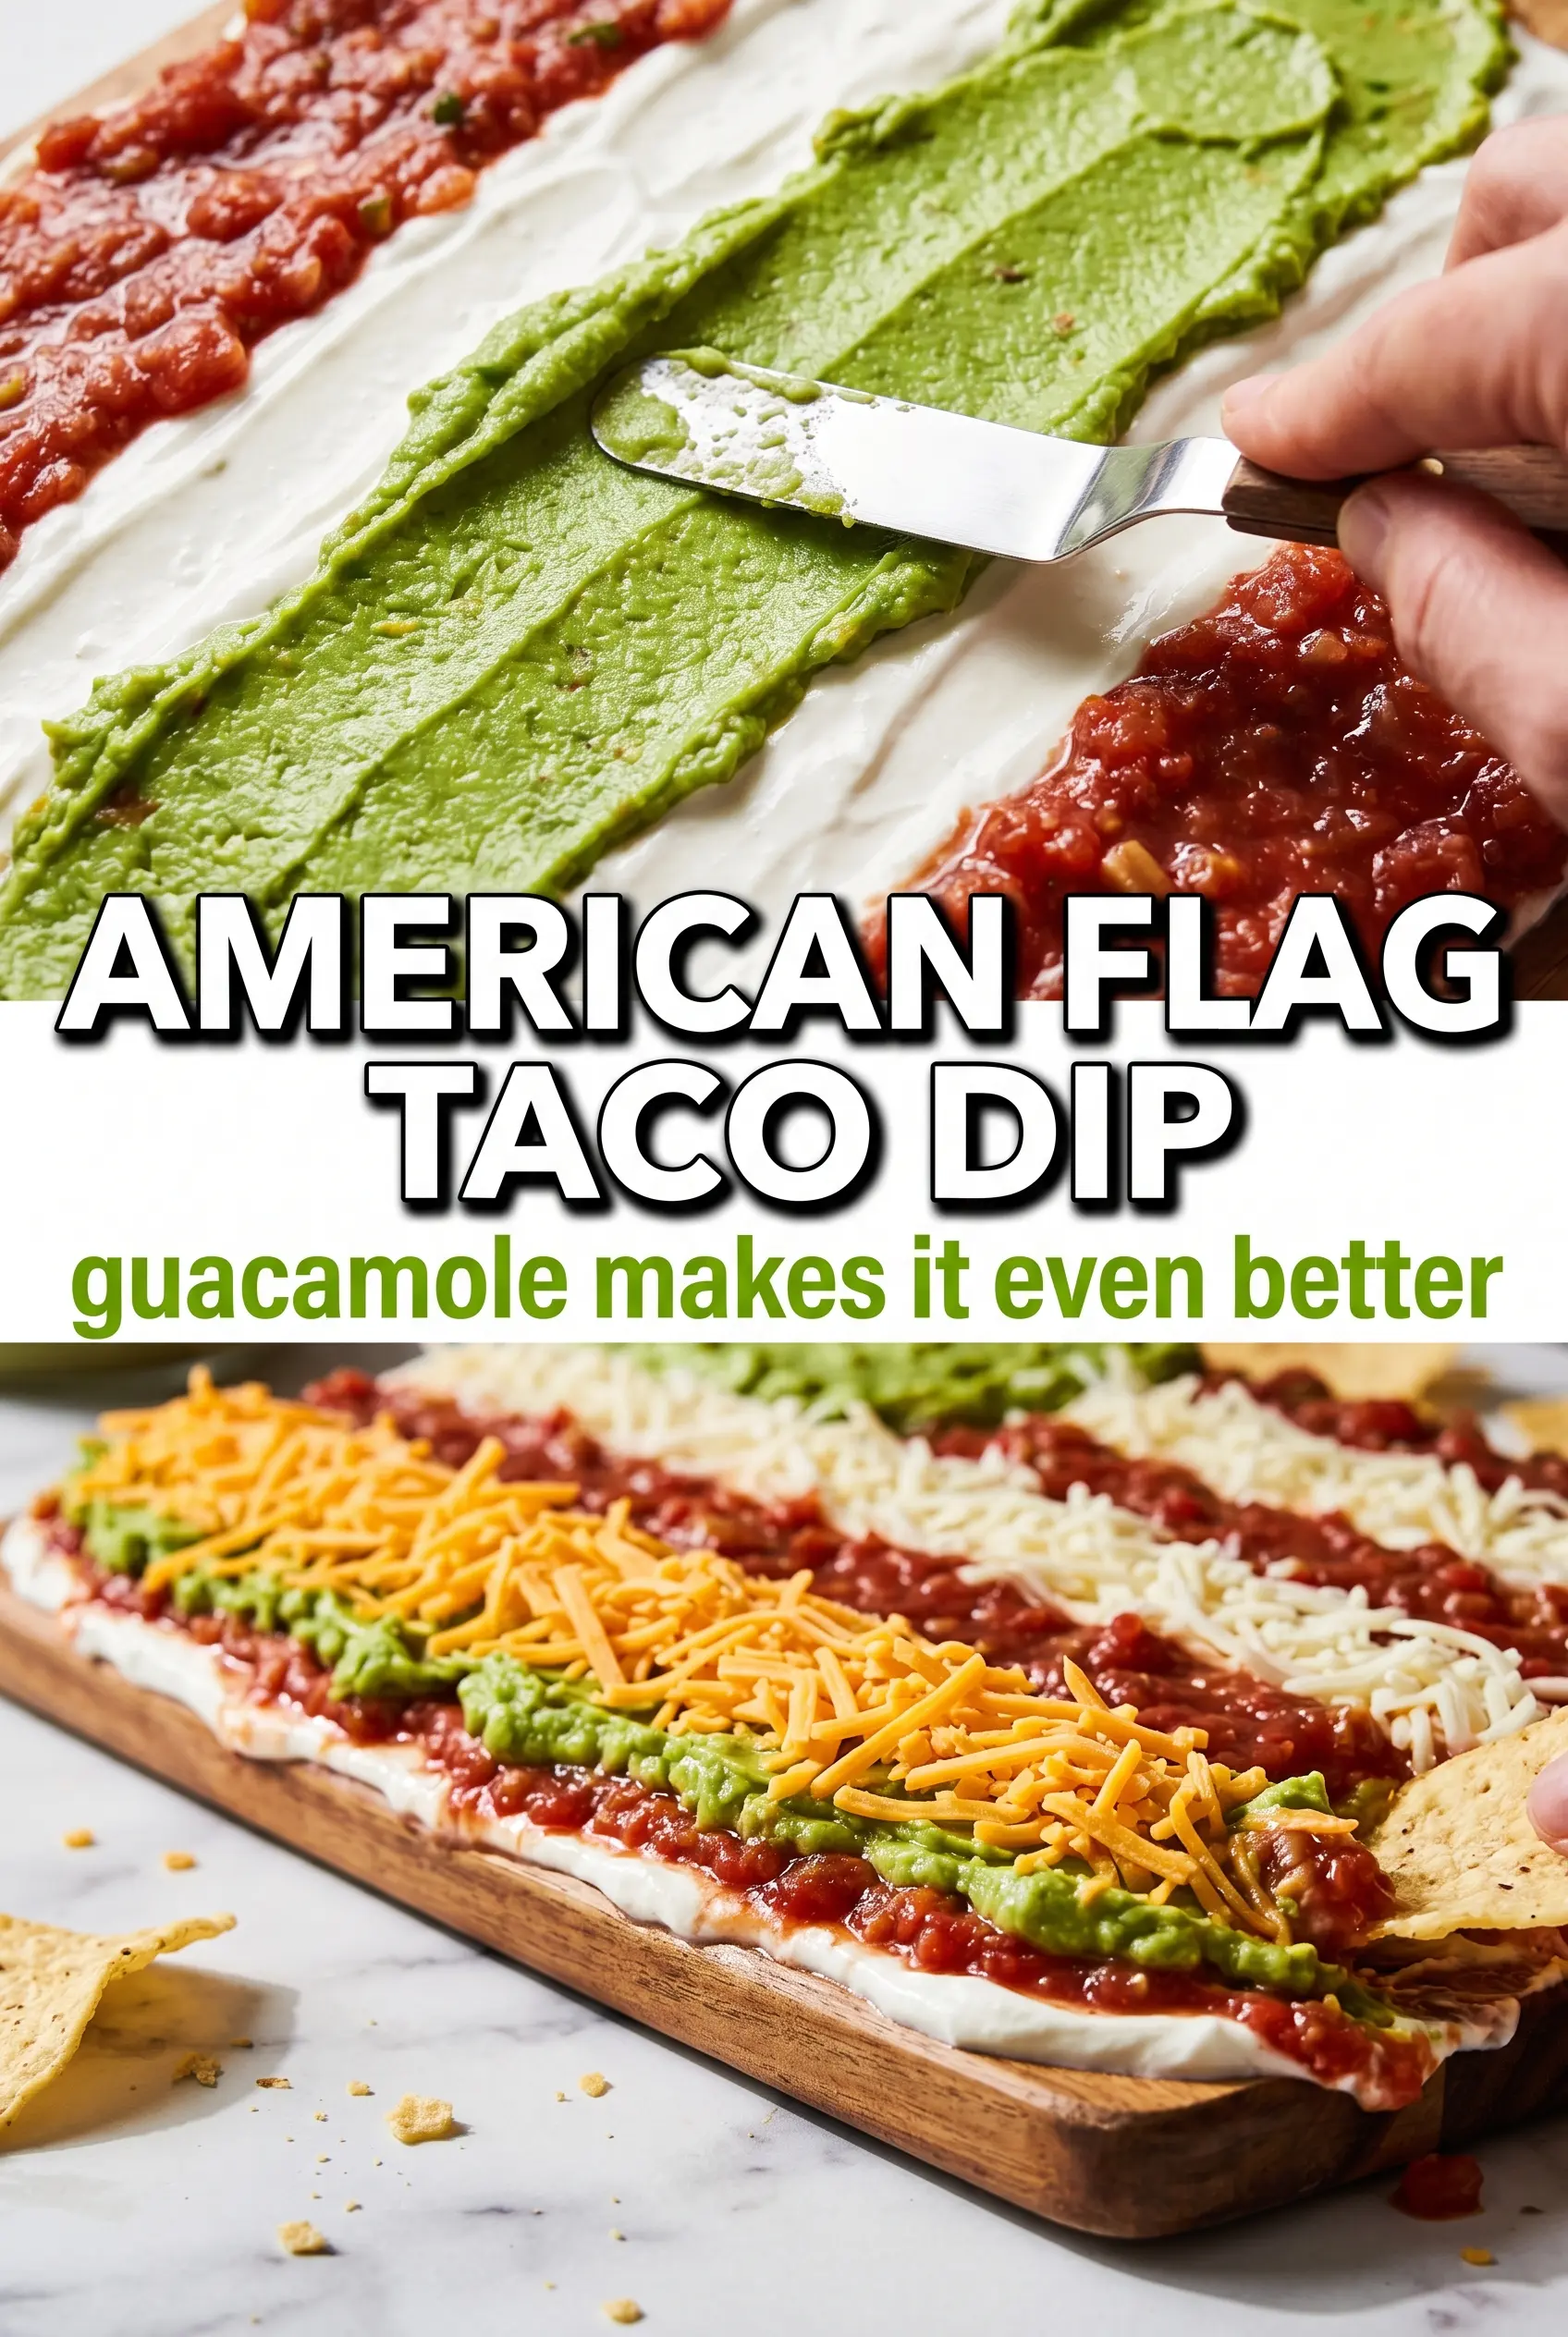
Stack the guacamole and cheese without pressing too hard
Spread the guacamole over the cream cheese in a gentle, even layer, then scatter the shredded Mexican cheese over the top. Use a light hand here. Heavy pressure pushes the lower layers out of place and makes the flag top uneven, which shows up immediately once the stripes go on.
Pipe the flag pattern last
Spoon the sour cream into a piping bag or zip-top bag with the corner snipped off, then pipe horizontal lines across the surface. Leave narrow gaps for the red rows, then spoon or scatter the salsa or diced tomato between the white stripes. Finish by packing sliced black olives into the upper left corner so the canton looks dense and intentional, not patchy. Chill the whole dish for 30 minutes before serving so the design sets up and the stripes stay distinct.
How to Change the Layers Without Losing the Flag Design
Make it lighter with Greek yogurt
Swap some or all of the sour cream for full-fat Greek yogurt if you want a tangier, lighter top layer. It pipes a little firmer than sour cream, which actually helps the stripes stay neat, but the flavor lands sharper and less mellow.
Use dairy-free layers for the creamy middle
Choose a dairy-free cream cheese and a plant-based sour cream style topping if you need the dip to stay dairy-free. The texture still works, but the flavor is a little less rich, so season the bean and cream layer generously. Look for thicker substitutes; thin ones won’t hold the flag stripes cleanly.
Turn it into a vegetarian party dip with extra crunch
This dip is already vegetarian as written, but you can make it feel a little fresher by adding diced bell pepper, sliced green onions, or corn on top of the cheese layer. Those toppings don’t change the structure, but they add texture and brightness so the dip eats less heavy.
Store and serve the flag dip the smart way
Refrigerator: Cover tightly and chill for up to 3 days. The flag design will soften over time, so this one is best the day it’s made. Freezer: Don’t freeze it; the sour cream and guacamole turn grainy and watery after thawing. Reheating: This dip is served cold, so don’t warm it up. If it sits out at a party, give it another 10 to 15 minutes in the fridge before serving again so the stripes firm back up.
Questions I Get Asked About This Recipe
American Flag Taco Dip
Ingredients
Equipment
Method
- Spread refried beans in an even layer across the bottom of a large rectangular baking dish or serving tray.
- Mix cream cheese with taco seasoning until smooth, then spread evenly over the bean layer.
- Spread guacamole over the cream cheese layer, then top with the shredded cheese blend.
- Spoon sour cream into a piping bag or zip-lock bag with a corner snipped and pipe horizontal white stripes across the top of the dip.
- Add rows of salsa or diced red tomato between the sour cream stripes to create the red stripe effect.
- In the upper left corner, arrange sliced black olives tightly to form the blue canton rectangle.
- Scatter green onions across the top, chill for 30 minutes, and serve with tortilla chips.