
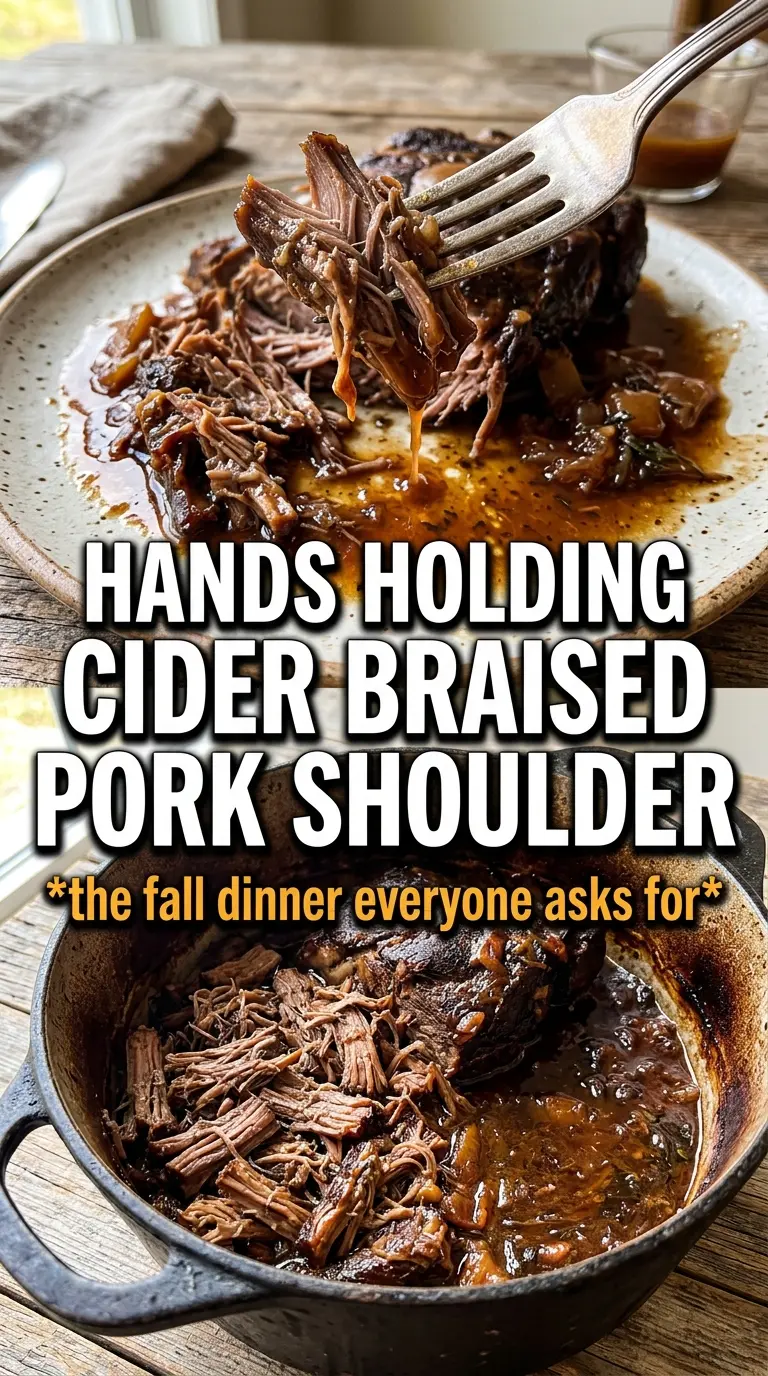
Apple cider braised pork shoulder turns a tough, inexpensive cut into something spoon-tender and deeply savory, with a pan sauce that tastes like it spent all afternoon getting acquainted with onions, herbs, and apples. The pork breaks apart in thick, juicy strands, and the cider cooks down into a glossy sauce that clings to every bite instead of turning watery at the bottom of the pot.
What makes this version work is the balance: enough cider to bring apple sweetness and acidity, enough broth to keep the braise from tasting sugary, and a little Dijon to sharpen everything up. The pork gets a hard sear first, which gives the finished dish a darker, richer base than a straight dump-and-braise method ever will. The apples hold their shape just long enough to perfume the sauce without disappearing completely.
Below, I’m walking through the part that matters most — how to build that braising liquid so it tastes layered instead of flat, plus the small timing details that keep the pork tender and the sauce from feeling greasy.
The pork was fall-apart tender right at the 4-hour mark, and the cider sauce thickened just enough to spoon over the potatoes without being watery. My husband kept going back for the apples and onions too.
Save this apple cider braised pork shoulder for a cozy braise with tender shredded pork, caramelized apples, and a rich cider pan sauce.
The Secret to Braising Pork Shoulder Without a Muddy Sauce
Pork shoulder brings its own richness, but it also releases a lot of fat and collagen as it cooks. If you skip the sear or rush the reduction, the final pot can taste flat and look greasy instead of glossy. The goal here is not just tenderness. It’s tenderness with a sauce that tastes concentrated and clean.
The sear does more than color the meat. It leaves browned bits on the bottom of the pot, and those bits dissolve into the cider-broth mixture to give the sauce depth. The cider should come to a simmer before the pork goes back in, but not a hard boil. A violent boil can tighten the meat and make the liquid taste harsh instead of round.
- Boneless pork shoulder — This is the right cut for long braising because the connective tissue melts slowly into the meat. Pork loin won’t give you the same shreddable texture and dries out before the sauce is ready.
- Hard or fresh apple cider — Fresh cider gives the cleanest apple flavor. Hard cider adds a little more bite and less sweetness, which works well if your apples are very ripe. Both reduce nicely; just avoid anything labeled apple cider cocktail or anything heavily spiced.
- Dijon mustard — Dijon sharpens the sauce and keeps the cider from tasting one-note. Grainy mustard can work in a pinch, but it won’t melt in as smoothly.
- Apples — Choose apples that hold their shape, like Honeycrisp, Braeburn, or Pink Lady. Soft apples turn to mush in a long braise and disappear into the sauce.
What Each Ingredient Is Actually Doing in This Recipe
- Primary ingredient (the star) — Quality matters most. Choose the best you can find.
- Cooking medium (oil, butter, or broth) — This carries flavors and prevents dryness.
- Seasonings (salt, pepper, spices, herbs) — Layer flavors so nothing overpowers. Build depth gradually.
- Aromatics (garlic, onion, herbs) — Cook with fat to bloom flavors. Become the foundation.
- Supporting ingredients — Complement the main ingredient without overpowering it.
- Sauce or liquid (if applicable) — Brings flavors together. Balance richness with acid.
- Acid (lemon, vinegar, wine, or other) — Brightens and prevents flat-tasting results.
- Final finish (garnish, glaze, or sauce) — Prevents one-dimensional taste and adds visual appeal.
Building the Braise in Layers, Not Just in Liquid
Season the pork generously and let it sit while the oven heats. Dry meat browns better, and brown meat gives you the best base for the sauce. When you sear it, don’t crowd the pot; if the pieces steam instead of brown, you’ll miss the caramelized crust that carries the whole dish. After the onions and garlic soften, whisk the cider mixture until the mustard and brown sugar dissolve so they don’t sink and scorch on the bottom.
Getting a Deep Sear
Heat the oil until it shimmers, then lay the pork in the pot and leave it alone until it releases cleanly. If it sticks hard, it’s not ready yet. Turn it only when a deep brown crust has formed on all sides, including the edges. Pale spots here mean pale flavor later, and there’s no shortcut that fixes that once the meat is in the oven.
Building the Braising Liquid
Cook the onion and garlic just until they soften and smell sweet, not brown. Whisk the cider, broth, Dijon, brown sugar, and vinegar together before pouring them in so the sugar is fully dissolved. That step keeps the sauce smooth and prevents little gritty pockets of mustard or sugar at the bottom of the pot. Scrape the browned bits as the liquid goes in; that’s where the flavor lives.
Finishing in the Oven
Add the apples, thyme, and rosemary, then cover the pot tightly and slide it into the oven. The pork is done when it shreds with almost no resistance and the strands separate easily with a fork. If it still feels tight, keep braising. Pulling it early is the fastest way to end up with chewy pork instead of that soft, pull-apart texture this dish is built for.
Make It With Hard Cider for a Sharper Finish
Hard cider gives the sauce a drier, slightly more savory edge and cuts the sweetness from the apples. It’s the better choice if you want the braise to taste balanced and grown-up rather than dessert-like. Use it straight from the bottle and keep the broth amount the same so the liquid still covers the bottom of the pot well.
Use Fresh Apple Cider for a Rounder, Sweeter Sauce
Fresh cider makes the braising liquid taste softer and fruitier, which is great if you’re serving the pork over mashed potatoes or polenta. The tradeoff is sweetness, so don’t skip the Dijon and vinegar. They keep the sauce from turning syrupy.
Dairy-Free and Naturally Gluten-Free Serving Ideas
The braise itself is dairy-free and gluten-free as written, as long as your broth is certified gluten-free. Serve it over mashed potatoes made with olive oil or broth instead of butter if you need to keep the whole plate dairy-free. Polenta or roasted root vegetables also work well and catch the sauce nicely.
Storage and Reheating
- Refrigerator: Store the pork and sauce together for up to 4 days. The flavor gets even better, and the sauce may thicken as it chills.
- Freezer: This freezes well for up to 3 months. Cool it completely, pack it with some of the sauce, and thaw it in the refrigerator overnight before reheating.
- Reheating: Warm it gently in a covered pot over low heat with a splash of broth or cider if needed. Don’t blast it on high heat or the pork will dry out before the sauce loosens back up.