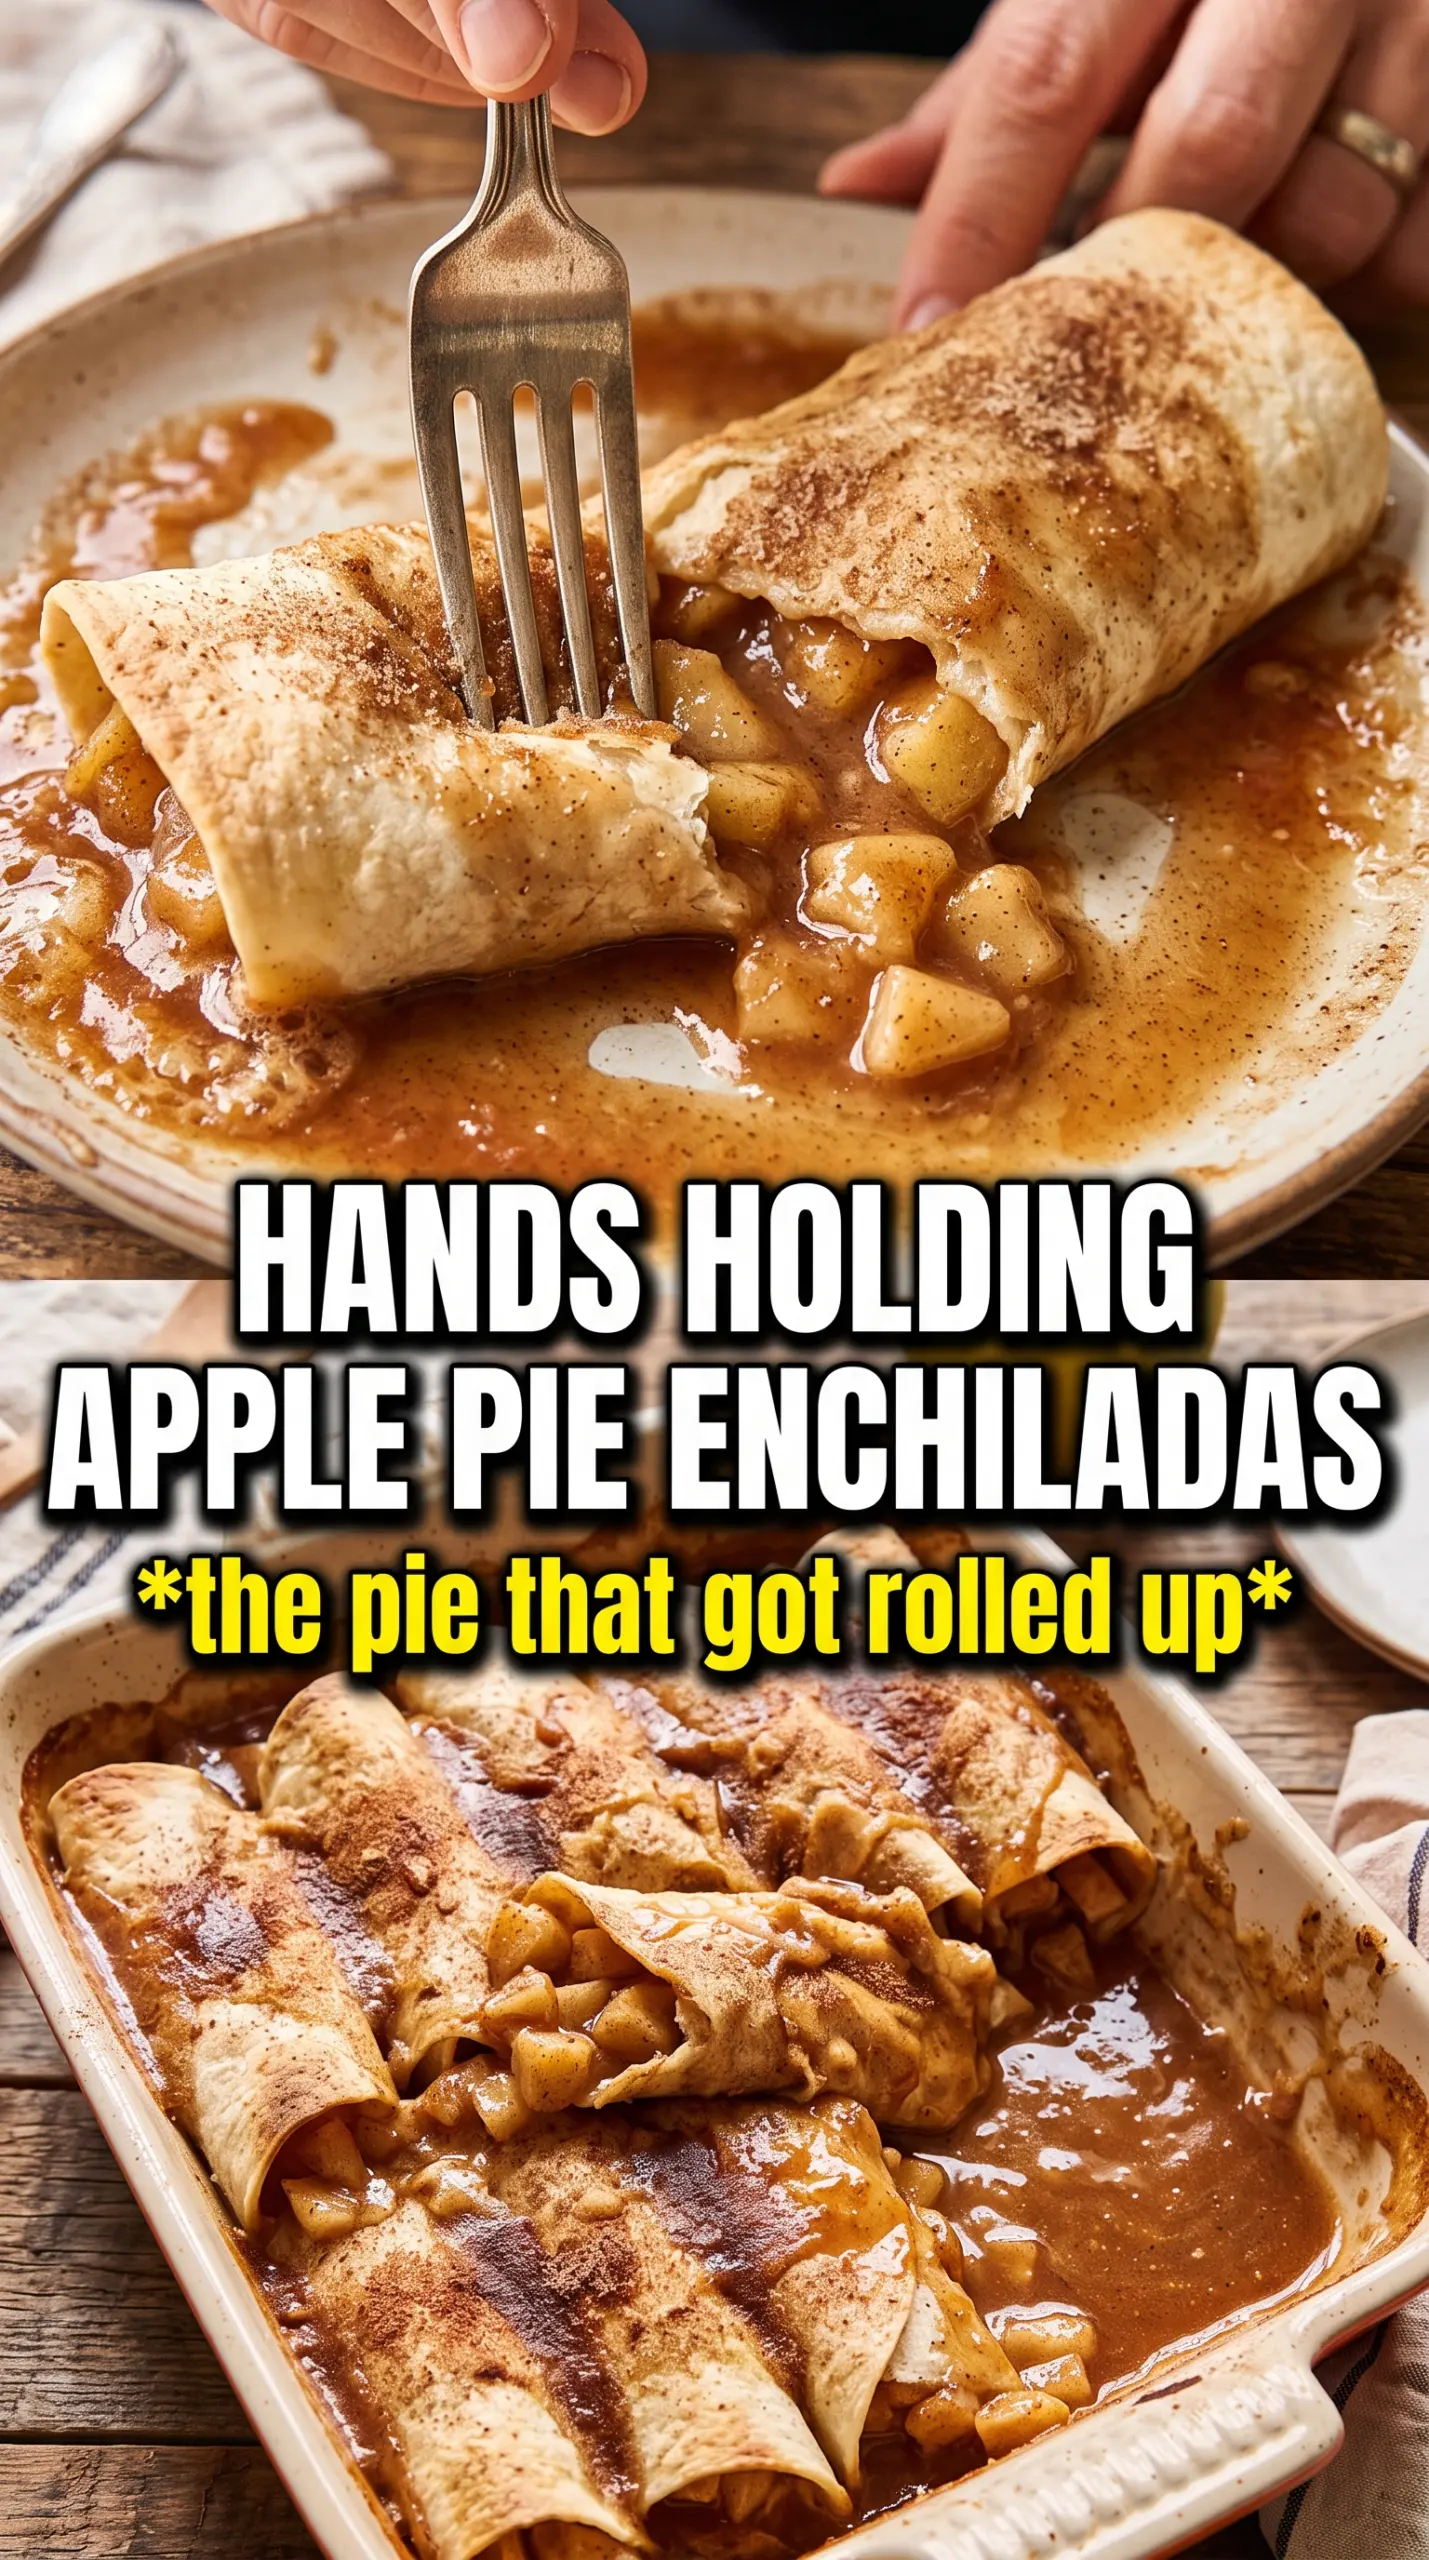
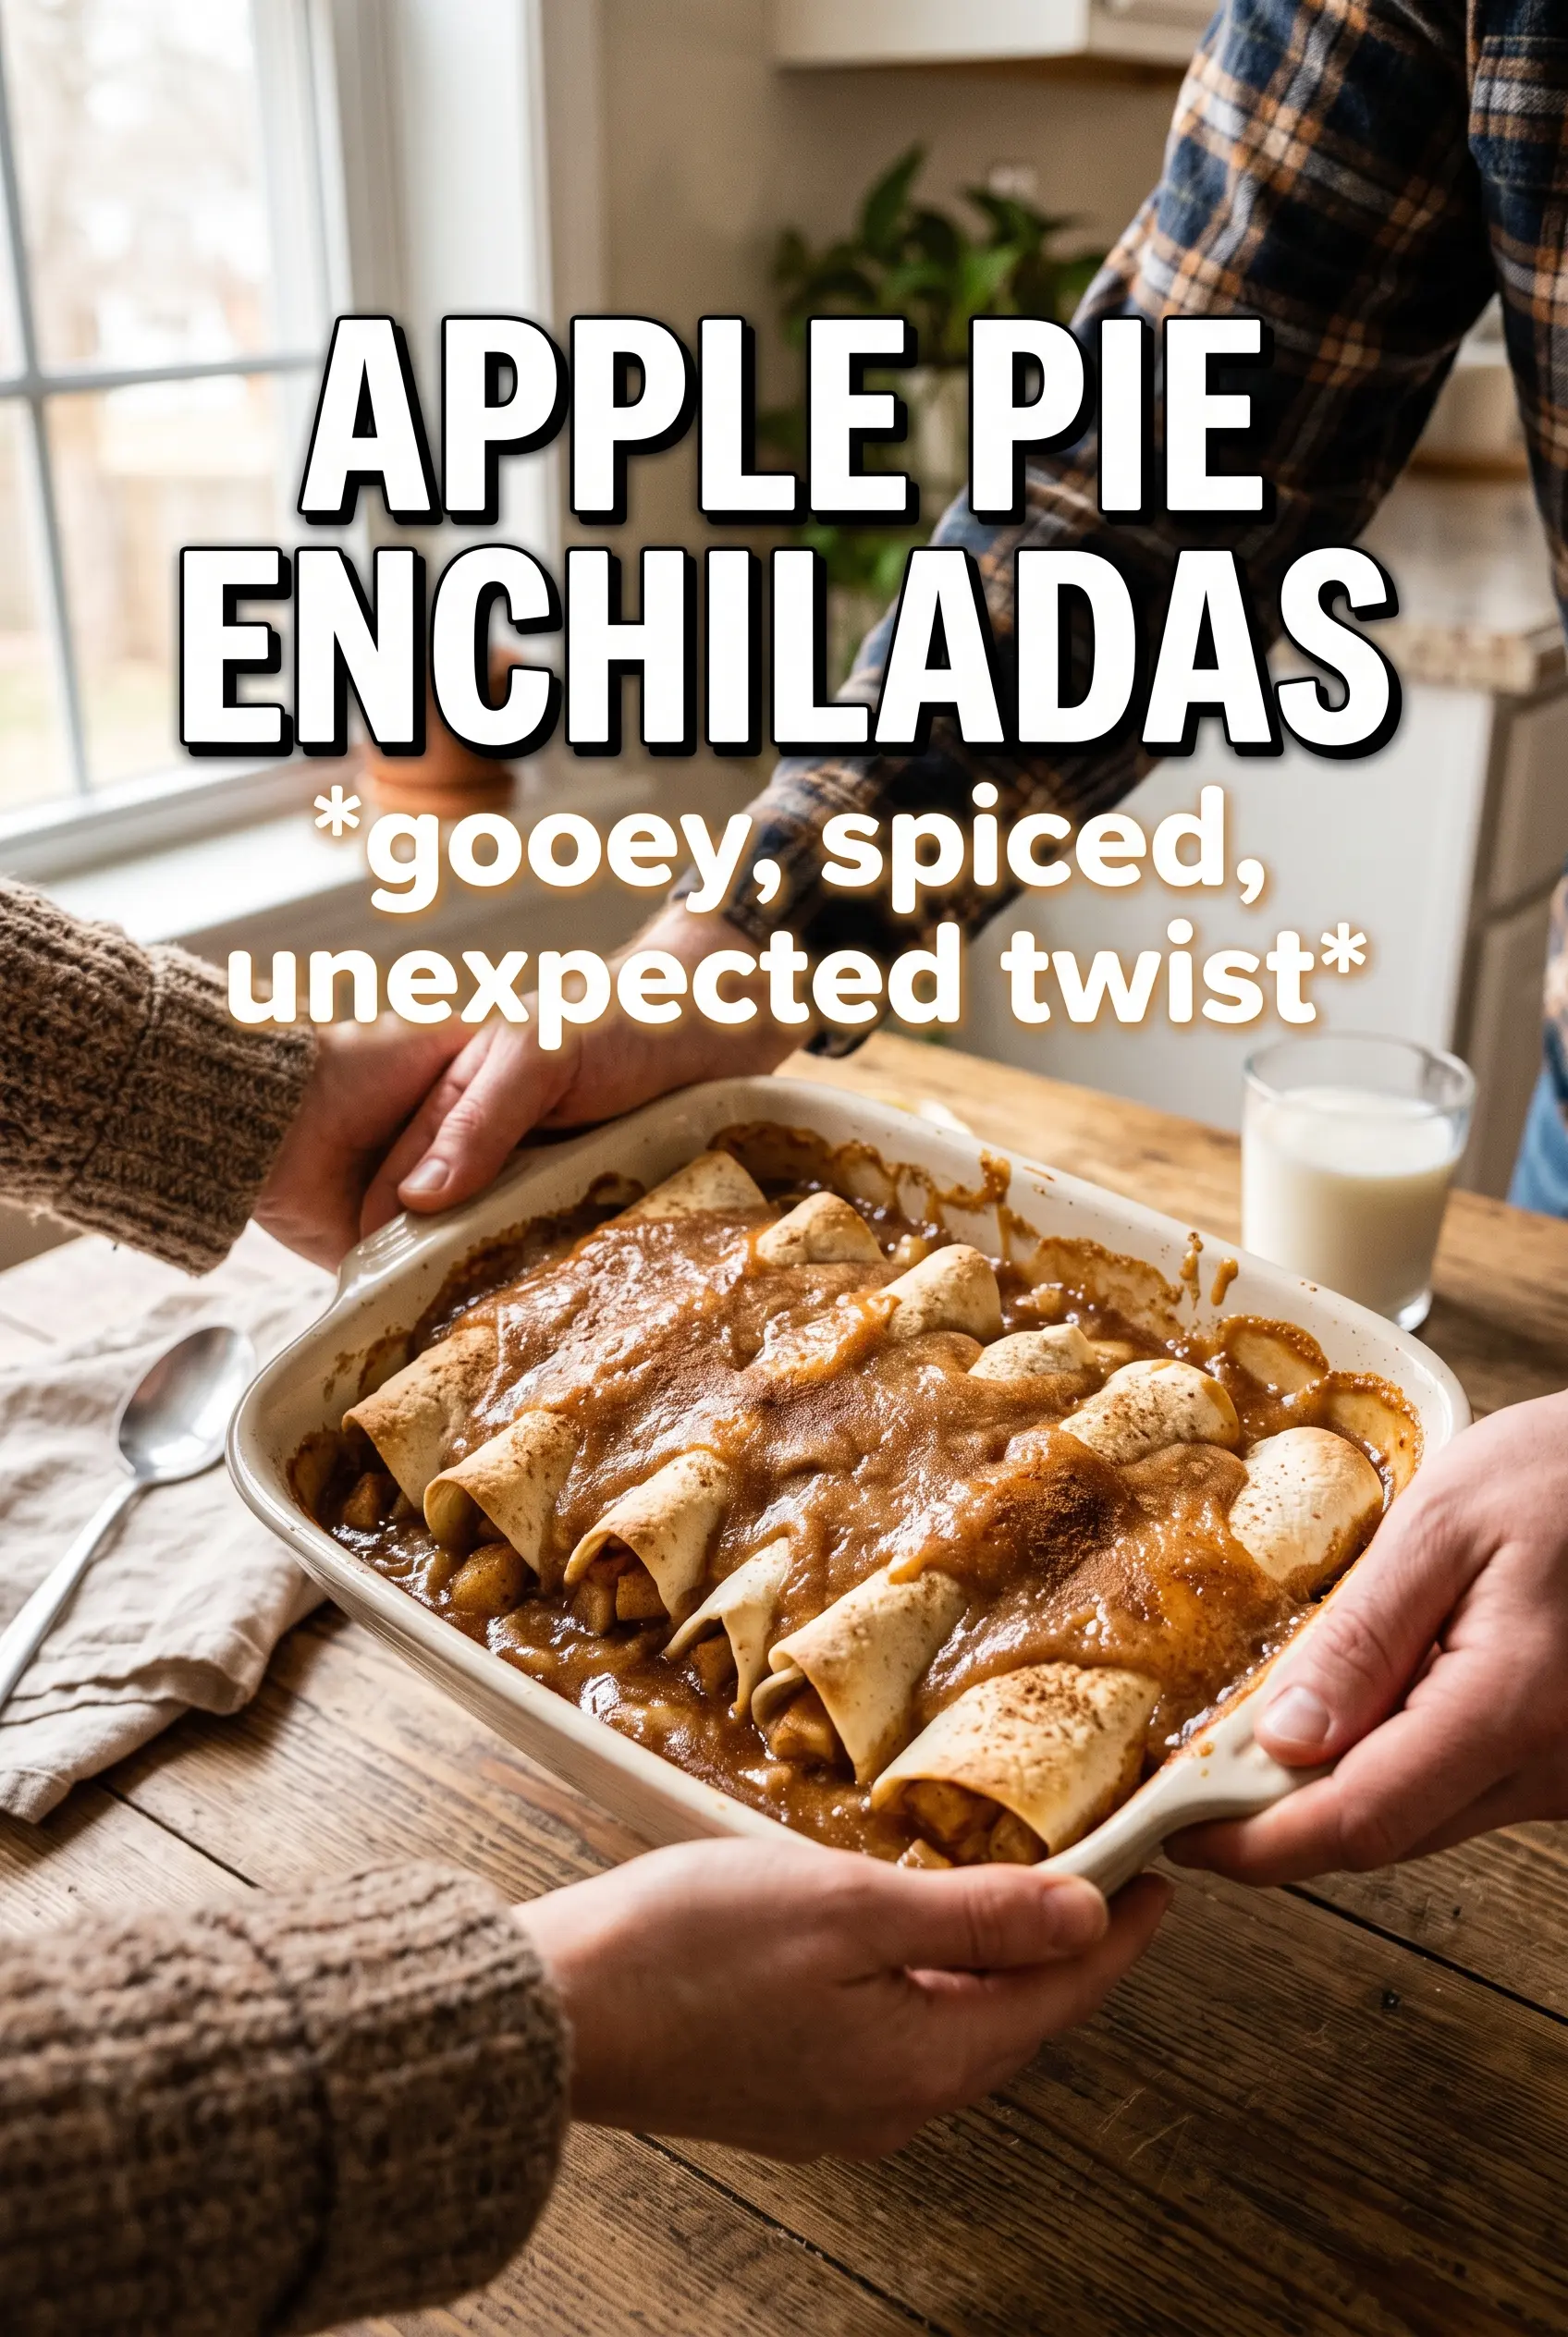
Apple pie enchiladas bake into something that lands halfway between a hand pie and a saucy dessert casserole: crisp-edged tortillas on top, soft cinnamon apples tucked inside, and a caramel-like butter sauce bubbling around the pan. The best part is the contrast. The filling stays tender, the tortillas go glossy and lightly chewy at the edges, and the whole dish comes to the table hot enough for the ice cream to melt into the sauce.
This version works because it keeps the apple filling concentrated and the sauce balanced. A little cinnamon and nutmeg in the apples gives the filling more depth, and the butter-sugar sauce brings enough sweetness to coat the tortillas without drowning them. Rolling the tortillas tightly and placing them seam-side down keeps the filling where it belongs, which matters once that hot sauce goes over the top.
Below, I’ll walk through the one part people usually get wrong — the sauce consistency — plus a few swaps if you need to work with what you already have in the pantry.
The sauce bubbled up around the tortillas and baked into this glossy caramel layer I wasn’t expecting. They held together perfectly when I served them, and the vanilla ice cream on top was the right call.
Like this caramel-sauced apple pie enchilada bake? Save it to Pinterest for the nights when you want a warm dessert with bubbling edges and melted ice cream.
The Part That Keeps the Tortillas from Going Soggy
The mistake with dessert enchiladas is usually the sauce: too thin and the tortillas turn limp, too thick and it bakes into a sticky layer that never settles evenly. This recipe lands in the middle because the butter, sugars, and water cook together into a pourable syrup that clings to the rolls and caramelizes in the oven instead of pooling at the bottom of the dish.
The other detail that matters is the tortilla itself. Flour tortillas hold up better than corn here because they soften without breaking apart, which gives you that tender baked texture instead of a cracked shell. Rolling them tightly and placing them seam-side down is what keeps the apple filling in place when the sauce starts bubbling around them.
- Flour tortillas — Use the soft 8-inch kind. Burrito-size tortillas are too large and make the dessert heavy, while corn tortillas will crack before the baking time is up.
- Apple pie filling — Canned filling keeps this fast and dependable. If your filling has big apple slices, chop them once or twice so the rolls pack more neatly and slice cleaner.
- Butter — Unsalted butter gives you control over the sweetness. It also helps the sauce taste rounder and more like caramel than just melted sugar.
- Brown sugar — This is what gives the sauce its deeper molasses note. Light brown sugar works fine; dark brown sugar makes the sauce a little richer and darker.
- Cinnamon and nutmeg — The spices in both the filling and sauce matter. The filling alone tastes flat; the extra spice in the sauce makes the whole pan taste like baked apple pie instead of just sweet apples in a tortilla.
What Each Ingredient Is Actually Doing in This Recipe
- Primary ingredient (the star) — Quality matters most. Choose the best you can find.
- Cooking medium (oil, butter, or broth) — This carries flavors and prevents dryness.
- Seasonings (salt, pepper, spices, herbs) — Layer flavors so nothing overpowers. Build depth gradually.
- Aromatics (garlic, onion, herbs) — Cook with fat to bloom flavors. Become the foundation.
- Supporting ingredients — Complement the main ingredient without overpowering it.
- Sauce or liquid (if applicable) — Brings flavors together. Balance richness with acid.
- Acid (lemon, vinegar, wine, or other) — Brightens and prevents flat-tasting results.
- Final finish (garnish, glaze, or sauce) — Prevents one-dimensional taste and adds visual appeal.
How to Keep the Filling Centered and the Sauce Glossy
Season the Apples First
Stir the cinnamon and nutmeg into the apple pie filling before you start rolling. That takes the canned filling from one-note sweet to something that tastes baked and spiced all the way through. If the filling looks especially thick, give it a good stir so the syrup coats the apples evenly. You want the filling spoonable, not runny, or it will slide out when you roll the tortillas.
Roll Tight, Then Set the Seam Down
Spoon just 2 to 3 tablespoons of filling down the center of each tortilla. More than that sounds generous, but it usually leaks once the rolls bake and expands in the oven. Roll each tortilla snugly and place it seam-side down in the buttered dish so the roll holds its shape. If the tortillas crack at the edge, warm them for a few seconds in the microwave first; cold tortillas are the usual problem.
Cook the Sauce Until Smooth, Not Browned
Melt the butter with the sugars and water over medium heat, then stir until everything looks fully dissolved and glossy. You’re not waiting for a deep caramel here. You’re building a smooth syrup that will finish in the oven. If the sugar looks grainy, keep stirring until the mixture turns evenly thick and the last crystals disappear, then pour it right over the enchiladas while it’s hot.
Bake Until the Edges Bubble
The enchiladas are done when the sauce is bubbling around the sides and the tops look lightly glazed and golden. That bubbling matters more than the clock. It means the sauce has thickened enough to cling to the tortillas instead of staying watery. Let the pan sit for a few minutes before serving so the sauce settles slightly; straight from the oven, it’s loose and can run too fast when you scoop it.
How to Adapt These Apple Pie Enchiladas
Dairy-Free Version
Swap the butter for a good dairy-free stick butter that melts cleanly. The sauce will still thicken and bubble, but it may taste a little less rich, so keep the cinnamon and nutmeg measured generously to carry the flavor.
Using Fresh Apples Instead of Canned Filling
Cook diced apples with a little butter, sugar, cinnamon, nutmeg, and a splash of water until they soften and the juices turn syrupy. This gives you more texture and a fresher apple bite, but you’ll lose the thick, jammy consistency of canned pie filling.
Make-Ahead Assembly
Roll the enchiladas and place them in the baking dish a few hours ahead, then cover and refrigerate. Hold the sauce until just before baking so the tortillas don’t absorb it and turn too soft. When you’re ready, warm the sauce slightly so it pours easily, then bake as directed.
Storage and Reheating
- Refrigerator: Store leftovers covered for up to 3 days. The tortillas soften as they sit, but the flavor stays good.
- Freezer: I don’t recommend freezing the baked dessert. The sauce separates and the tortillas get soft and a little gummy after thawing.
- Reheating: Warm individual portions in the microwave until hot, or cover the baking dish with foil and reheat in a 300F oven. Add the ice cream after reheating, not before, or it’ll melt into a puddle before the enchiladas heat through.
Questions I Get Asked About This Recipe
Apple Pie Enchiladas
Ingredients
Equipment
Method
- Preheat the oven to 350F and butter a 9x13 baking dish to prevent sticking.
- Stir cinnamon and nutmeg into the apple pie filling until evenly coated.
- Spoon 2-3 tablespoons of apple filling down the center of each flour tortilla, roll tightly, and place seam-side down in the buttered dish.
- Melt unsalted butter with granulated sugar, packed brown sugar, and water over medium heat, stirring until smooth.
- Stir in cinnamon and nutmeg to finish the sauce, then pour it over the rolled enchiladas.
- Bake for 20-25 minutes at 350F until the sauce is bubbly and the tortillas look golden.
- Serve the apple pie enchiladas warm with vanilla ice cream and drizzle with caramel sauce.