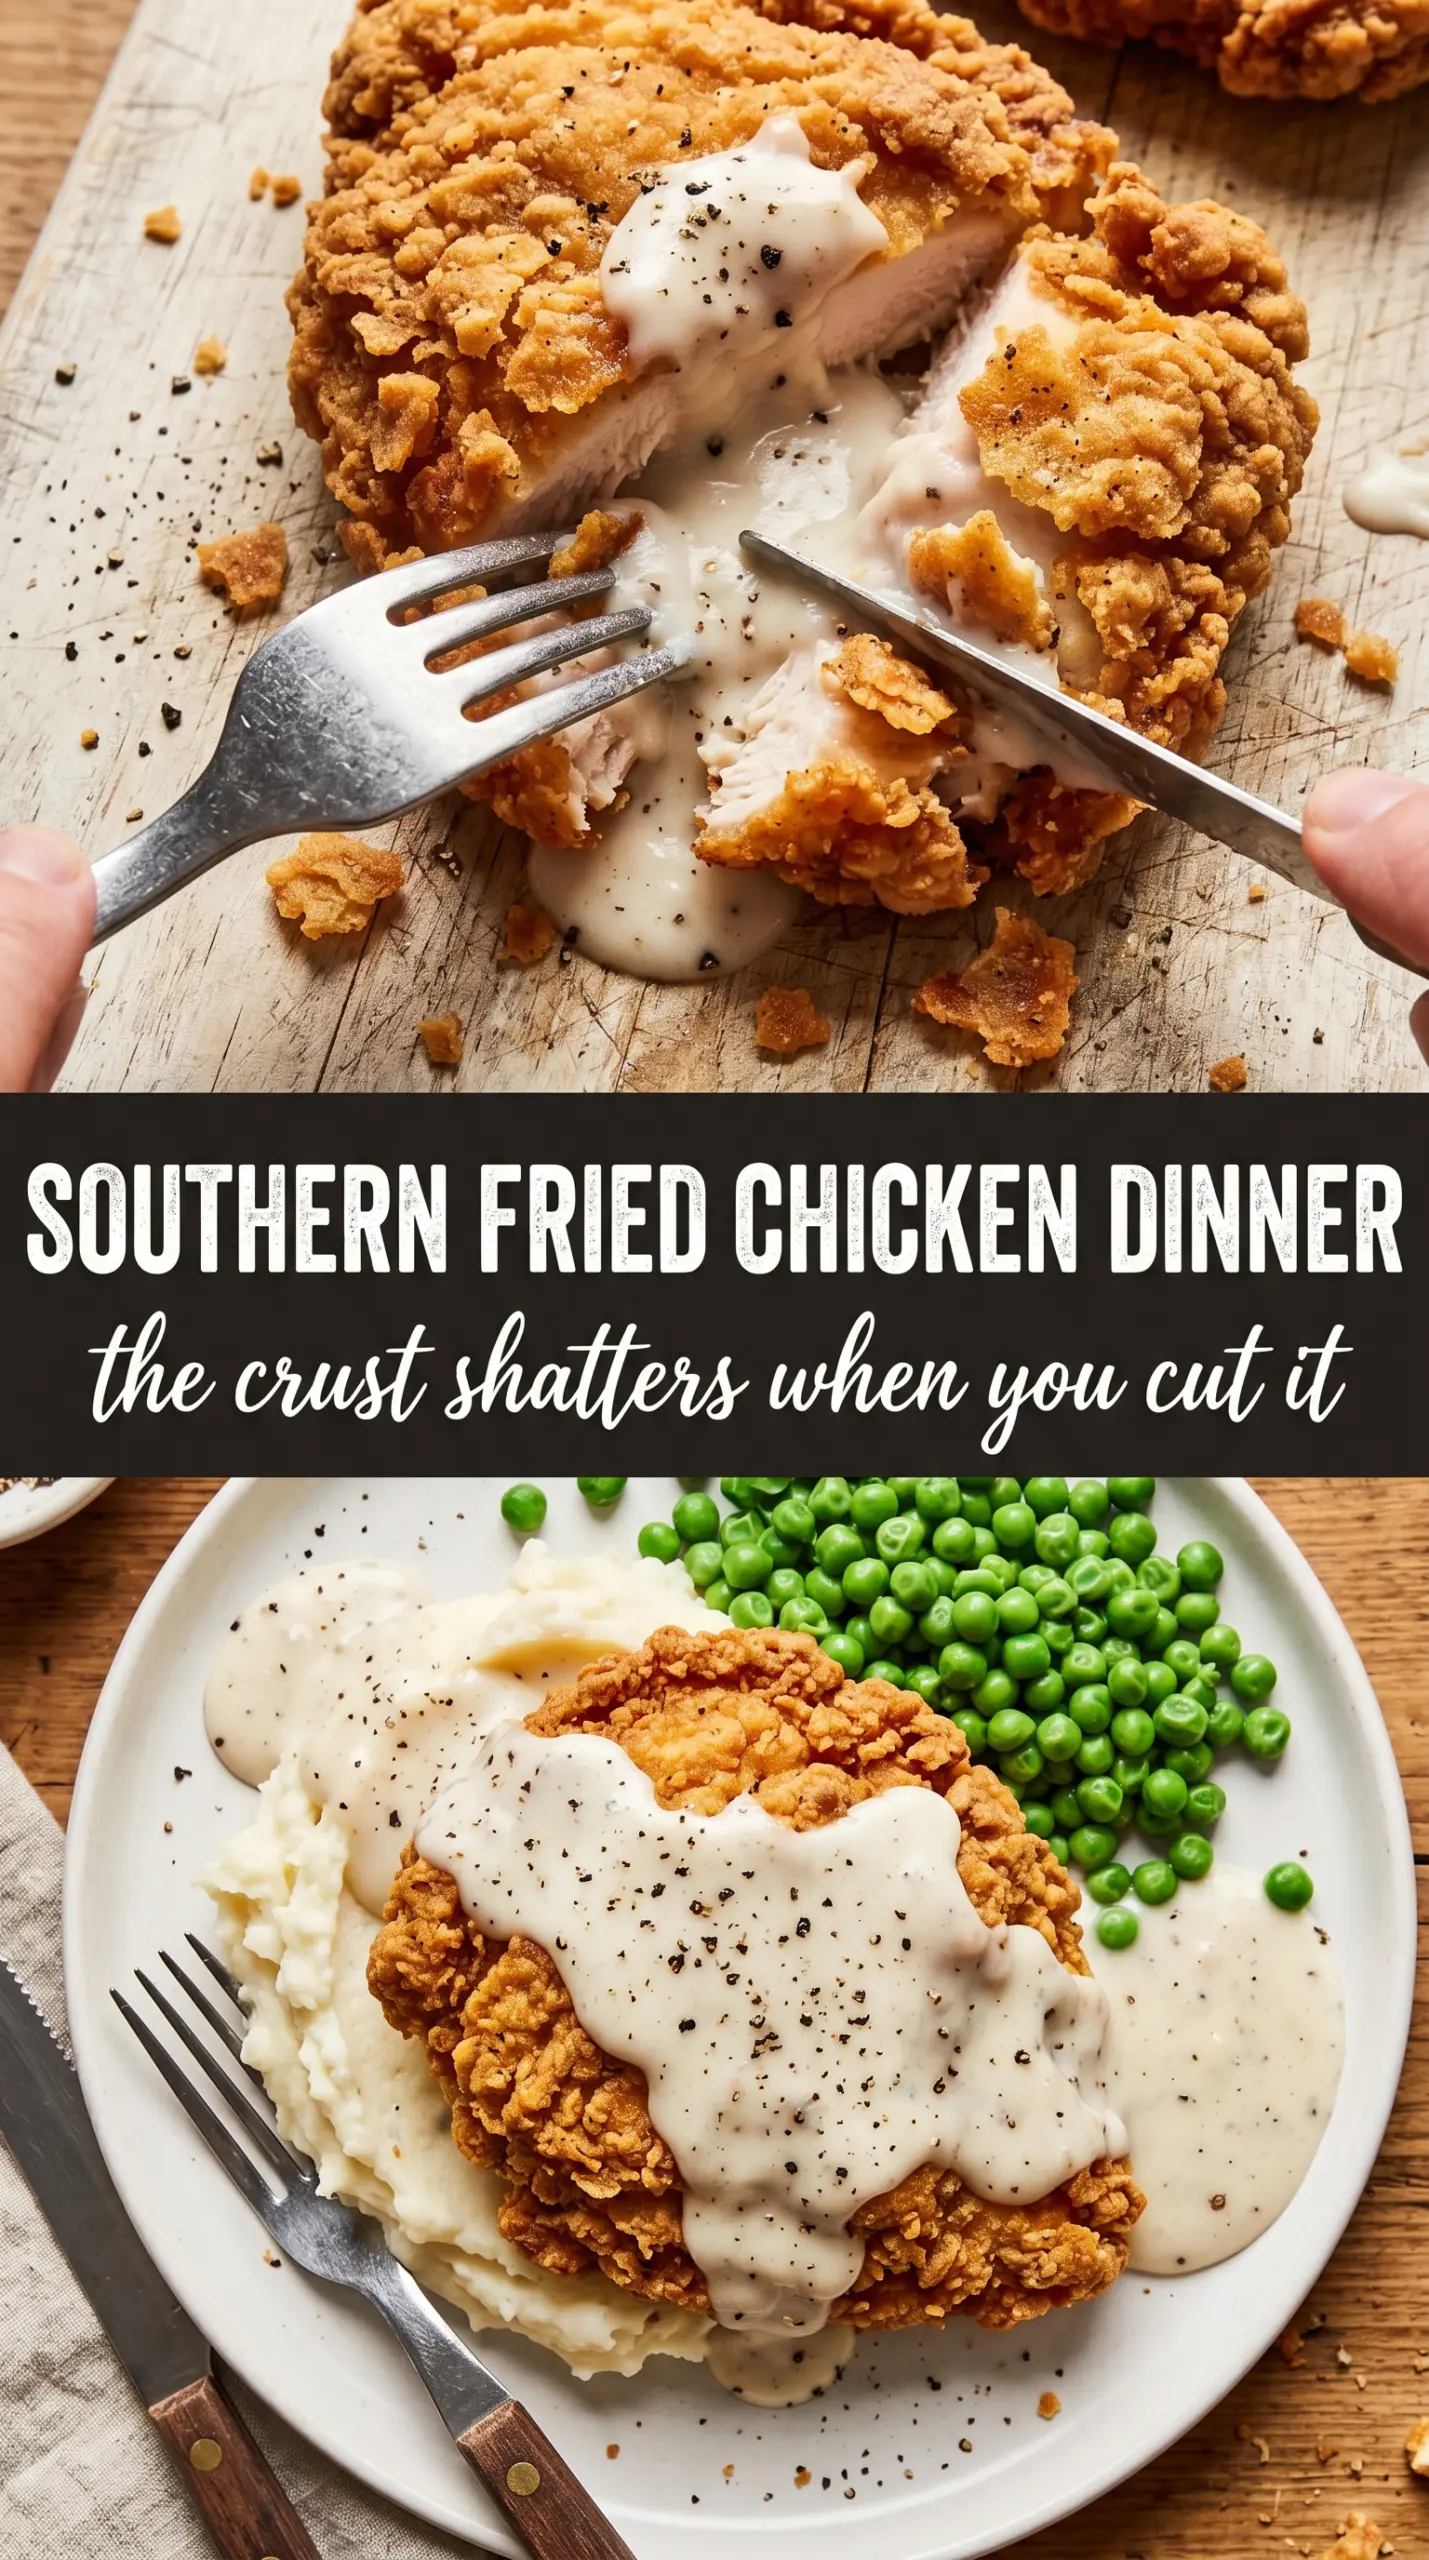
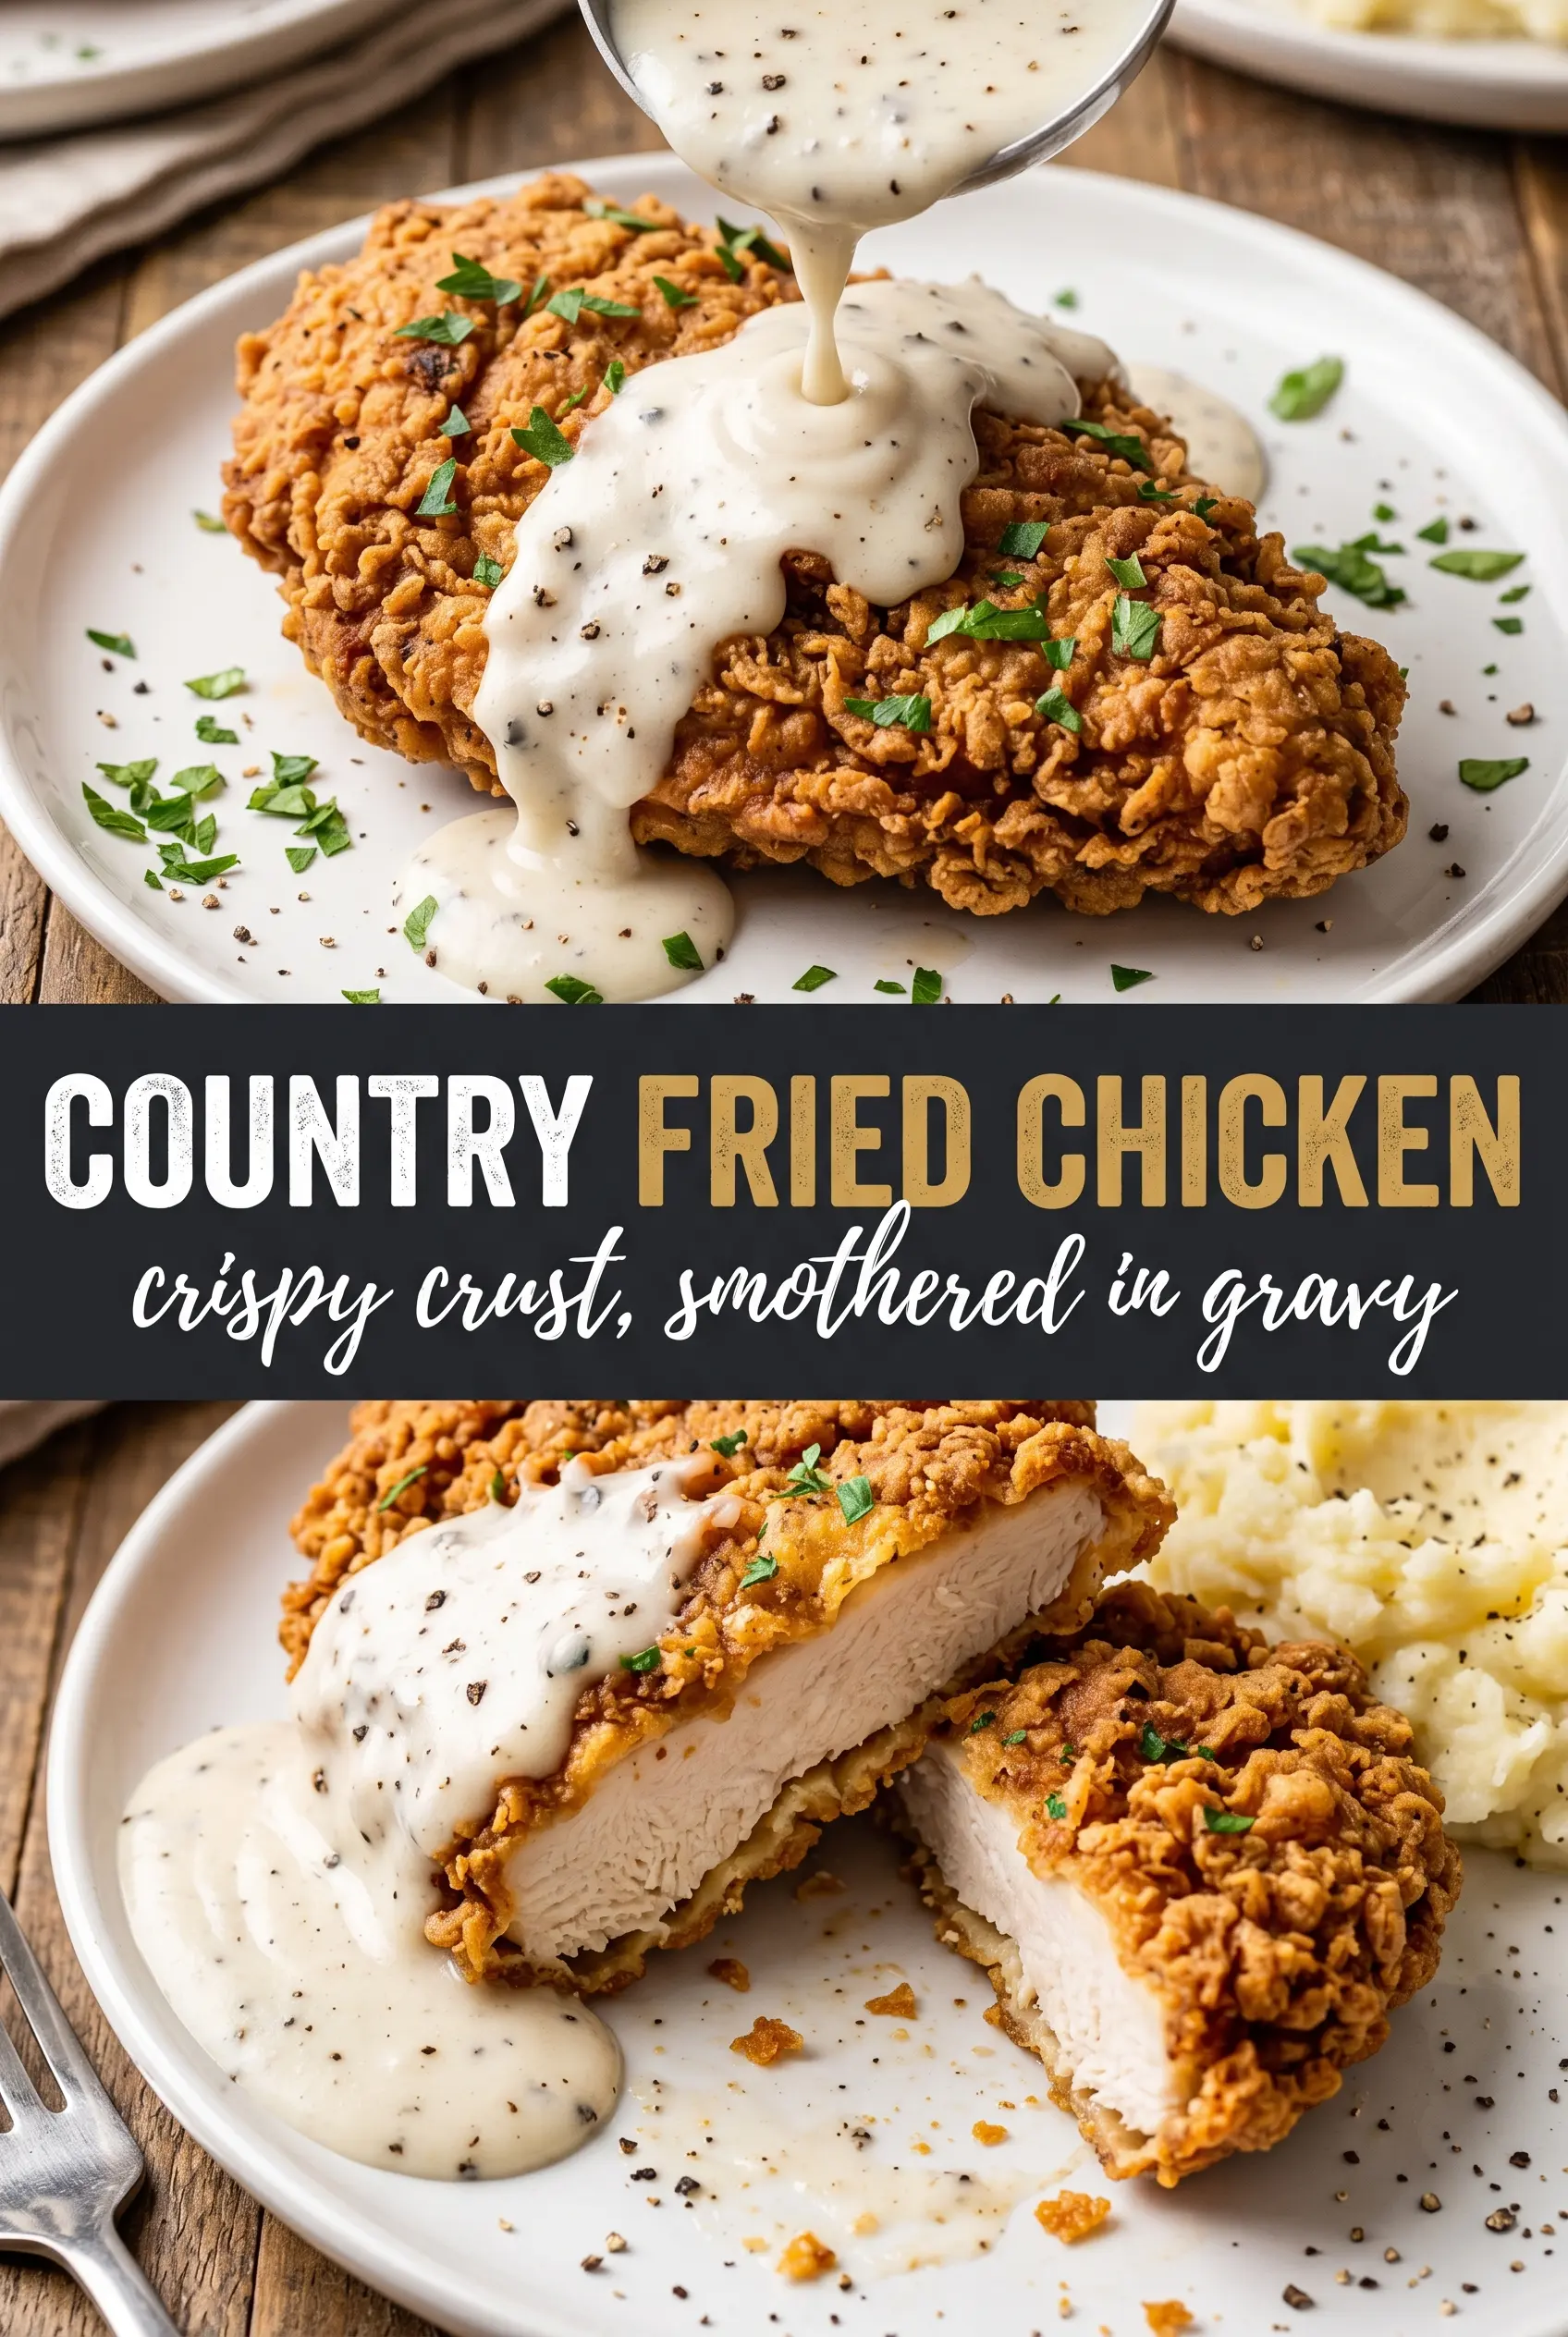
Country fried chicken lands on the plate with the kind of crunch that makes people go quiet for a second. The crust turns deeply golden and craggy in the skillet, then holds onto its texture even after the white gravy goes on top. Inside, the chicken stays juicy because the buttermilk does the work before it ever hits the oil.
The coating in this version is built for real crunch, not just color. A seasoned flour mixture gives the chicken its backbone, while the buttermilk soak helps the dredge cling in thick, uneven layers that fry up with those rough, crisp edges everybody wants. The hot sauce doesn’t make it spicy in a loud way; it just sharpens the flavor and brings the chicken forward.
Below, I’ve included the little details that keep the breading from slipping, the oil from running too cool, and the gravy from turning thin. Those are the spots where country fried chicken usually goes sideways, and they’re exactly where this method stays steady.
The crust stayed crisp even after I spooned on the gravy, and the chicken was cooked through in just about 25 minutes. I used thighs and the coating came out thick, craggy, and stayed put all the way to the last bite.
Country fried chicken with white gravy is the kind of dinner that earns its place on repeat.
The Reason the Coating Stays Crispy After the Gravy Hits
The trick with country fried chicken is getting a coating that fries into layers instead of one smooth shell. That starts with a wet-but-not-dripping dredge, then a second pass through the seasoned flour so the surface builds those dry, shaggy bits that fry up crisp. If the chicken goes into the oil with a heavy slick of buttermilk still clinging to it, the breading turns pasty before it can set.
Heat matters just as much as the breading. At 350°F, the crust sets fast enough to keep the juices in, but not so fast that the outside burns before the chicken cooks through. If your oil runs cool, the coating absorbs it and goes soft. If it runs too hot, the flour darkens before the meat is done, which is how you end up with a bitter crust and undercooked chicken.
What the Buttermilk, Hot Sauce, and Spices Are Really Doing
- Buttermilk — This is the backbone of the texture. Its acidity gently tenderizes the chicken and gives the flour something sticky to grab onto. Regular milk won’t do the same job, and that thinner coating is easier to knock off in the fryer.
- Hot sauce — You’re not adding this for heat alone. It wakes up the buttermilk and gives the chicken a little bite under the coating. If you don’t keep hot sauce in the house, a spoonful of pickle juice gives a similar tang, but the flavor is a little sharper.
- Smoked paprika, garlic powder, onion powder, cayenne — This is where the crust gets its personality. The spices need to be in the flour, not sprinkled after frying, so every bite tastes seasoned all the way through. If you’re backing off the cayenne, replace it with more paprika rather than leaving the coating flat.
- Bone-in chicken pieces — Bone-in pieces stay juicier and give you a little more forgiveness in the fryer. Thighs are the safest choice if you want the most tenderness, while breasts need closer attention because they dry out faster once they’re done.
- Vegetable oil — Use a neutral oil with a high smoke point so the coating can fry without tasting greasy. You need enough depth for the pieces to cook evenly; shallow oil won’t give the same crisp finish and can leave pale spots where the chicken sat against the pan.
How to Build the Crunch, Then Keep the Chicken Juicy
Soaking the Chicken First
Let the chicken sit in the buttermilk and hot sauce long enough for the surface to loosen and the seasoning to start moving inward. Thirty minutes is the minimum, but overnight gives you a fuller, more even result. If you rush this part, the chicken still fries, but the flavor stays on the surface and the coating won’t cling as well.
Pressing on the Flour Coating
Lift each piece from the buttermilk and let the excess drip off for a few seconds before it hits the flour. Then press the flour on firmly with your hands so the surface gets thick, uneven, and a little clumpy. Those little ridges are what turn into the crunchy bits people fight over. For an extra-craggy crust, dip it back into the buttermilk and flour one more time.
Frying at the Right Pace
Heat the oil until it shimmers and holds steady around 350°F. Add the chicken without crowding the pan, or the oil temperature drops and the crust turns greasy. Fry until each piece is deeply golden and the thickest part reaches 165°F, turning once so both sides color evenly. If the outside is dark before the center is done, the oil is too hot; if it looks pale and absorbs oil, the pan never came up to temperature.
Making the White Gravy in the Same Skillet
Use the pan drippings from frying because that’s where the flavor is. Whisk the flour into the drippings for a minute to cook off the raw taste, then add the milk slowly while whisking so the gravy stays smooth. If it turns lumpy, the milk went in too fast or the pan was too hot. Keep whisking over medium heat until it coats a spoon, then season it assertively with salt and pepper so it stands up to the fried chicken.
How I Change This Recipe for Different Pans, Diets, and Cravings
Use thighs for the juiciest result
Thighs handle frying better than breasts because they stay tender even if they go a minute past perfect. The crust stays the same, but the center comes out richer and less likely to dry out. If you like chicken breast, keep the pieces even in thickness so they finish at the same time.
Gluten-free coating
Use a 1:1 gluten-free flour blend that’s meant for baking or frying. The crust won’t have quite the same old-fashioned texture as all-purpose flour, but it still gets crisp if you press it on firmly and fry at the correct temperature. Avoid blends with a lot of whole-grain starches, since they can make the coating gritty.
Lighter seasoning, same crunch
Cut the cayenne in half and bump up the black pepper if you want more of a classic diner-style chicken instead of heat. The crust still tastes layered and savory, but the spice reads as background rather than front and center. This works especially well if you’re serving the chicken with a peppery gravy.
Storage and Reheating
- Refrigerator: Store the chicken and gravy separately for up to 3 days. The coating softens a bit, but the chicken stays usable.
- Freezer: The fried chicken freezes well without the gravy. Wrap pieces tightly and freeze for up to 2 months. The gravy doesn’t freeze as nicely; it can separate when thawed.
- Reheating: Reheat the chicken on a wire rack in a 375°F oven until hot and crisp again. Don’t microwave it if you want the crust to stay intact; that turns the breading soft in a hurry. Warm the gravy in a small saucepan with a splash of milk to loosen it.
Answers to the Questions Worth Asking
Country Fried Chicken
Ingredients
Equipment
Method
- Soak the chicken pieces in buttermilk and hot sauce for at least 30 minutes or overnight, keeping them refrigerated if soaking longer.
- Pour off any excess buttermilk from the chicken and let it drip briefly so the coating can adhere.
- Whisk together all seasoned flour coating ingredients in a shallow dish until evenly combined and speckled throughout.
- Dredge each chicken piece firmly in the seasoned flour so the coating fully clings to the surface.
- Repeat the dip-and-dredge process for extra crunch, pressing the flour onto the chicken after the second dredge.
- Heat 2-3 inches of oil to 350°F in a large cast iron skillet before adding the chicken.
- Fry the chicken for 10-12 minutes per side until deeply golden and the internal temperature reaches 165°F.
- Drain the chicken on paper towels to remove surface oil and help keep the coating crisp.
- Whisk pan drippings and flour together in a skillet over medium heat for 1 minute to cook out the raw flour taste.
- Gradually whisk in the whole milk and cook until thickened, stirring so the gravy turns smooth and creamy.
- Season the gravy with salt and pepper to taste until balanced.
- Serve the chicken immediately with white gravy poured over the top so it pools around the base.