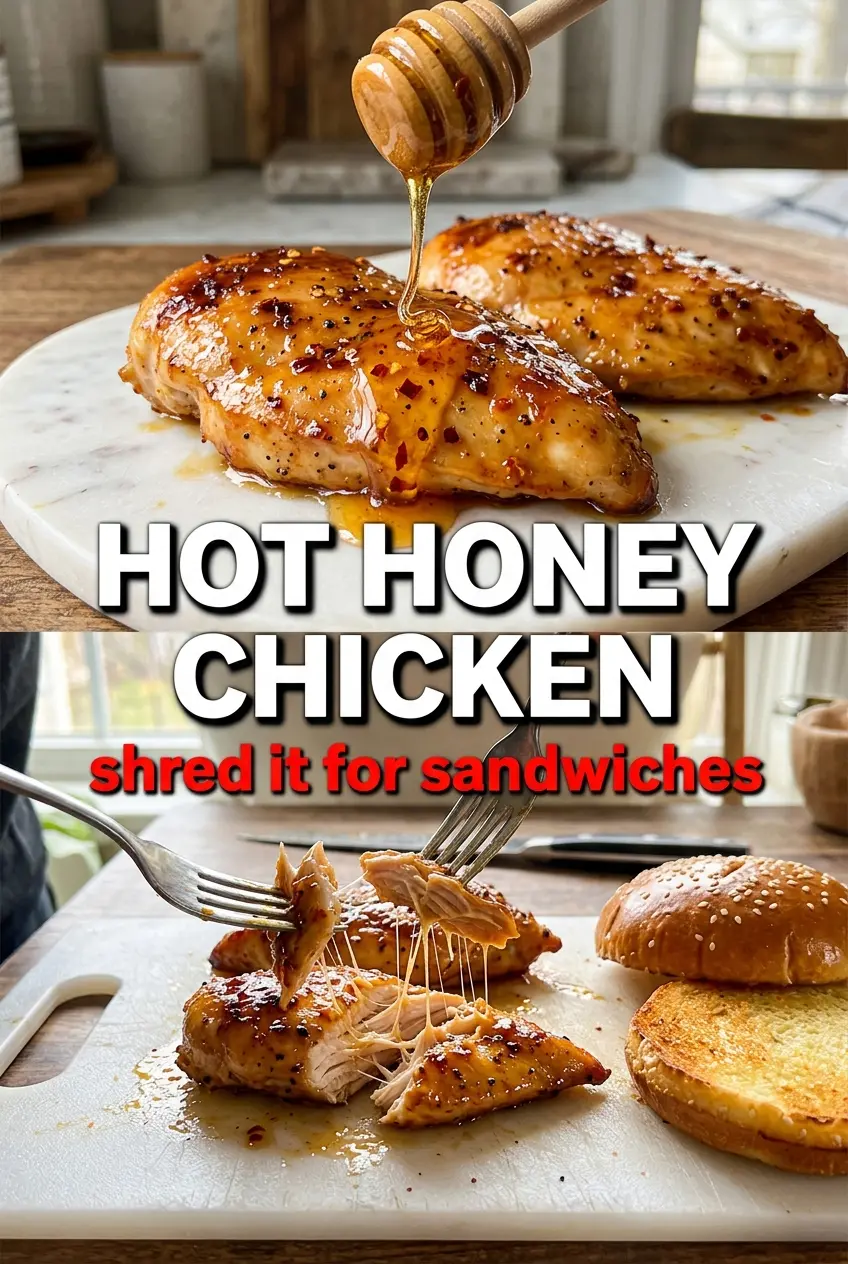
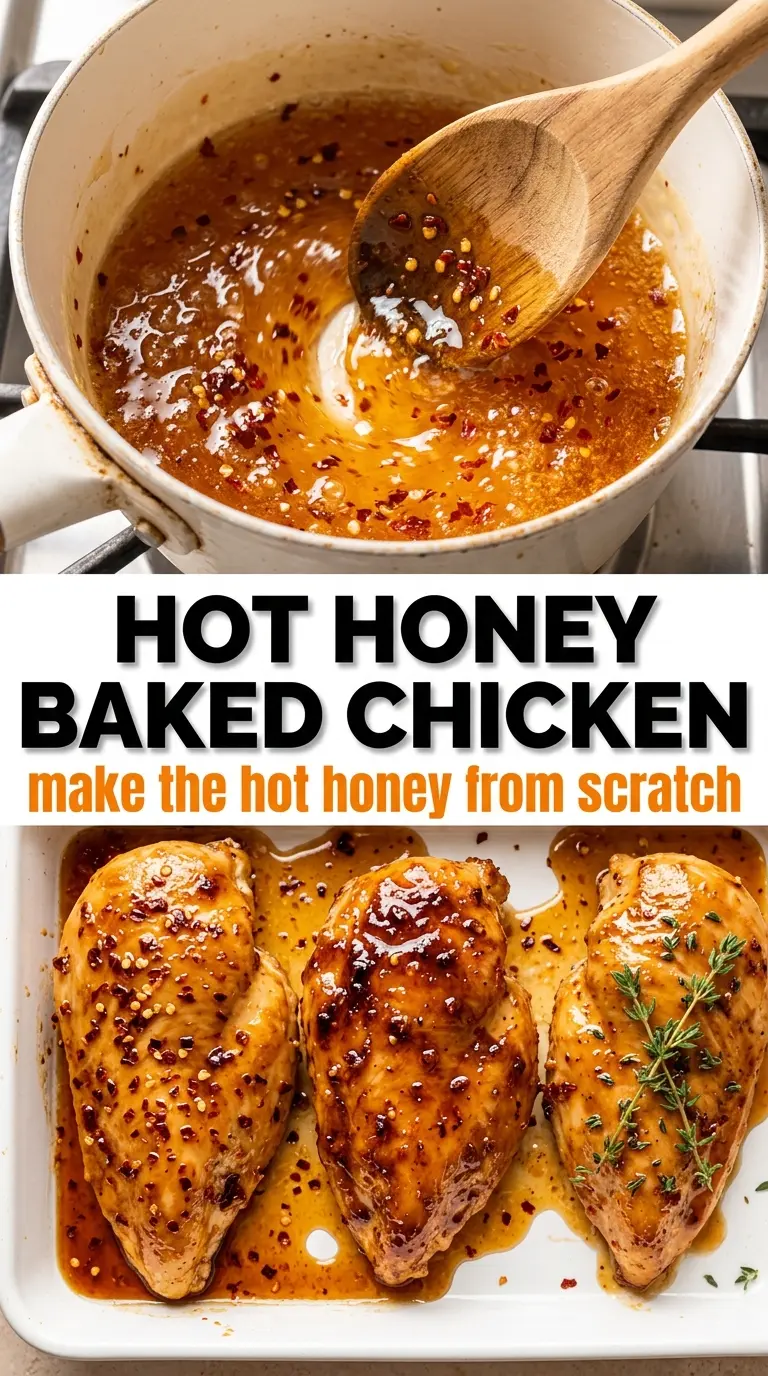
Sticky, glossy hot honey baked chicken breasts land on the plate with caramelized edges, a juicy center, and just enough heat to keep each bite interesting. The glaze tightens in the oven into a dark amber coating that clings to the chicken instead of sliding off, and the red pepper flakes give it that speckled, peppery look that tells you the sauce means business.
The trick is balancing sweetness, acid, and fat so the glaze tastes bold instead of flat. Honey brings the shine and caramelization, hot sauce adds tang and heat, butter smooths everything out, and a little apple cider vinegar keeps the glaze from turning cloying. Baking at a high temperature lets the outside color fast without drying out the chicken, as long as you don’t overbake it past 165°F.
Below, I’m breaking down the part that matters most: how to get the glaze to stick, deepen, and stay spoonable instead of burning in the pan. There’s also a useful note on what to do if your chicken breasts are unevenly sized, because that’s usually what throws this dish off.
The glaze caramelized into this sticky, shiny coating and the chicken stayed juicy all the way through. I basted at the halfway point like you said and the flavor was perfect — sweet, spicy, and not too salty.
Hot honey baked chicken breasts with that sticky amber glaze are perfect for the nights when you want sweet heat and almost no cleanup.
The Part That Keeps the Glaze Sticky Instead of Burnt
The biggest mistake with hot honey chicken is treating the glaze like barbecue sauce and letting it bake forever. Honey darkens fast, and once the sugars cross from caramelized to scorched, the whole dish turns bitter before the chicken is done. The answer is high heat for a short time, plus one baste halfway through so the surface stays wet long enough to build a glossy coating.
That halfway baste matters more than people think. It refreshes the glaze before the final blast in the oven, which gives you those sticky edges and that deep amber finish without needing a long bake. If your chicken breasts are thick on one end and thin on the other, pound them lightly or tuck the thin ends under so everything finishes at the same time.
- Chicken breasts — Boneless, skinless breasts work best here because the glaze clings to the smooth surface and the oven heat can move quickly. If yours are very large, split them horizontally or lightly pound them to an even thickness so the thick end doesn’t dry out before the center cooks through.
- Hot sauce — Frank’s brings tang, salt, and a clean vinegar-backed heat that keeps the glaze from tasting one-note. A thicker, sweeter hot sauce will work in a pinch, but it changes the balance and can make the glaze heavier.
- Honey — This is what gives you that lacquered finish. Use a regular pourable honey, not a whipped or crystallized one, so it mixes smoothly with the rest of the glaze and brushes on evenly.
- Apple cider vinegar — The vinegar is small but important. It cuts the sweetness and helps the glaze taste bright after it caramelizes in the oven.
What Each Ingredient Is Actually Doing in This Recipe
- Primary ingredient (the star) — Quality matters most. Choose the best you can find.
- Cooking medium (oil, butter, or broth) — This carries flavors and prevents dryness.
- Seasonings (salt, pepper, spices, herbs) — Layer flavors so nothing overpowers. Build depth gradually.
- Aromatics (garlic, onion, herbs) — Cook with fat to bloom flavors. Become the foundation.
- Supporting ingredients — Complement the main ingredient without overpowering it.
- Sauce or liquid (if applicable) — Brings flavors together. Balance richness with acid.
- Acid (lemon, vinegar, wine, or other) — Brightens and prevents flat-tasting results.
- Final finish (garnish, glaze, or sauce) — Prevents one-dimensional taste and adds visual appeal.
Getting the Chicken Glazed, Basted, and Pulled at the Right Moment
Seasoning the Surface
Pat the chicken dry before you add the seasoning. Moisture on the surface keeps the spices from sticking and makes the glaze slide around instead of clinging. Salt, pepper, garlic powder, and smoked paprika build the first layer of flavor, and the paprika gives the finished chicken a deeper color under the glaze. Don’t drown the chicken in oil; just enough to help the seasonings adhere is plenty.
Mixing the Glaze Until It Smears Cleanly
Whisk the honey, hot sauce, melted butter, vinegar, red pepper flakes, and garlic powder until the mixture looks smooth and glossy. If the butter is too hot, it can separate and the glaze will look greasy, so let it cool for a minute before mixing. You want a pourable sauce that coats a spoon lightly, not a thin liquid that runs off the chicken before it hits the oven.
Baking to a Dark Amber Finish
Brush the chicken generously with glaze before it goes into the oven, then bake at 425°F until the internal temperature reaches 165°F and the edges look bronzed and sticky. Halfway through, baste again with the reserved glaze. That second coat is what builds the shiny finish. If the glaze starts to look too dark before the chicken is done, tent loosely with foil for the last few minutes instead of lowering the oven so much that the sauce stops caramelizing.
Resting Before the Final Drizzle
Let the chicken sit for 5 minutes after it comes out of the oven. That rest keeps the juices inside the meat instead of running out the second you slice in. Finish with flaky sea salt, fresh thyme, and a little extra hot honey if you want it even stickier. The salt sharpens the sweetness, and the herbs keep the glaze from tasting heavy.
Three Smart Ways to Adjust the Heat, Sweetness, or Protein
Milder Sweet Heat
Cut the hot sauce to 1 tablespoon and keep the honey the same. You’ll still get a warm, peppery finish, but the glaze reads more sweet than spicy and works better for anyone who wants the coating without the burn.
Dairy-Free Version
Swap the butter for olive oil or a plant-based butter. You lose a little of the round, silky finish that butter gives the glaze, but the sauce still caramelizes well and keeps its shine.
Chicken Thigh Swap
Boneless, skinless thighs work if you want a richer result and a little more forgiveness in the oven. They usually need a few extra minutes, and the glaze can tolerate that because thighs stay juicier than breasts.
Storage and Reheating
- Refrigerator: Store leftovers in an airtight container for up to 4 days. The glaze will thicken as it chills, and the surface will lose a little of its fresh shine.
- Freezer: It freezes well for up to 2 months. Wrap the chicken tightly and freeze the pieces in a single layer first if you can so the glaze doesn’t smear off in the bag.
- Reheating: Reheat covered at 325°F with a spoonful of water or extra glaze in the pan, or warm gently in a skillet over low heat. High heat dries out the chicken fast and can turn the sugars in the glaze bitter before the center is hot.