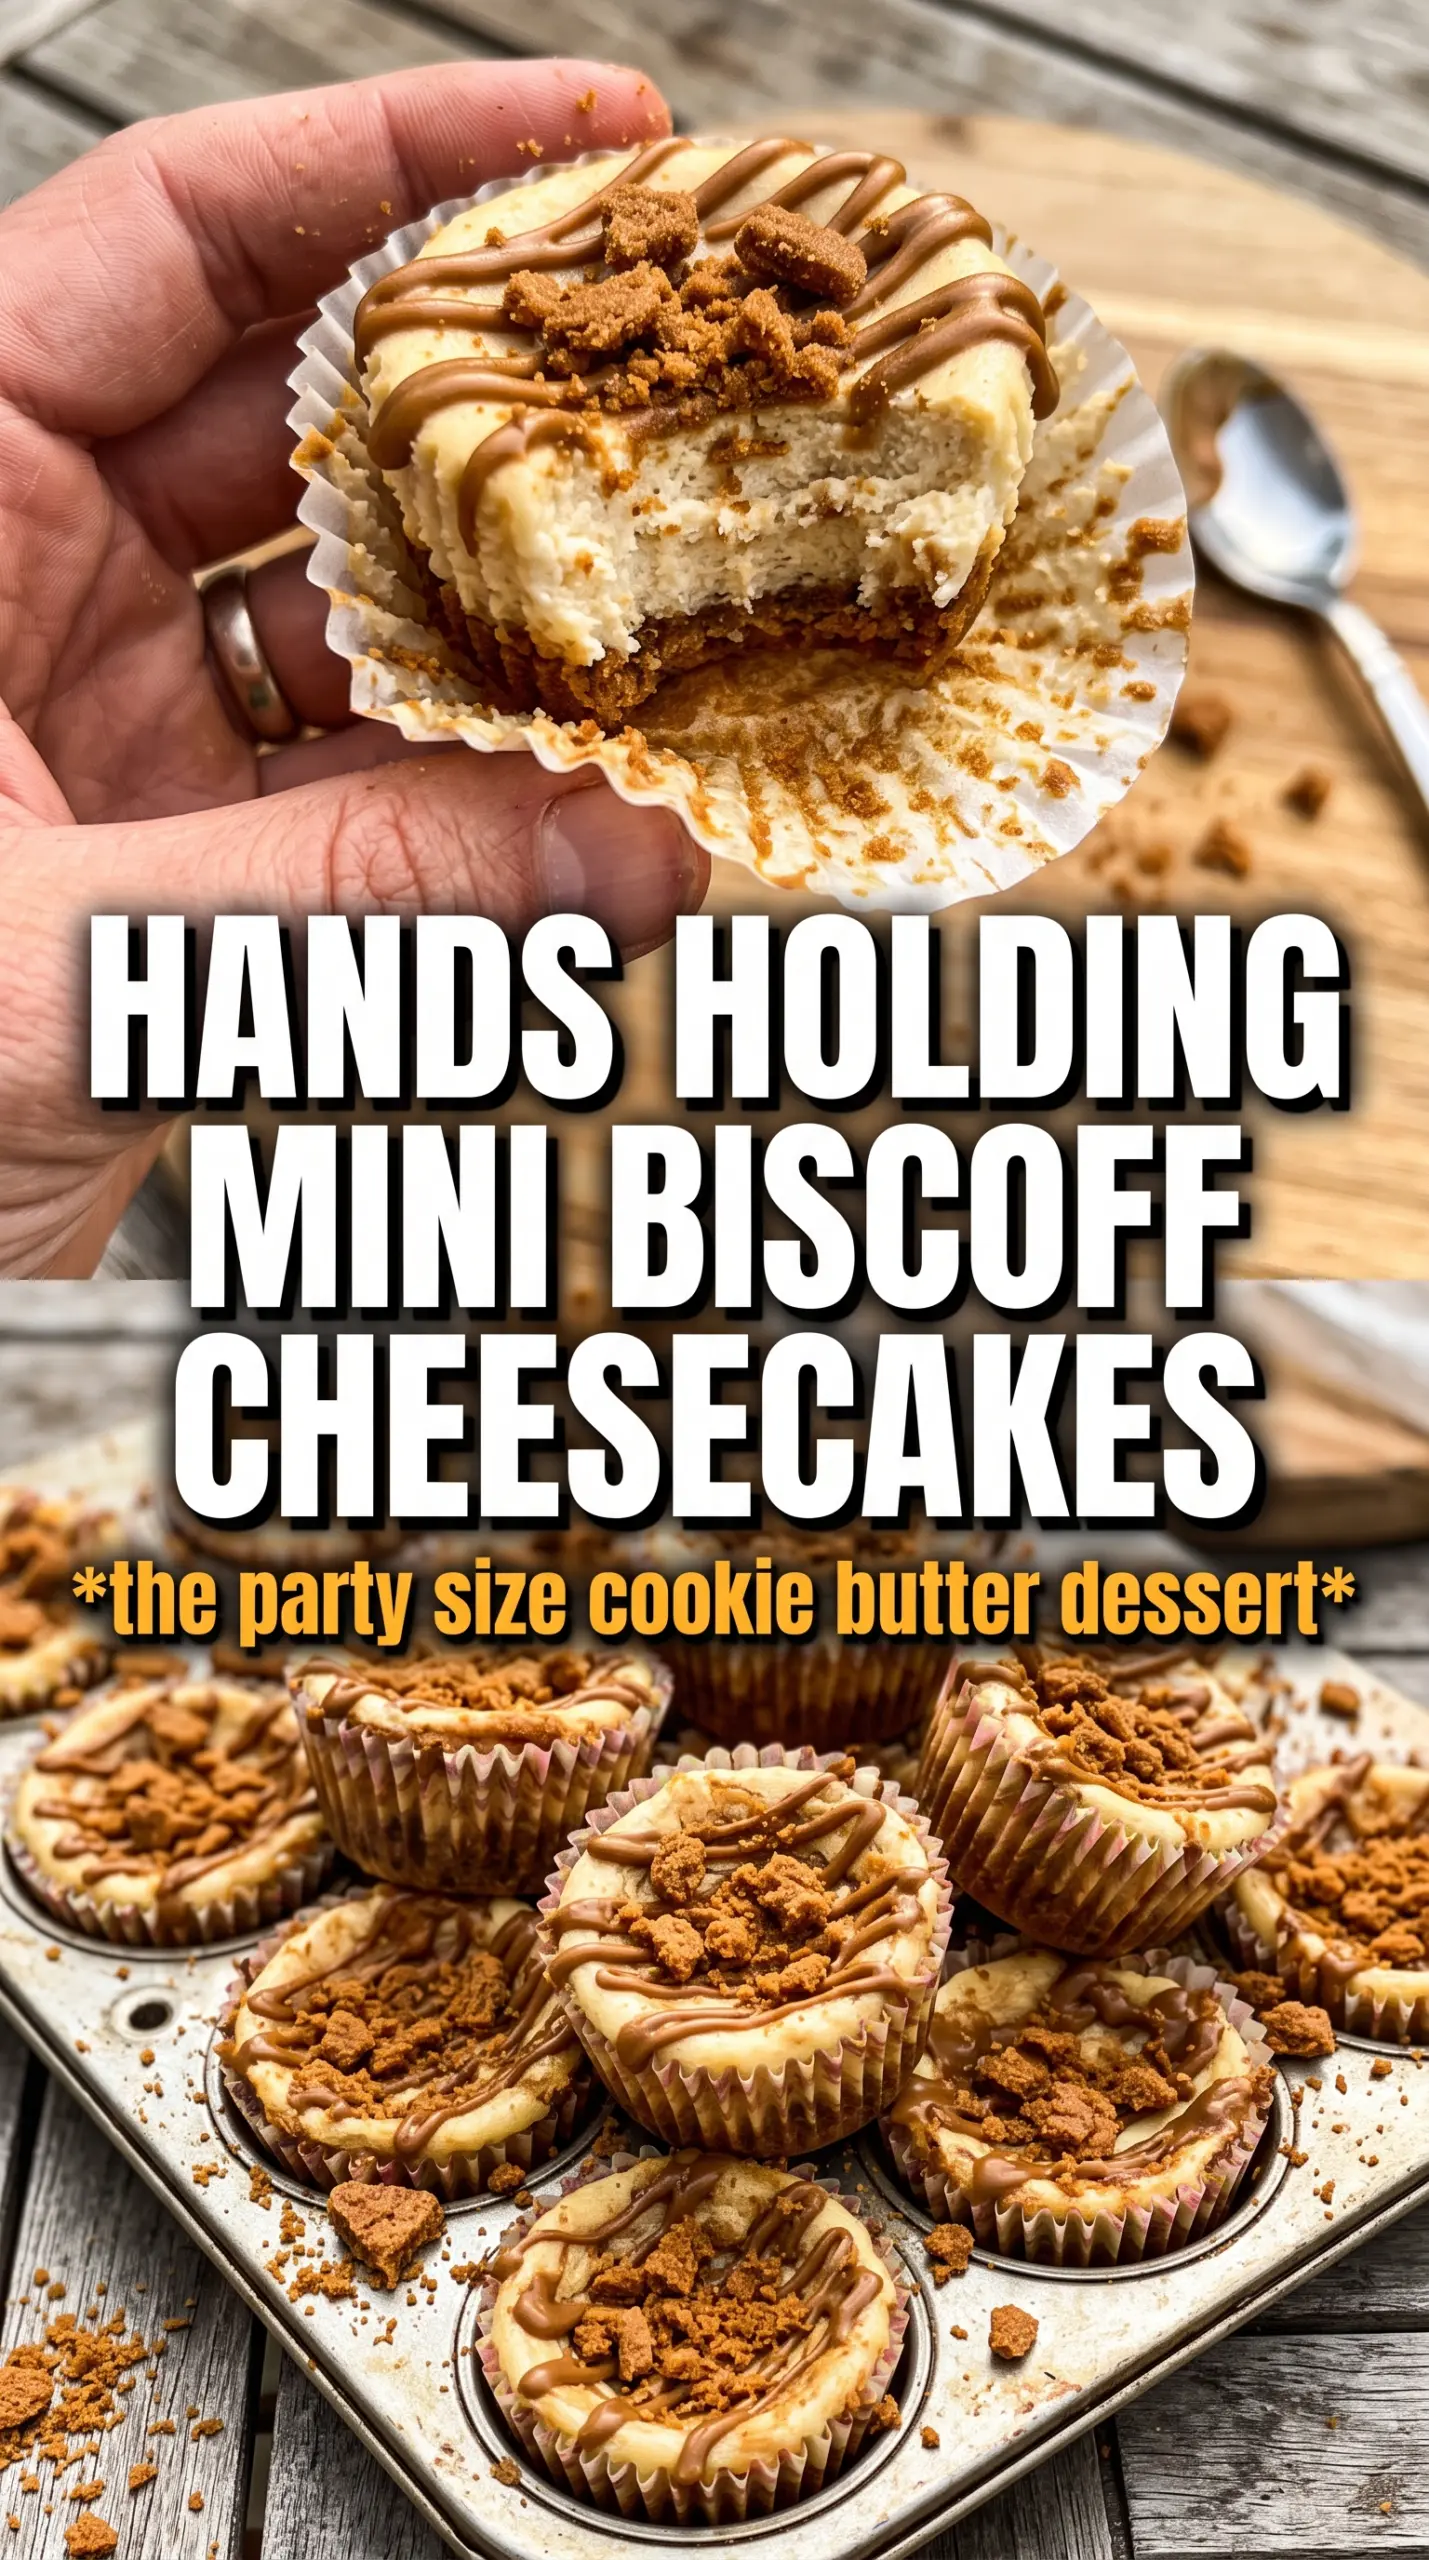
Mini Biscoff cheesecakes bake up with a buttery cookie crust, a smooth spiced filling, and that unmistakable caramelized cookie butter finish on top. The size makes them feel a little special, but the real win is the texture: firm enough to lift cleanly from the liner, creamy in the middle, and rich without being heavy. The Biscoff drizzle and cookie garnish turn each one into a small, polished dessert that tastes like it came from a bakery case.
What makes this version work is the balance. The crust gets a short bake first, which keeps it crisp under the filling instead of turning soft and sandy. In the filling, the cream cheese has to be fully softened before you beat it smooth, or you’ll end up with little lumps that never disappear. The sour cream keeps the texture supple, while the cookie butter carries the flavor all the way through the cheesecake instead of leaving it only on top.
Below, I’ll walk through the one part that matters most for a clean, creamy set, plus the ingredient choices that make these taste deeply of Biscoff instead of just vaguely spiced. If you’ve ever had mini cheesecakes crack, sink, or come out grainy, the details here will help.
The crust stayed crisp even after chilling, and the filling set up with that dense, creamy texture you want in a cheesecake. The Biscoff drizzle on top was the part my kids kept picking off first.
Save these Mini Biscoff Cheesecakes for the nights when you want a crisp cookie crust, creamy center, and that thick Biscoff drizzle on top.
The Secret to a Cheesecake That Sets Cleanly in Muffin Cups
Mini cheesecakes fail in one of two ways: they overbake and turn dry, or they bake too hard on the edges while the center stays loose and then sinks on cooling. The sweet spot is pulling them when the centers still have a slight wobble in the middle. They finish setting as they cool, and that slow carryover is what gives you a creamy slice instead of a crumbly one.
The other thing that matters is how much air you beat into the batter. Once the cream cheese and sugar are smooth, stop whipping as soon as the eggs go in and the mixture looks combined. Too much air gives you puffy tops that collapse later. These are small cheesecakes, so the margin between done and overdone is narrow.
- Warm cream cheese — It has to be soft all the way through so the batter turns smooth without extra beating. Cold cream cheese leaves tiny lumps that show up after baking.
- Sour cream — This adds moisture and a slight tang that keeps the filling from tasting flat. Plain Greek yogurt works in a pinch, but it sets a little tighter and tastes sharper.
- Eggs — They give the cheesecakes structure. Add them one at a time and stop mixing as soon as they disappear, or the batter can turn too airy.
- Cookie butter — This is the flavor anchor. The spread blends into the filling better than crushed cookies would, and it gives a deeper Biscoff taste throughout the cheesecake.
What Each Ingredient Is Actually Doing in These Mini Cheesecakes
- Biscoff cookies — These make the crust and also the garnish, so the flavor reads as Biscoff from the first bite to the last. Graham crackers won’t give the same caramelized spice, though they’ll still make a workable crust if that’s all you have.
- Butter — Melted butter holds the crust together and helps it bake into a firm base. If you use too little, the crust will crumble when you peel the liner away.
- Cream cheese — Full-fat brick cream cheese gives the best set and the richest texture. Whipped or tub-style cream cheese can make the filling too soft.
- Biscoff spread — The filling needs this, and the warmed topping makes the cheesecakes look finished without much effort. If yours is very thick, warm it just until it loosens; hot spread can melt the top instead of sitting in a neat drizzle.
- Cinnamon — It reinforces the warm spice already in the cookies without taking over. The half teaspoon is enough; more and the cheesecake starts tasting like cinnamon bun filling instead of Biscoff.
Building the Crust and Filling Without Trapping Air
Pressing the Crust Until It Holds
Mix the crushed cookies, melted butter, and sugar until every crumb looks evenly damp, then divide it into the liners and press firmly. A small glass or measuring spoon helps you pack the crumbs tightly, and that pressure matters because a loose crust falls apart when you peel away the paper. Bake just long enough to set it, about 5 minutes, so it smells toasted but not dark. If the crust looks greasy after baking, the butter ratio was off or the crumbs were pressed too loosely.
Mixing the Filling Only Until Smooth
Beat the cream cheese and sugar first until the mixture looks completely smooth and glossy. Add the eggs one at a time, mixing on low to medium just until each one disappears. Stir in the sour cream, Biscoff spread, vanilla, and cinnamon at the end, and stop as soon as the batter looks uniform. Overmixing here puts too much air into the batter, which leads to cracks or sunken centers after cooling.
Baking for a Slight Jiggle
Spoon the filling over the warm crusts and bake until the edges look set and the centers still wobble a little when you nudge the pan. That jiggle tells you the cheesecakes are done without being dry. Pull them out and let them cool in the pan before moving them to the fridge, because sudden temperature changes can make the tops split. Chill them for at least 3 hours so the texture firms up cleanly before you add the topping.
Finishing With the Drizzle and Cookie
Warm the Biscoff spread just enough to drizzle, not enough to make it run thin. A spoon works fine, or you can pipe it if you want a neater finish. Press the whole cookie on top while the drizzle is still soft so it anchors in place. If you add the garnish after the cheesecake is fully chilled and the topping has already set, it won’t stick as well.
Three Ways to Work These Mini Biscoff Cheesecakes Into Your Day
Dairy-Free Version
Use dairy-free cream cheese and a plant-based butter substitute for the crust. The texture will be a little softer and the tang slightly different, but the cookie butter flavor still carries the dessert. Chill them fully so they have time to firm up.
Gluten-Free Swap
Use a certified gluten-free speculoos-style cookie or gluten-free spiced cookie for the crust and topping. The filling is naturally gluten-free as written, so the main job is choosing a cookie with enough flavor and a fine enough crumb to hold together after baking.
Mini Cheesecake Bars Instead of Cups
Press the crust into a parchment-lined 8×8 pan, spread the filling over the top, and bake a few minutes longer until the center still has a slight wobble. You’ll get cleaner slices and a slightly thinner crust-to-filling ratio, which is nice if you want a dessert that serves a crowd more easily.
Storage and Reheating
- Refrigerator: Store covered for up to 4 days. The crust stays best on day 1 and 2, but the filling keeps its texture nicely.
- Freezer: These freeze well without the topping. Wrap each cheesecake tightly and freeze for up to 1 month, then thaw in the refrigerator before adding the drizzle and cookie.
- Reheating: These are meant to be served cold, not reheated. If they get too firm straight from the fridge, let them sit at room temperature for 10 to 15 minutes so the filling softens slightly and the flavor comes through.
Answers to the Questions Worth Asking

Mini Biscoff Cheesecakes
Ingredients
Equipment
Method
- Preheat oven to 325°F and line a 12-cup muffin tin with liners, keeping the liners seated for easy unmolding.
- Combine crushed Biscoff cookies, melted unsalted butter, and sugar, then press the mixture firmly into each liner to form an even base.
- Bake the crusts for 5 minutes at 325°F, using a light golden look as your visual cue.
- Beat softened cream cheese and granulated sugar until smooth, scraping the bowl so no lumps remain.
- Add eggs one at a time and beat just until incorporated to keep the filling creamy.
- Stir in sour cream, Biscoff cookie butter, vanilla extract, and cinnamon until fully blended.
- Divide the filling among the muffin cups, then bake 18–20 minutes at 325°F until the centers are just set with a slight jiggle.
- Cool the mini cheesecakes to room temperature, then refrigerate for 3 hours to firm up.
- Warm the Biscoff spread until pourable, then drizzle over each cheesecake.
- Press a whole Biscoff cookie into each top for a sealed, textured finish before serving.