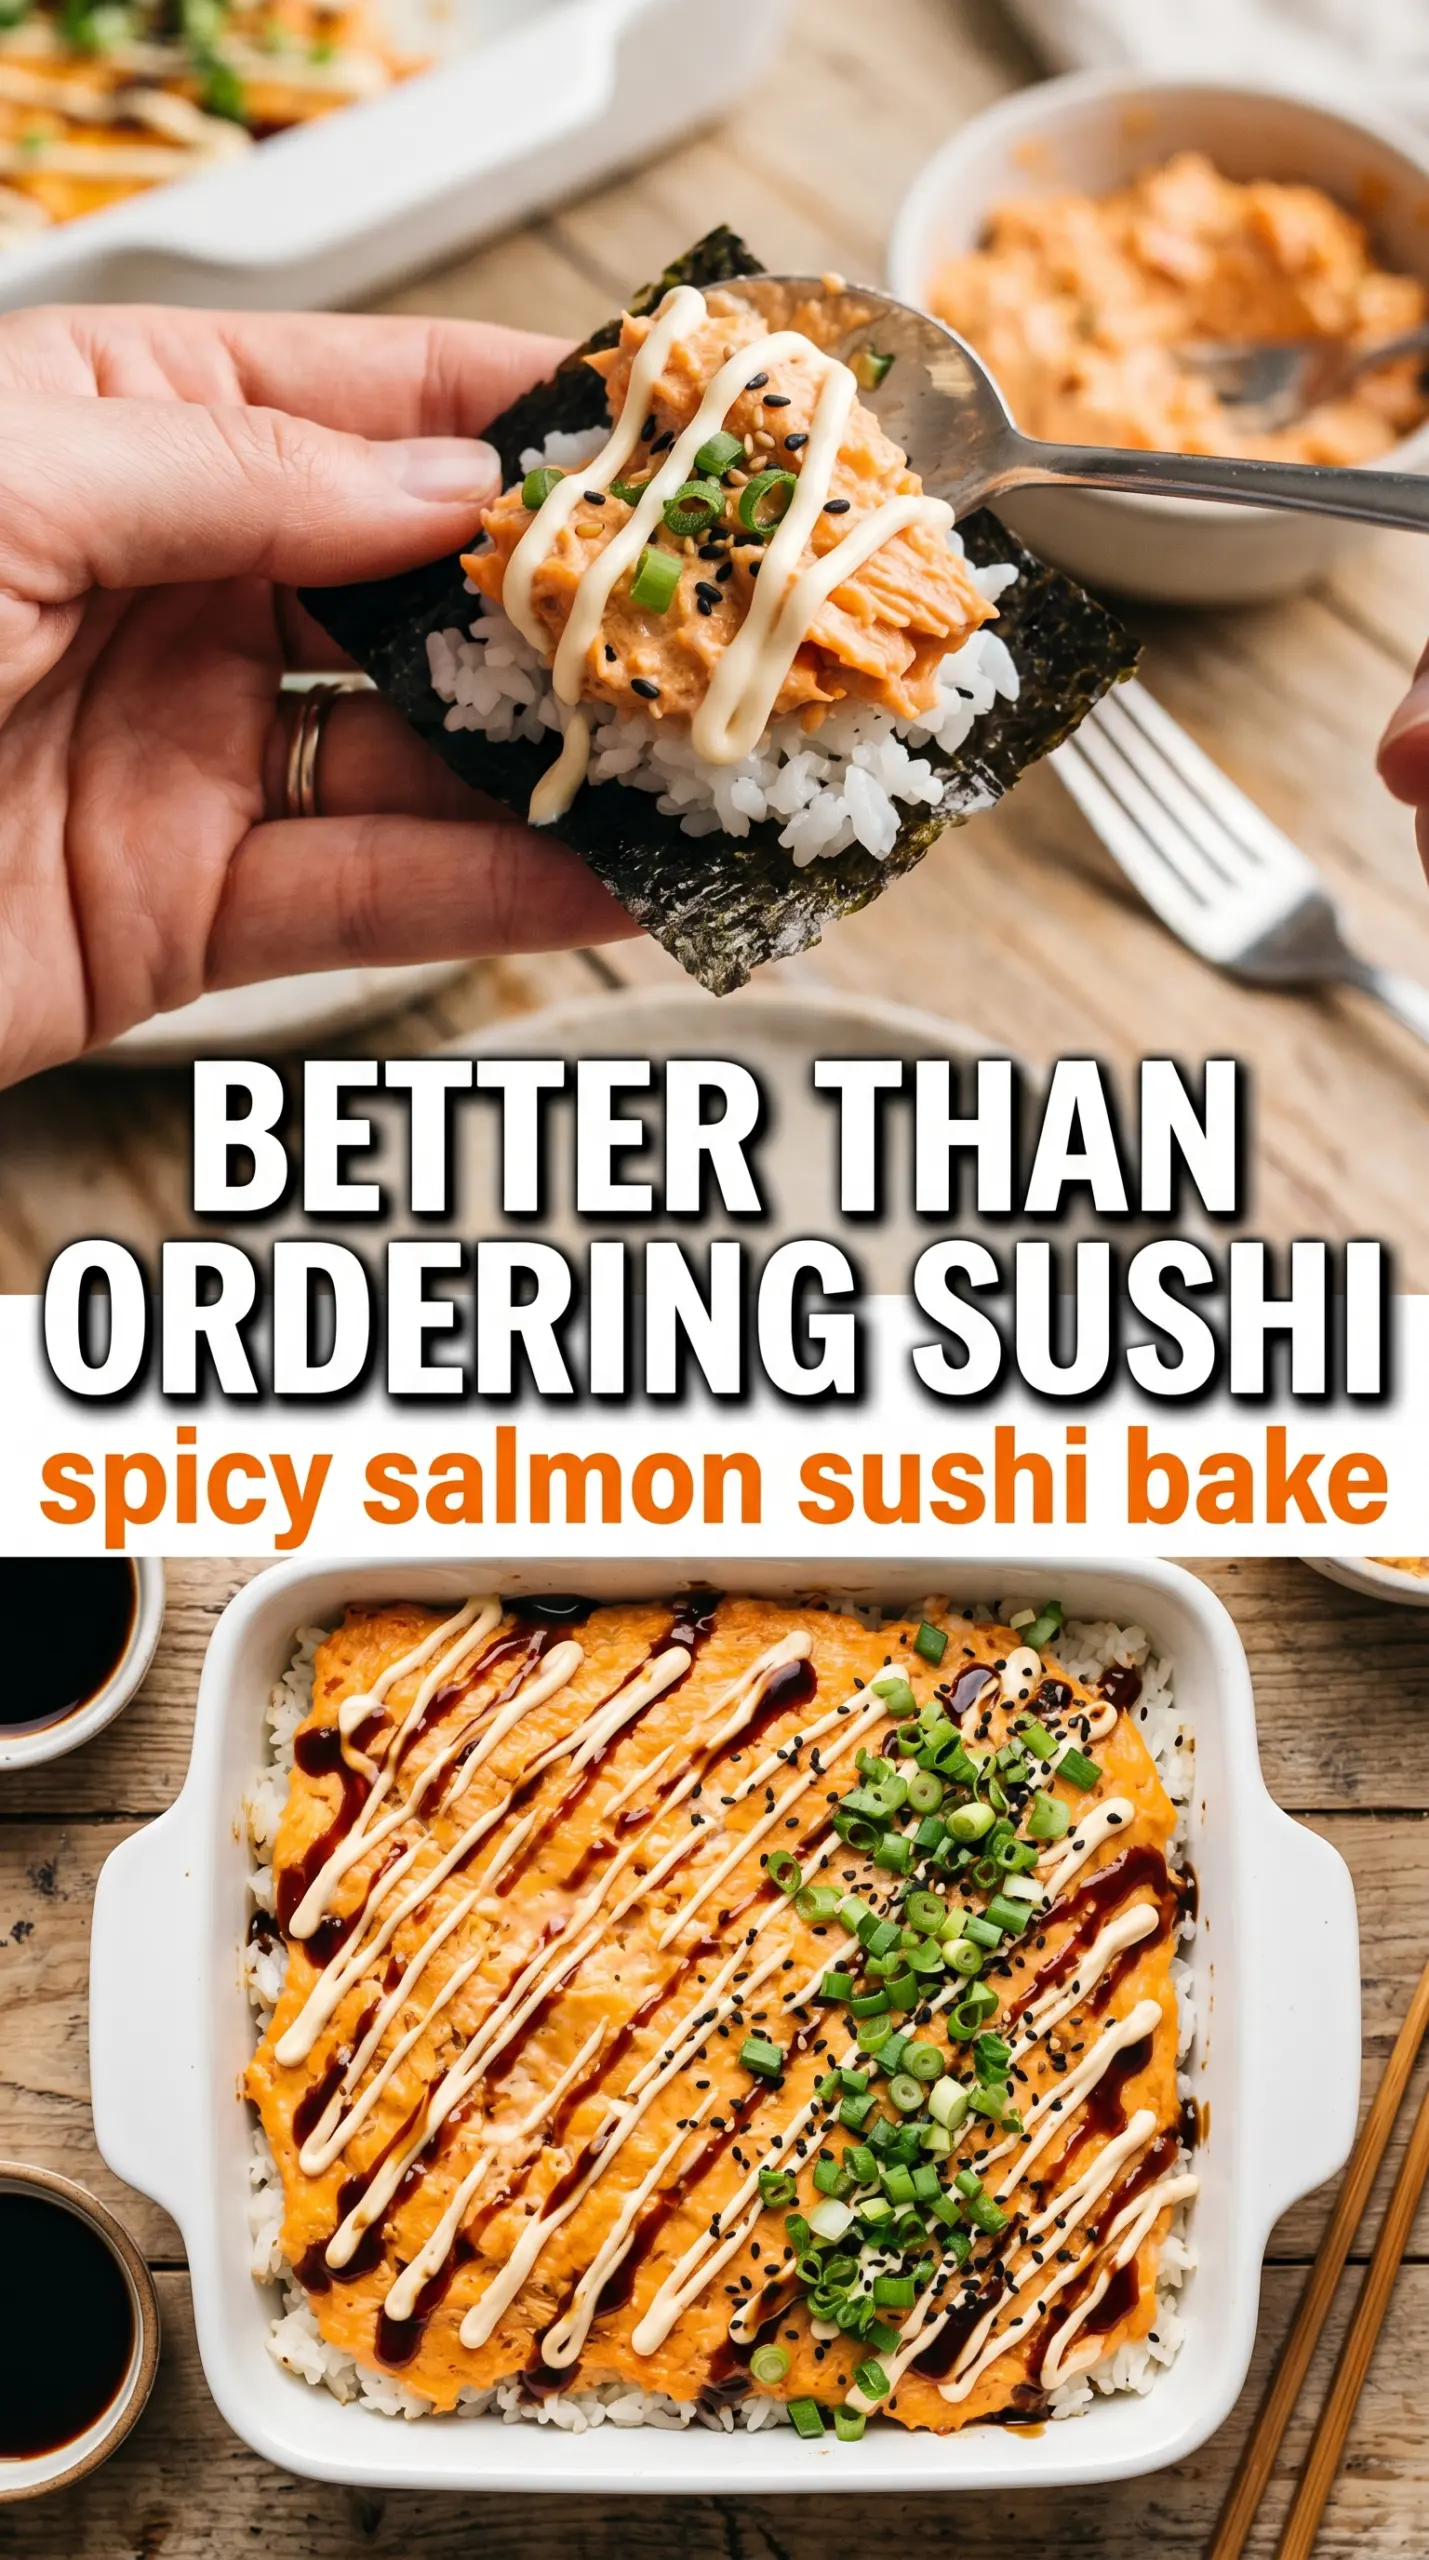
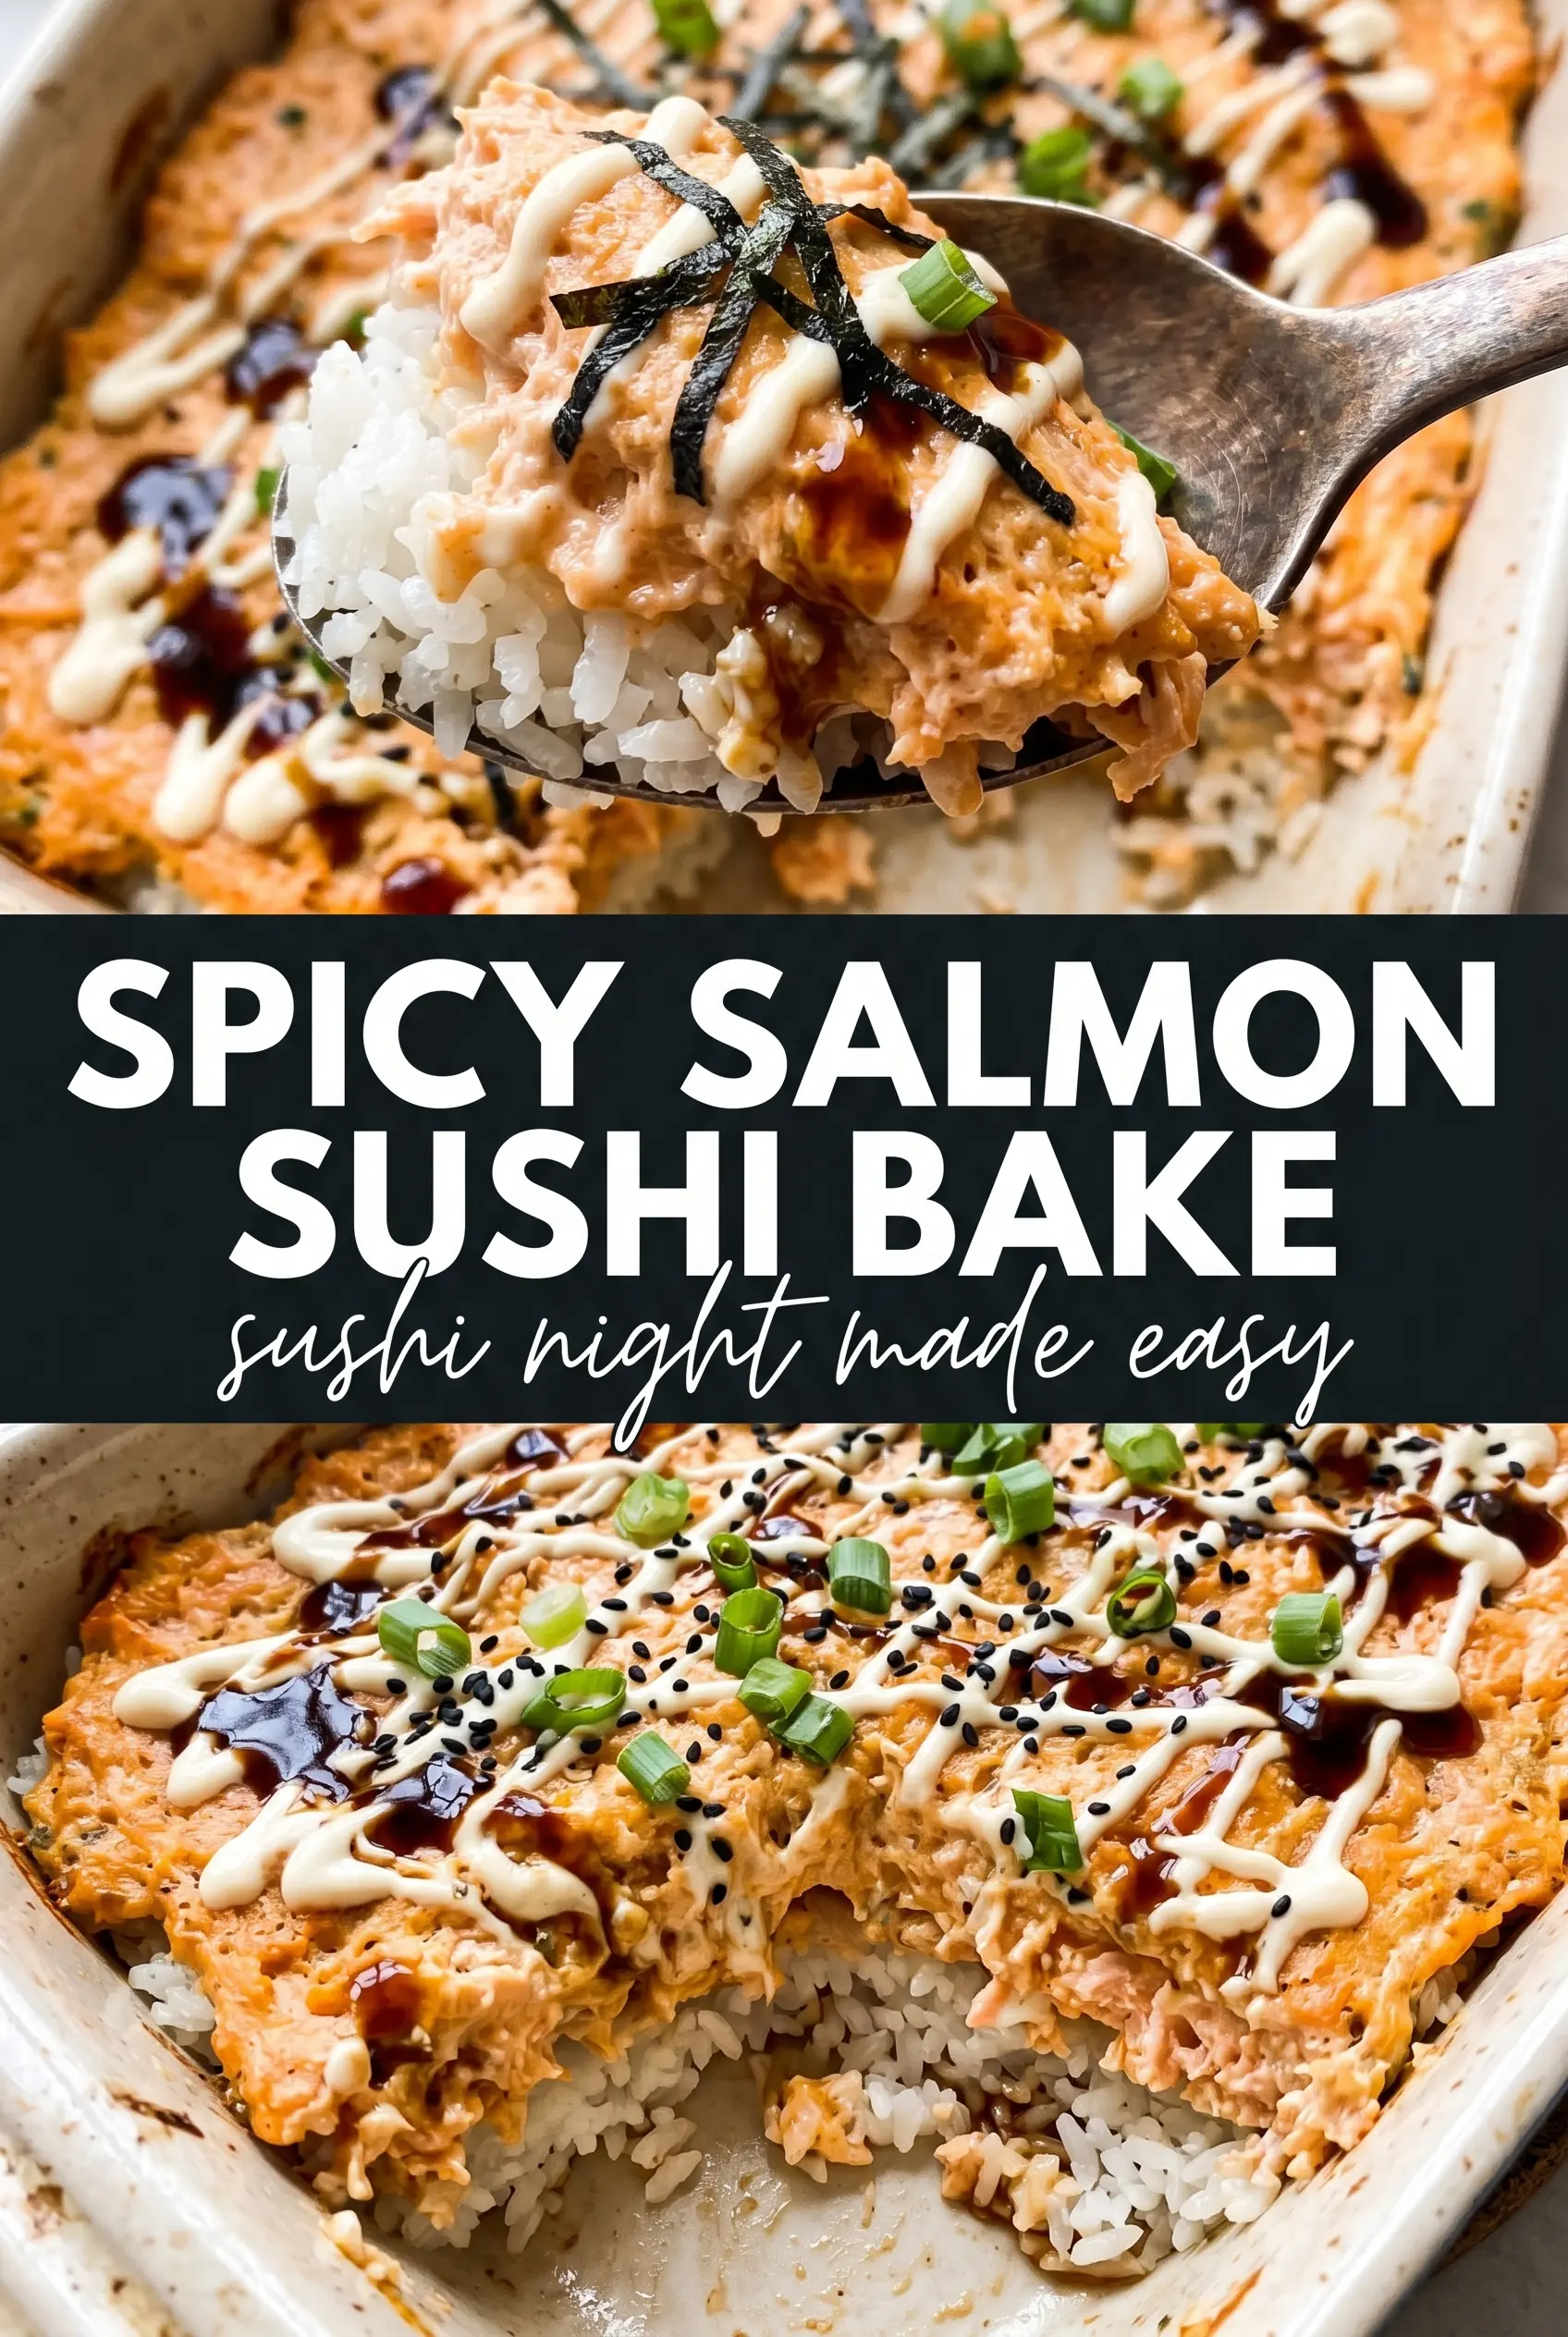
Golden, bubbling, and packed with spicy salmon flavor, this sushi bake has the kind of salty-creamy-slightly-sweet balance that keeps people hovering around the baking dish before it even hits the table. The rice turns tender and seasoned, the salmon layer bakes into a rich, spoonable topping, and the nori on the side gives you that sushi-shop bite without any rolling.
What makes this version work is the contrast. The sushi rice gets seasoned while it's warm so the vinegar mixture absorbs instead of sitting on the surface, and the salmon filling uses softened cream cheese plus Japanese mayo for a smooth, cohesive texture that browns lightly in the oven. A little soy sauce deepens the seasoning, while furikake adds the savory finish that keeps each bite from tasting flat.
Below, I'll walk through the small details that matter most, including how to keep the rice from turning mushy and how to adjust the heat level if you want the salmon filling more mellow or more punchy.
The rice stayed fluffy underneath and the salmon topping baked up creamy instead of greasy. I used the full amount of sriracha and it had just the right kick with the furikake on top.
Save this spicy salmon sushi bake for the nights when you want sushi flavor, a creamy baked topping, and zero rolling.
The Trick to a Sushi Bake That Stays Layered Instead of Turny
The biggest mistake with sushi bake is treating the rice like a casserole filler instead of the base. Once the vinegar, sugar, and salt go in, the rice should be spread in an even layer while it's still warm enough to absorb the seasoning and settle into the pan. If it gets packed down too hard, it turns dense; if it's left underseasoned, the whole dish tastes like spicy salmon sitting on plain rice.
The other failure point is the topping. Cream cheese needs to be soft before it mixes with the salmon, or you'll end up with little cold lumps that never fully melt in the oven. You want a spreadable mixture that moves across the rice in one smooth layer, because that even thickness is what gives you those bubbling edges without drying out the center.
What the Cream Cheese, Kewpie, and Furikake Are Doing Here
- Cooked sushi rice — Short-grain rice matters here because it clings together and scoops cleanly with nori. Long-grain rice won't give you the same texture or the right sticky base.
- Rice vinegar, sugar, and salt — This is the seasoning that turns plain rice into sushi rice. Add it while the rice is still warm so it absorbs evenly instead of tasting sharply vinegary on the surface.
- Salmon — Use salmon that's already cooked and flaked into medium pieces. If the salmon is dry, the mayo and cream cheese will rescue some moisture, but overcooked salmon still tastes stringy, so stop cooking it as soon as it flakes.
- Cream cheese — This gives the topping its rich, baked texture and keeps the salmon from drying out. Full-fat works best because it melts smoothly and holds the mixture together better than low-fat versions.
- Japanese mayonnaise — Kewpie has a rounder, richer flavor than standard mayo, and that extra egg-yolk richness makes a big difference here. If you need to swap it, use regular mayo with a tiny pinch of sugar to soften the sharpness.
- Sriracha and soy sauce — Sriracha brings the heat, while soy sauce adds the savory backbone that keeps the topping from tasting one-note. If you want a milder bake, cut the sriracha back to 2 tablespoons and keep the soy sauce the same.
- Furikake — This is the finishing layer that makes the dish taste unmistakably sushi-inspired. Don't skip it unless you have to; it brings seaweed, sesame, and salt in one shake.
Building the Bake So the Top Bubbles and the Rice Stays Tender
Seasoning the Rice First
Spread the cooked sushi rice into a greased 9×13 baking dish, then drizzle the vinegar mixture over the top while the rice is still warm. Use a rice paddle or spatula to fold it gently through the top layer before pressing everything into an even bed. The goal is seasoned rice that still looks fluffy, not a compact block that bakes up heavy.
Mixing the Salmon Filling
Stir the flaked salmon with softened cream cheese, Japanese mayo, sriracha, and soy sauce until the mixture looks uniform and spreadable. If the cream cheese is cold, stop and let it soften; otherwise you'll chase lumps around the bowl and overmix the salmon trying to fix them. The finished filling should hold together but still look creamy, almost like a thick spread.
Baking Until the Edges Brown
Spread the salmon mixture over the rice in an even layer, then finish with the remaining furikake. Bake at 400°F until the top is hot, the edges are bubbling, and a few spots on the surface are just turning golden. Pull it when it looks a little too soft in the middle rather than waiting for the whole top to firm up, because it will keep setting as it sits.
Finishing With the Right Garnishes
Drizzle with extra sriracha mayo, scatter on sliced green onions, and serve right away with nori sheets. The nori should stay crisp enough to scoop, so don't top the dish too far in advance or the sheets will soften before they reach the table. This is one of those meals that is best eaten as soon as it comes out of the oven.
How to Adjust the Heat, Richness, and Crowd Size
Make It Milder for Kids or Heat-Sensitive Eaters
Cut the sriracha in the filling down to 1 tablespoon and use just a light drizzle on top. You'll still get the creamy-spicy balance from the mayo, but the heat lands much softer and lets the salmon and furikake come through more clearly.
Go Dairy-Free Without Losing the Creamy Layer
Swap the cream cheese for a dairy-free cream cheese that softens well and has a neutral flavor. The texture will still be rich, though a little less tangy, so keep the mayo and soy sauce in place to preserve the savory balance.
Make It Gluten-Free
Use a gluten-free soy sauce or tamari and check that your furikake is gluten-free, since some blends include wheat. The rest of the dish already fits naturally, so this is an easy swap that doesn't change the texture or the bake time.
Stretch It for a Bigger Group
Double everything and bake it in two 9×13 pans rather than forcing it into one deeper dish. A deeper layer takes longer to heat through and can leave the center underbaked while the edges dry out.
Storage and Reheating
- Refrigerator: Store leftovers in an airtight container for up to 3 days. The rice firms up a bit, but the flavor holds well.
- Freezer: I don't recommend freezing the assembled bake. The rice and creamy topping both lose their texture after thawing.
- Reheating: Warm individual portions in the oven at 350°F until heated through, or use short microwave bursts. Cover loosely so the salmon doesn't dry out, and don't overheat it or the cream cheese layer can separate.
Questions I Get Asked About This Recipe
Spicy Salmon Sushi Bake
Ingredients
Equipment
Method
- Season cooked sushi rice with rice vinegar, sugar, and salt, then spread it evenly in a greased 9x13 baking dish.
- Sprinkle 1 tablespoon of furikake over the rice layer, creating an even, speckled surface.
- Mix flaked salmon with softened cream cheese, Japanese mayonnaise, sriracha, and soy sauce until combined, then spread it evenly over the rice.
- Sprinkle the remaining furikake over the top so the casserole bakes with a crisp, seasoned layer.
- Bake at 400°F for 15–20 minutes until the top is golden and bubbling at the edges.
- Drizzle with extra sriracha mayo, top with green onions, and serve immediately with nori sheets for scooping.