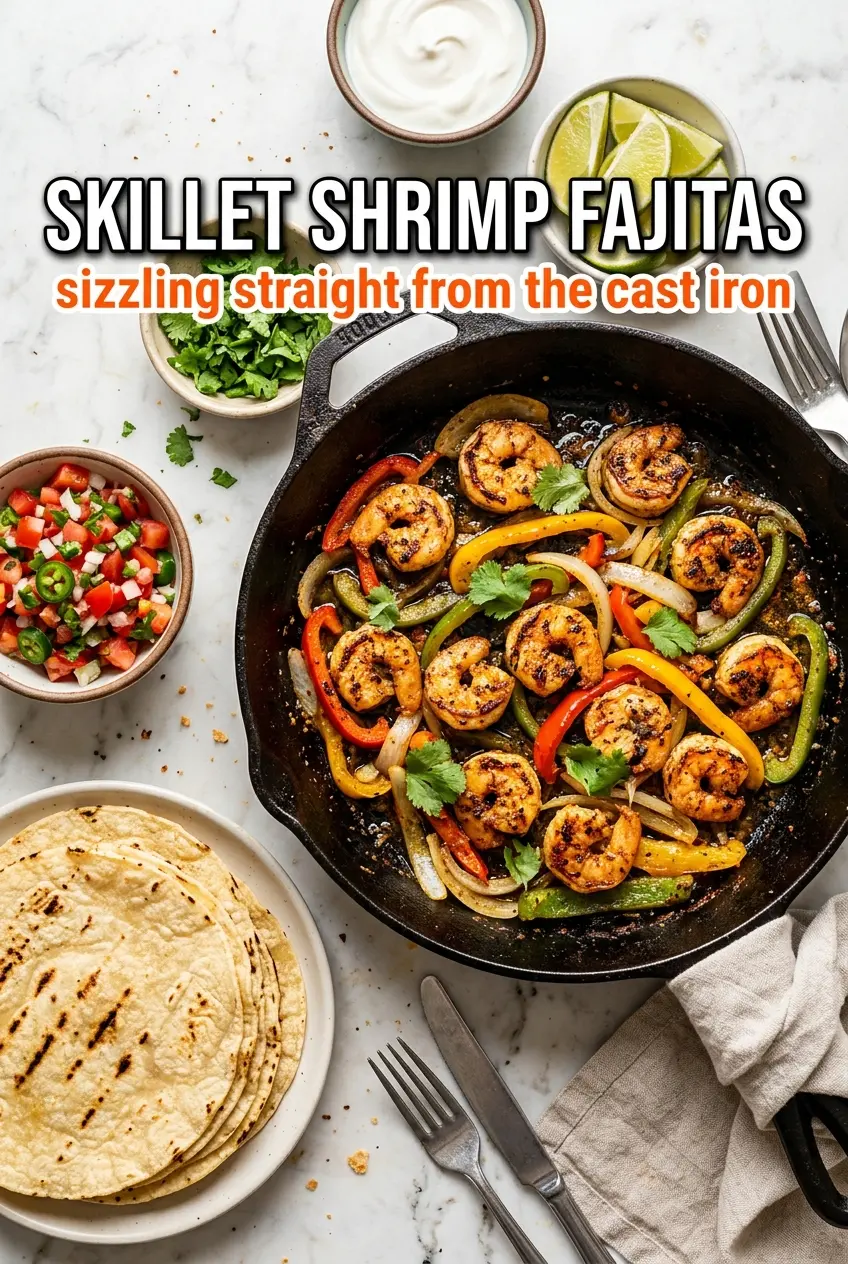
Skillet shrimp fajitas hit the table fast, but they still taste like you put in real effort. The shrimp stay tender and juicy, the peppers pick up char at the edges, and the lime at the end brightens everything so the whole pan tastes awake. It’s the kind of dinner that disappears quickly because every bite has a little smoke, a little heat, and a lot of fresh flavor wrapped up in a warm tortilla.
The trick is treating the skillet like a hot stage, not a place to gently cook everything at once. The vegetables need that high heat first so they soften and blister before the shrimp go in. Shrimp cook in minutes, so they only need enough time to turn opaque and curl into a loose C-shape; go past that and they turn rubbery fast. The garlic and spices only get 30 seconds in the center of the pan, just long enough to bloom without burning.
Below, you’ll find the timing cues that keep the shrimp tender, the pepper texture that gives the fajitas their bite, and the easiest way to keep the whole skillet sizzling until the last tortilla is filled.
The peppers got those caramelized edges and the shrimp stayed tender instead of turning tough. I loved that the lime went on at the end because it pulled everything together right before serving.
Save these skillet shrimp fajitas for the night you want charred peppers, juicy shrimp, and dinner on the table in 30 minutes.
The Searing Window That Keeps Shrimp Tender
Shrimp fajitas fail when the pan isn’t hot enough or when everything gets crowded into one layer too early. Shrimp release moisture fast, and if that moisture pools, you steam them instead of searing them. That’s how you end up with soft peppers and rubbery shrimp in the same skillet.
High heat gives the peppers a quick blister before they turn limp, and it lets the shrimp cook in a short burst on each side. You’re looking for shrimp that turn pink and opaque with a gentle curl, not a tight comma shape. Once they hit that point, they’re done. Pulling the pan off the heat the moment the lime goes in keeps the shrimp from carrying over into overcooked territory.
What the Spice Mix Is Doing Before the Shrimp Even Hit the Pan
- Chili powder — This brings the base fajita flavor and gives the dish its warm red color. A fresh jar matters more than an expensive one; stale chili powder tastes flat no matter what else you add.
- Cumin — Cumin adds the earthy note that makes the skillet taste like fajitas instead of just seasoned shrimp and peppers. Don’t skip it unless you want a much lighter, less grounded flavor.
- Paprika — Paprika rounds out the spice blend and helps the shrimp take on that warm, smoky look. Smoked paprika works if you want more depth, but use a light hand because it can take over fast.
- Lime juice — The lime goes in at the end so it stays bright. If you add it too early, it dulls the skillet heat and can make the shrimp taste less vivid.
- Cast iron skillet — This is the one pan that earns its keep here. It holds heat better than a thin skillet, which is what gives the peppers their char and keeps the shrimp from dropping the temperature the moment they hit the pan.
Building the Fajitas in the Right Order
Getting the Vegetables Started First
Heat the olive oil in a large cast iron skillet over high heat until it shimmers and thins across the pan. Add the sliced peppers and onion before anything else, because they need a head start and they can take the heat. Leave them alone long enough to get charred spots on the edges; if you stir constantly, they’ll soften without ever browning. Push them to the sides once they’ve picked up color so the center of the skillet stays open for the aromatics.
Blooming the Garlic and Spices
Add the garlic and spice mixture to the center of the skillet and stir it around for about 30 seconds. You want it fragrant and sizzling, not dark brown. If the garlic starts to catch before the shrimp go in, the pan is too hot or the spices sat there too long; pull the skillet from the burner for a few seconds and keep moving everything around.
Cooking the Shrimp Just Until They Turn Pink
Add the shrimp in a single layer if you can. Let them sit long enough to pick up color on the first side, then turn them and cook until they’re pink and opaque throughout, usually 2 to 3 minutes per side depending on size. The biggest mistake here is walking away and waiting for them to look dry before serving. By then, they’re already overdone. Toss everything together at the end, squeeze the lime over the skillet, and serve right away so the whole pan stays hot and glossy.
How to Adapt These Shrimp Fajitas for Different Nights
Gluten-Free Fajita Bowls
Skip the flour tortillas and serve the shrimp and vegetables over rice, cauliflower rice, or shredded lettuce. The skillet itself doesn’t need any changes, and the lime at the end still keeps the bowl tasting fresh. You lose the soft tortilla wrap, but you gain a lighter meal that still feels full and satisfying.
Dairy-Free Serving Board
Leave off the sour cream and build the plate with guacamole, salsa, cilantro, and extra lime wedges instead. You won’t miss the dairy because the shrimp and peppers already carry plenty of richness from the oil and char. This version tastes brighter and keeps the fajitas feeling clean and sharp.
Making It Milder
Use less chili powder and lean on cumin, paprika, and lime for flavor. That keeps the dish smoky and bright without pushing the heat level up. If the salsa on the table is spicy, choose a mild one so the skillet itself stays balanced.
Storage and Reheating
- Refrigerator: Store the shrimp and vegetables separately from the tortillas for up to 2 days. The peppers soften a bit after chilling, but the flavor stays good.
- Freezer: The cooked shrimp and vegetables can be frozen, but the texture of the peppers will be softer after thawing. Freeze in a sealed container for up to 1 month if you need to, though this dish is best fresh.
- Reheating: Warm the shrimp mixture quickly in a skillet over medium-low heat just until heated through. Don’t blast it on high heat again or the shrimp will tighten up and turn chewy.
Questions I Get Asked About This Recipe
Skillet Shrimp Fajitas
Ingredients
Equipment
Method
- Combine chili powder, cumin, paprika, salt, and pepper in a small bowl until evenly mixed, with no visible spice clumps.
- Keep the spice mix nearby so you can add it quickly once the skillet and aromatics are hot.
- Heat olive oil in a large cast iron skillet over high heat until very hot, so the oil shimmers immediately when you move the pan.
- Add the sliced bell peppers and white onion and cook for 3-4 minutes until slightly charred, then push them to the sides of the skillet to clear the center.
- Add minced garlic and the spice mixture to the center and cook for 30 seconds until fragrant, with the garlic becoming aromatic and not browned.
- Add the shrimp and cook for 2-3 minutes per side until pink and cooked through, adjusting heat if needed to keep the sizzling steady.
- Toss everything together so the shrimp and vegetables are evenly coated with the spice-garlic mixture.
- Squeeze fresh lime juice over the entire skillet to brighten the flavors and create a light glossy sizzling finish.
- Serve immediately on a sizzling skillet with warm tortillas and toppings (sour cream, guacamole, salsa, and cilantro) on the side.