Crispy baked chicken tacos hit that perfect middle ground between a weeknight shortcut and a meal that still feels fresh and satisfying. The tortillas bake into sturdy shells with a shattering edge, the chicken stays juicy and well-seasoned, and the toppings bring enough cool crunch and tang to keep every bite balanced. They’re the kind of tacos that disappear fast because they’re easy to pick up, easy to customize, and much less messy than a skillet-fried version.
The key is getting the chicken seasoned before it goes into the pan, then letting the taco shells bake on their own before you fill them. That keeps the tortillas crisp instead of softening under the weight of the filling. Corn tortillas work best here because they hold their shape and bring that classic taco flavor, but they need a quick bake and a light spray of oil so they don’t crack before you can fill them.
Below, I’ll walk through the small details that make these tacos stay crispy, plus a few smart swaps if you want to change up the filling or toppings without losing the structure of the dish.
The shells actually stayed crisp after filling them, and the chicken had enough seasoning that we didn’t need much extra salsa. I baked a second tray right away because everyone wanted more.
These baked chicken tacos stay crisp, hold their shape, and make weeknight taco night feel a little more put together.
The Shells Need Their Own Head Start
The mistake with baked tacos is stuffing them before the tortillas have enough structure. Once the filling goes in, steam starts working against you, and soft shells sag fast. Baking the tortillas first gives you a crisp base that can handle chicken, cheese, and toppings without turning leathery in the middle.
Corn tortillas are worth using here because they bake into a sturdier shell than flour tortillas. If they’re cold or dry, warm them first so they bend without splitting. A light coating of oil helps them blister and crisp instead of drying into brittle chips.
What Each Ingredient Is Actually Doing in This Dish
- Chicken breasts — Lean chicken breasts shred cleanly and soak up the taco seasoning well. Slice larger pieces in half horizontally if they’re very thick so they cook evenly and stay juicy instead of drying out before the center reaches temperature.
- Taco seasoning — This carries the whole filling. A good blend gives you cumin, chili, garlic, and salt in one shot, which means the chicken tastes seasoned all the way through instead of just dusty on the outside.
- Corn tortillas — These are the backbone of the recipe. They’re the right choice for a crisp shell because they hold up better in the oven, but they need enough oil and heat to become flexible before they set.
- Shredded cheese, lettuce, tomatoes, cilantro, sour cream, salsa, and lime — These toppings bring the contrast. Cool, creamy, acidic, and fresh layers keep the tacos from tasting one-note. Use what you like, but keep at least one crunchy topping and one bright, acidic finish.
- Olive oil and cooking spray — Olive oil helps the chicken brown and pick up flavor in the skillet, while the spray on the tortillas keeps the shells crisping evenly in the oven. Skip the spray and you’ll get dry spots before the tortillas fully set.
Building Crispy Tacos Without Letting the Shells Collapse
Seasoning and Searing the Chicken
Coat the chicken breasts with taco seasoning, salt, and pepper before they hit the skillet. The seasoning needs direct contact with the meat so the flavor goes beyond the surface. Cook over medium-high heat until the chicken is browned and the thickest part reaches 165°F; if the pan is too hot, the outside will darken before the center cooks through, and if it’s too cool, you’ll miss the browned bits that give the filling depth.
Shredding While the Chicken Is Still Warm
Let the chicken rest just long enough to handle, then shred it while it’s still warm. Warm chicken pulls apart more easily and keeps a juicier texture than cold chicken, which tends to clump. If the pieces look dry, stir in a spoonful of the pan juices before filling the tacos.
Shaping and Baking the Shells
Form the tortillas into taco shapes on a baking sheet sprayed with oil, then bake at 375°F until they’re crisp and lightly golden at the edges. The tortillas should feel set and rigid when you lift one carefully. If they’re pale and floppy, give them another minute or two; if they go too far, they’ll crack when you fill them.
Filling and Finishing Fast
Add the shredded chicken first, then layer on the toppings right before serving. That order matters because the warm chicken helps the cheese soften slightly without making the shell soggy. Finish with salsa and a squeeze of lime for brightness, and serve immediately while the shells still have that crisp bite.
Three Ways to Make These Tacos Work for Different Nights
Dairy-Free Taco Night
Skip the cheese and sour cream and lean on salsa, avocado, extra cilantro, and a good squeeze of lime. You’ll lose the creamy finish, but the tacos stay bright and satisfying, especially if the chicken is well seasoned.
Using Rotisserie Chicken
Shredded rotisserie chicken works when you need a shortcut. Warm it in a skillet with a spoonful of taco seasoning and a splash of water or broth so it tastes seasoned instead of plain. This saves time, but you’ll want to be generous with toppings since the chicken won’t have the same fresh-seared flavor.
Gluten-Free by Default
Corn tortillas keep this recipe naturally gluten-free as long as your taco seasoning is certified gluten-free. Check the label on pre-mixed seasoning blends, since some include wheat-based fillers or anti-caking ingredients.
Storage and Reheating
- Refrigerator: Store the chicken separately for up to 4 days. Keep the toppings and baked shells in separate containers so the tacos don’t soften.
- Freezer: The chicken freezes well for up to 2 months. The baked shells and fresh toppings don’t freeze well, so make those fresh when you’re ready to serve.
- Reheating: Reheat the chicken in a skillet over low heat or in the microwave with a splash of water to keep it from drying out. Crisp the tortillas again in the oven for a few minutes before filling them; reheating the filled tacos will make the shells go soft.
Answers to the Questions Worth Asking
Baked Chicken Tacos
Ingredients
Equipment
Method
- Season the chicken breasts with salt, pepper, and taco seasoning. Rub well so the spices coat all sides.
- Heat the olive oil in a skillet over medium-high heat. Cook the chicken for 6–8 minutes per side, until the internal temperature reaches 165°F.
- Shred the cooked chicken with two forks. Keep shredding until evenly broken into bite-size pieces.
- Preheat the oven to 375°F while you prep the tortillas. Spray a baking sheet with vegetable oil cooking spray.
- Form the corn tortillas into taco shells on the sprayed baking sheet. Bake for 8–10 minutes at 375°F until crispy and lightly golden at the edges.
- Fill each tortilla shell with the shredded chicken. Add a generous portion so the shell is packed but still stable.
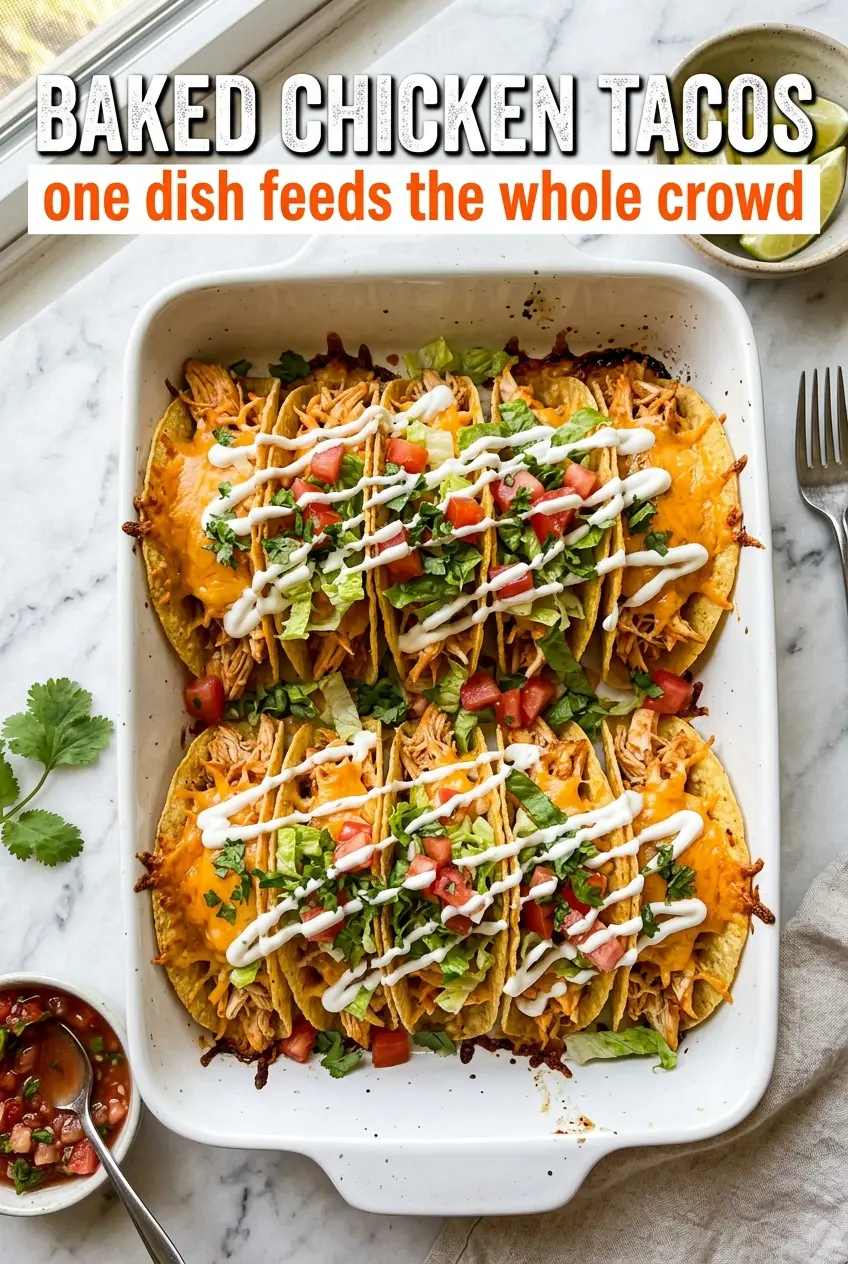
- Top the tacos with lettuce, tomatoes, shredded cheese, and cilantro. Arrange the toppings so every taco has a bit of color and crunch.
- Serve the tacos with salsa, sour cream, and lime wedges. Squeeze lime over the top just before eating.